
Easy Kitchen Tips – Italian Seasoning Recipe
 Ingredients
3 tablespoons dried parsley
3 tablespoons dried basil
2 1/2 tablespoons dried oregano
1 teaspoon dried thyme
1 tablespoon garlic powder
1 teaspoon onion powder
1 teaspoon dried rosemary
1/2 teaspoon red pepper flakes
1/4 teaspoon black pepper
Directions
Mix all the spices together in a small bowl, then give them a whirl in your food processor*, or spice grinder* then store in an airtight container.
Ingredients
3 tablespoons dried parsley
3 tablespoons dried basil
2 1/2 tablespoons dried oregano
1 teaspoon dried thyme
1 tablespoon garlic powder
1 teaspoon onion powder
1 teaspoon dried rosemary
1/2 teaspoon red pepper flakes
1/4 teaspoon black pepper
3 tablespoons dried parsley
3 tablespoons dried basil
2 1/2 tablespoons dried oregano
1 teaspoon dried thyme
1 tablespoon garlic powder
1 teaspoon onion powder
1 teaspoon dried rosemary
1/2 teaspoon red pepper flakes
1/4 teaspoon black pepper
Directions
Mix all the spices together in a small bowl, then give them a whirl in your food processor*, or spice grinder* then store in an airtight container.
Orange Peel Sugar Scrub
Here is a recipe for a deliciously sweet sugar scrub!
With winter in full swing, my skin gets dry and flaky. I'm horrible about not using lotion, because I'm usually grabbing Gray out of the tub too, getting her dressed, and chasing her around. Lotion, is not exactly on my mind.
So I turn to scrubs to keep my skin soft, flake free, and in this case smelling delicious!

Materials:
Glass container for storage
3/4 cup granulated sugar
4Tbs Almond Oil
1Tbs Olive Oil
Zest of 1 Orange

Start by zesting your orange. Make sure you use a microplane or something similar because you want very tiny pieces. Watch Those Fingers!!

Zest likes to hide on the back of the grater, so make sure you scrape all of that goodness off.

Add your sugar and zest to your glass container. Mix it well, muddling it some to help release the oils of the orange

Add your oils a little at a time, stirring them in with the sugar mixture.

Finish the container off with a label if it's a gift, or a decorative bow and enjoy!
Kiss your winter skin ~GoodBye~

*Just a tip- I try not to use a scrub more than twice a week. Your skin needs time to recover after a good exfoliation*
source:http://gritsandgiggles.blogspot.com/2012/01/tutorial-orange-peel-sugar-scrub.html
DIY Fourth of July Craft Project – Homemade Red, White and Blue Soap


Homemade Fourth of July Soap Recipe
Ingredients:
Instructions:
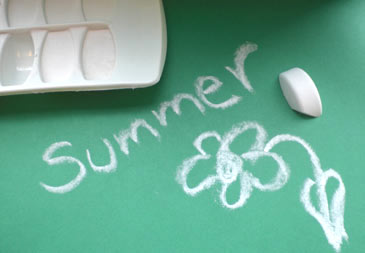
Homemade Sidewalk Chalk
Age: 3 and up
Time: 20 minutes
Type of Activity: Arts and Crafts
Spending the afternoon creating a sidewalk masterpiece is a great way for your kids to enjoy a spring day. But long after their fantastic artwork has washed away, your kids will remember making their own colored chalk!
Materials needed:
 1 cup plaster of Paris
1 cup water
Powdered tempera paint
Mold for chalk (small paper cups, ice cube trays, tissue rolls, etc.)
Mixing bowl and spoon
What to do:
Step One: In a large bowl, mix the water and plaster of Paris together.
Step Two: Add the powdered tempera paint to the mixture.
Step Three: Once the paint has been mixed in well, set it aside for a few minutes.
Step Four: Pour the mixture into the mold and let it dry. This can take anywhere from several hours to a day (or maybe longer), depending on the size of the mold. Remember: The bigger the mold, the longer it will take to dry.
Step Five: Once the mold is dry, remove the chalk. If the chalk is still moist, let it air dry for another 24 hours.
Now your kids can have a blast drawing with the chalk they created. Anything they draw will be washed away by the rain, so don't worry if they accidentally get some on the side of your house!
Read more on FamilyEducation: http://fun.familyeducation.com/childrens-art-activities/crafts/29578.html#ixzz2WLy0bD99
Time: 20 minutes
Type of Activity: Arts and Crafts
Read more on FamilyEducation: http://fun.familyeducation.com/childrens-art-activities/crafts/29578.html#ixzz2WLy0bD99
Homemade Glue and Paste Recipes
What a Great Addition to Family Go Round.
The following glue and paste recipes use a variety of ingredients and methods. Choose the one that best suits your project. For variety, add food coloring before using. Store all glues and pastes in airtight containers in the refrigerator.
Glue
Materials
- 3/4 cup water
- 2 tablespoons corn syrup
- 1 teaspoon white vinegar
- Small saucepan
- Small bowl
- 2 tablespoons cornstarch
- 3/4 cup cold water
Directions
- Mix water, corn syrup, and vinegar in saucepan.
- Bring to a full, rolling boil.
- In bowl, mix cornstarch with cold water.
- Add this mixture slowly to the hot mixture, stirring constantly until the mixture returns to a boil.
- Boil for 1 minute, then remove from heat.
- When cooled, pour into another container and let stand overnight before using.
Homemade Paste
Materials
- 1/2 cup flour
- Cold water
- Saucepan
- Food coloring (optional)
Directions
- Add cold water to flour until mixture is as thick as cream.
- Simmer and stir in saucepan for 5 minutes.
- Add a few drops of food coloring, if desired.
- This wet, messy paste takes a while to dry.
Papier-Mache Paste
Materials
- 1 cup water
- 1/4 cup flour
- 5 cups lightly boiling water
- Large saucepan
Directions
- Mix flour into 1 cup water until mixture is thin and runny.
- Stir this mixture into lightly boiling water.
- Gently boil and stir 2-3 minutes.
- Cool before using.
No-Cook Paste
Materials
- Bowl
- 1/2 cup flour
- Water
- Salt
Directions
- In bowl, mix flour with enough water to make a mixture that's gooey, but not runny.
Add a pinch of salt; stir.
source: http://fun.familyeducation.com/crafts/toddler/37042.htm
Home Made Cat Food
Foods To Avoid When You Make Your Own Cat Food

You should never give your cat chocolate, pork, bacon, onions, bones or raw eggs (cooked eggs are okay). These foods can cause adverse reactions and effects within your cat's system, so avoid them.
It's also wise to limit the amount of human-food grade tuna you feed your cat.
Tinned tuna can sometimes contain high levels of mercury. In small amounts, this is fine, but over time your cat could end up with large deposits of mercury in its system that could compromise health.
You also shouldn't feed your cat with dog food, as cats require more protein than dog food contains.
Raw Diets For Your Cat
While raw diets have become very fashionable, many vets will tell you that many raw foods could potentially be infested with parasites or bacteria. You should cook any meat you intend to feed your cat to kill any bacterial contaminants.
You should also remember that raw meat alone could be lacking in sufficient nutrients to keep your cat in optimum health. You may need to add vitamins and minerals to help keep your cat healthy.
These could include calcium, phosphorus and Omega-3 acids. Your cat may also require alfalfa and wheat grass for added antioxidants and nutrients.
Always speak with your vet before switching your cat over to a raw diet.
Check out these home made cat food recipes!
Chunky Meat and Rice Cat Food
Ingredients
- 1/2 pound ground meat (chicken, beef, lamb or turkey are fine)
- 1/4 cup rice
- 1 large hard-boiled egg
- 4 teaspoons olive oil
- 1 cup chicken stock

Method
- Mash the boiled egg.
- Place all the ingredients into a saucepan and bring to the boil over a medium-low heat.
- When the stock is boiling, reduce the heat and simmer gently for 20 minutes or until the stock reduces. The rice will expand and swell and absorb much of the liquid.
- Remove your home made cat food mixture from the heat and allow it to cool completely.
- Blend the mixture in a food processor until all the ingredients are mashed together.
- Then place into an air-tight container and store in the fridge for up to 3 days.
Chicken and Pasta Cat Food
Ingredients
- 1/2 pound ground chicken
- 1 small finely chopped carrot
- 1/2 cup macaroni
- 2 tablespoons vegetable oil
- 1 1/2 cups chicken stock
Method
- Add the oil, garlic and chicken to a saucepan and cook until the chicken is cooked thoroughly.
- Add the chicken stock, carrot and macaroni and bring the mixture to the boil.
- When it's boiling rapidly, reduce the heat to low and allow to simmer for 15 minutes, or until the macaroni becomes very tender.
- Remove from the heat and allow the mixture to cool completely.
- Blend the mixture in a food processor so the ingredients are mashed together.
- Then place into an air-tight container and store in the fridge for up to 3 days.
*Remember to submit your own homemade things...by emailing us at familygoround@gmail.com or message on my familygoround facebook page.
Sardine Feast Cat Food
Ingredients
- 1 tin sardines in oil
- 1/2 cup cooked rice
- 1/2 teaspoon finely chopped parsley
Method
- Cook the rice until it's very soft.
- Drain well, then add a complete tin of sardines in oil and the finely chopped parsley.
- Mix the ingredients together well.
- Store any unused mixture in an air tight container in the fridge until needed again.
Meat and Oats Cat Food
Ingredients
- 1 cup rolled oats
- 3 cups water
- 1 hard-boiled egg
- 1 pound minced beef
- 2 tablespoons vegetable oil
- 1 tablespoon finely chopped spinach
Method
- Boil the rolled oats in water until they become very soft and begin to absorb the water.
- While these are cooking, boil an egg.
- When it's cool enough, remove the eggshell and mash the egg into the oats.
- In a fry pan, add the oil and beef and cook thoroughly.
- Add the beef into the oat and egg mixture and stir through the finely chopped spinach.
- Mix the home made cat food ingredients together well.
- Store any unused mixture in an air tight container in the fridge until needed again.
source:http://www.savvyhomemade.com
Softest, Silkiest Legs

Scrub:
-2 1/2 Cups of Sugar (Yes, just normal sugar)
-1 Cup of oil (I used Olive Oil and of course, I smell a little like Olive Oil. You can also use Canola, Vegetable, Avocado, Coconut or any fragranced body oil you have).
-5 Tablespoons of a citrus juice. Preferably fresh squeezed. (I used Key Lime)
Bath Time:
-Draw you a warm/hot bath.
-Soak for about five minutes.
-Shave one leg.
-Take a palm full of your homemade sugar scrub and scrub that leg and then rinse off.
-Shave your leg again. Yes, again.
-Take a palm full of sugar scrub and scrub your leg again.
-Repeat on your other leg.
-After your bath, dry off and then lotion your legs.
When you shave your leg the first time, obviously, it's going to remove the hair. When you scrub after you shave, it removes any dead skin. By shaving your leg again after you use the sugar scrub, you are getting all of that dead skin off of your leg. You will need to rinse your razor frequently (you will see why).
ROSE & GERANIUM BATH BOMBS
Enjoy taking a bath with these fun and fizzy aromatic bath bombs.
1 cup Baking Soda
1/2 cup Citric Acid
1/2 cup Epsom Salt
1 TBSP organic Rose Hydrosol or water
1 tsp organic Olive oil
Dried organic Rose petals
20 drops organic Geranium essential oil
1/2 cup Citric Acid
1/2 cup Epsom Salt
1 TBSP organic Rose Hydrosol or water
1 tsp organic Olive oil
Dried organic Rose petals
20 drops organic Geranium essential oil
Combine dry ingredients together in a large bowl. Slowly drizzle in Olive Oil and essential oil while stirring to prevent fizzing. Slowly spritz with hydrosol while stirring constantly until the mixture begins to clump together. The blend should be just moist enough to hold when pressed together with your hands, be careful not to add too much moisture. Add rose petals, press into molds, and allow to dry 2-3 hours before unmolding. Let bath bombs cure for one week before using them, then store in an airtight container. You can shape your bath bombs by using a melon baller, ice, candy or soap molds, clear plastic two-sided Christmas ornaments, egg cartons, or anything else you have on hand.
source:http://www.mountainroseherbs.com
Brown Sugar & Vanilla Body Scrub
A sweet smelling body scrub which will leave your skin feeling silky smooth.
1 cup organic brown sugar
1/2 cup organic granulated sugar
1/2 cup + 3 TBSP organic Sunflower oil
1/2 tsp organic Vanilla flavoring extract
1/2 cup organic granulated sugar
1/2 cup + 3 TBSP organic Sunflower oil
1/2 tsp organic Vanilla flavoring extract
Blend sugars together in a bowl, add oil and vanilla extract, and mix well. Package in jars, and enjoy!
source: mountainroseherbs.com
Sweet Lavender Bath Salts
Floral and relaxing, these salts are a perfect addition to any bath.
1 cup Salt (Epsom, Sea Salt, Dead Sea Salt, or a mixture)
1/4 cup Baking Soda
20 drops organic Lavender essential oil
1 TBSP organic Lavender flowers
1/4 cup Baking Soda
20 drops organic Lavender essential oil
1 TBSP organic Lavender flowers
Mix salt and baking soda together in a large bowl. Add essential oil and Lavender flowers, blend well. Package in a jar, or use right away.
Recipe written by Irene Wolansky. Irene is the Marketing Director at Mountain Rose Herbs
DIY Natural Room Scents

Homemade all Natural Bug Spray

Ingredients
3 1 ⁄2 ounces (which is basically 1/3 cup) of Witch Hazel
1 ⁄2 teaspoon Lemongrass Oil
1 ⁄ 2 teaspoon Eucalyptus Oil
1 ⁄ 2 teaspoon Citronella Oil
")
")
Never purchase bug spray again with chemicals.
Homemade Strawberry Liquor is really easy to make!

Place all ingredients into canning jar. Shake to mix sugar. Let sit for 3 months and stir occasionally. Strain out fruit, but reserve for other desserts.
Ingredients
SASSY WATER

Feeling sassy? I am.
Let's just say I spend way too much time on there.
Anyways... sassy water. (Don't you love the name?) Rumored to help you maintain a flat belly, lemon and water fuse overnight to create a natural detox, helping to flush impurities out of your system. The cucumber lends a cool, refreshing flavor while the mint gives it a bit of a snap. The original recipe had fresh ginger, but I didn't have any and I still really liked the result.

Ingredients:
2 lemons
1/2 cucumber
10-12 mint leaves
3 quarts water
2 lemons
1/2 cucumber
10-12 mint leaves
3 quarts water
Prep Time: 5 minutes
Chill Time: Overnight or 8 hours
Yields: 10-12 glasses
Chill Time: Overnight or 8 hours
Yields: 10-12 glasses
Method:
1. Slice cucumber and lemons. Place in the bottom of the pitcher. Toss in mint leaves. Add water
2. Chill overnight or for at least 8 hours
source:http://www.asweetsimplelife.com
Homemade Nutella

I was an exchange student (ah how many times I've said this sentence...) 5 years ago in the US. I'm not gonna talk about how it was (AMAZING) but then and there I gained sisters! Now I have one living in the States and one living in Germany. And next week we are gonna be reunited! I can't wait, I am so excited! So this week I am going to Germany and was thinking what I should bring. Because basically Germany has everything that Hungary has, if not more. So what to give what to give? I was thinking really hard when a completely random thing came to my mind. I should make some nutella. She loves nutella. Frankly, who doesn't, right? I love it, too although it's been years since I ate any. I can't really explain why because I always think that if I eat just one spoon, I will gain a 100 pounds immediately. But with this thought, I shouldn't be eating any brownies, cookies...etc.
BUT today I tried my homemade Nutella. OH MY GOD. I wouldn't have thought that it really will actually taste like the original Nutella. But it does! And to tell the truth, it tastes even better! But homemade is always better. Right? :) It is made with love and natural ingredients. And real chocolate...hmmm...Sounds heavenly, doesn't it?
If that hasn't convinced you to make some now, then I will tell you, it is SO easy to make! I am not saying it is mess-free. Nah, I made a huge mess in my kitchen but it's due to my very small food processor and my wish to make an enormous amount of lovely hazelnut-chocolate spread :)

Homemade Nutella
makes for 3 jars
200 g Hazelnuts
1 can Condensed Milk
255 g Chocolate - the darker the better
1/2 cup hot Milk
Roast the hazelnuts for about 10-15 minutes either in the oven or in a dry pan over the heat.

When the nuts are ready put them on a tray or a magazine and let them cool down a little.
Once they are not hot anymore, place them in the food processor and start processing them.

It will be quite a while, if you don't have a very professional machine, like me. The hazelnuts will become Hazelnut butter and will look like this.

When you're done with this, start bringing water to a boil. Place a big bowl over the water and melt the chocolate.

When the chocolate has melted, pour the condensed milk in.

Mix them together.

Love the chocolate swirls :) Then get ready to add the mixture to the hazelnut butter and process it some more. Add the hot milk if you find it too dense, I did. But if you like it thick, then you can leave the milk out.

When it is creamy enough, Nutella has been created! Congrats! Brace yourself for some battle with yourself, it will be VERY hard not to eat a lot :)


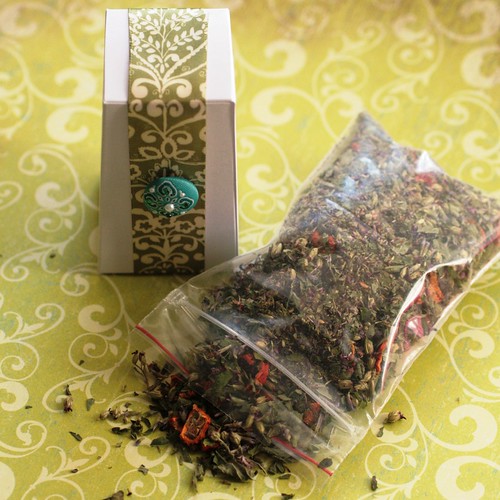
DIY-Homemade Herbal Tea
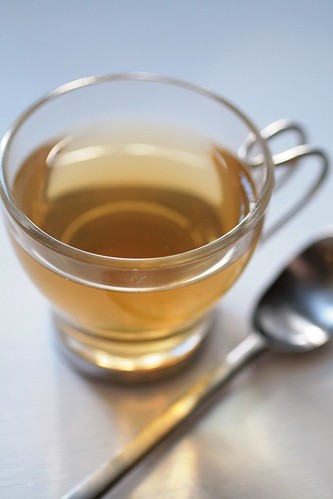
I spent this past weekend handcrafting my loose-leaf herbal tea blends using the herbs I’d grown and dried myself. I have to say that I’m pretty pleased with this year’s selection. For starters, I have made 10 blends this time compared to the one blend last year. But more importantly, some of these new recipes yeild some of the best herbal teas I’ve ever tasted (and I’m a big herbal tea drinker). In particular, the Floral Fantasy Tea and the Spiced Anise Tea are outstanding.
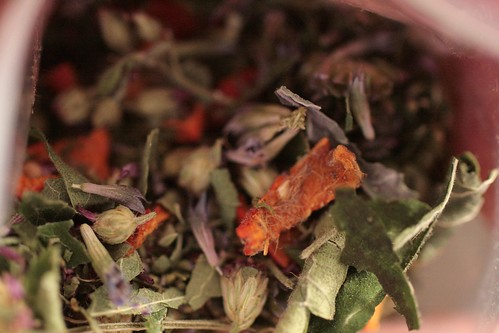
All herbs were grown in my own garden using organic growing practices (no chemical fertilizers or pesticides whatsoever). I handpicked the herbs so only the best leaves and flowers on the plants went into the teas. Blends are my own creation, crafted with both taste and each herb’s properties in mind. Each specially designed gift box has enough tea for 10 servings and detailed directions for brewing the perfect cup.
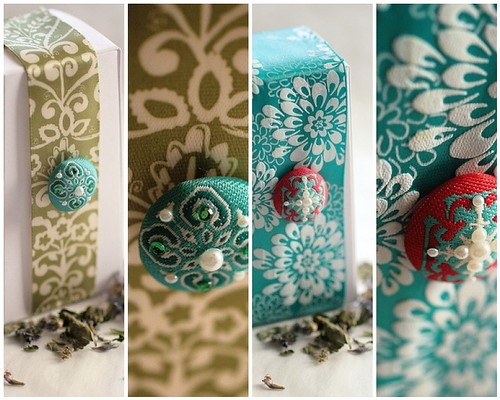
I will be selling these teas at the special Thanksgiving marketday at the Headhouse Market next Wednesday. If any are left, they’ll be going up on my brand new shinyEtsy online shop that I’m in the midst of designing and where I’ll be selling some of my photography prints too. Just in time for holiday gift giving…
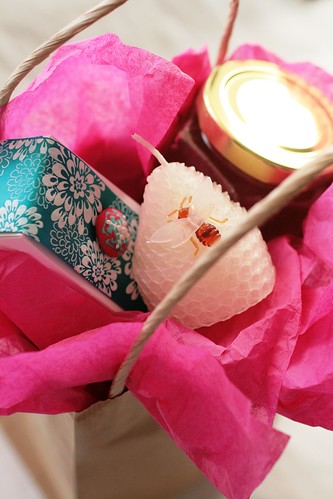
I’ll actually be giving several gift bags to my loved ones this holiday that contain a box of tea, a jar of wildflower honey from my bee hive and an adorable candle made of bees wax and decorate with a little bee. Cute, huh?
HERBAL TEA RECIPES Created by Straight from the Farm
Floral Fantasy Tea
3 parts Lavender
3 parts Yarrow
1 part Chamomile
1 part Stevia
3 parts Yarrow
1 part Chamomile
1 part Stevia
Spiced Anise Tea
4 parts Anise Hyssop
1 part Cinnamon
1 part Vanilla Bean
1 part Cloves
1 part Cinnamon
1 part Vanilla Bean
1 part Cloves
Devoted Remembrance Tea
3 parts Rosemary
3 parts Lavender
3 parts Marjoram
2 parts Anise Hyssop
3 parts Lavender
3 parts Marjoram
2 parts Anise Hyssop
Dark Rose Tea
2 parts Rose Hips
3 parts Anise Hyssop
3 parts Yarrow
1 part Bergamot
3 parts Anise Hyssop
3 parts Yarrow
1 part Bergamot
Aromatic Mint Tea
2 parts Spearmint
1 part Marjoram
1 part Sweet Woodruff
1 part Sage
1 part Marjoram
1 part Sweet Woodruff
1 part Sage

Good Start Tea
2 parts Yarrow
2 parts Rose Hips
2 parts Lavender
1 part Marjoram
1 part Stevia
2 parts Rose Hips
2 parts Lavender
1 part Marjoram
1 part Stevia
Chocolate Mint Tea
4 parts Chocolate Mint
3 parts Lavender
2 parts Sweet Woodruff
1 part Stevia
1 part Rose Hips
3 parts Lavender
2 parts Sweet Woodruff
1 part Stevia
1 part Rose Hips
Black Licorice Tea
2 parts Anise Hyssop
2 parts Bergamot
2 parts Marjoram
2 parts Spearmint
2 parts Bergamot
2 parts Marjoram
2 parts Spearmint
Everything & More Tea
1 part Lavender
1 part Yarrow
1 part Anise Hyssop
1 part Stevia
1 part Spearmint
1 part Bergamot
1 part Rose Hips
1 part Calendula
1 part Yarrow
1 part Anise Hyssop
1 part Stevia
1 part Spearmint
1 part Bergamot
1 part Rose Hips
1 part Calendula
Love Charm Tea
3 parts Yarrow
1 part Lavender
1 part Anise Hyssop
1 part Spearmint
1 part Lavender
1 part Anise Hyssop
1 part Spearmint
Homemade Butter
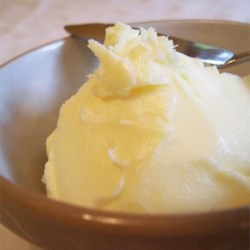
You would never believe how easy it is to make your own butter right from your own kitchen.
You can make it with or without salt or add little special extras, such as chives or garlic etc.
You will never buy butter again...Great for making Fresh Homemade Bread. Yum...
Great for dieting too. Anything Homemade is healthier.
ENJOY!
Ingredients
Makes 1 cup butter
Directions
Homemade Dishwasher pellets

Recently I started noticing how much money I was spending on dishwasher detergent, especially the pods or pellets. Brand-name pellets ranged from a low of 2.98 to 6.29 for 20 pellets on a recent visit to the grocery store. That's when I decided to make my own.
Materials and supplies:
2-gallon bucket
measuring
spoon
large glass mixing bowl
tablespoon
3 - 16 cube plastic ice cube trays
1 - 54-55 oz box of washing soda / detergent booster (3.89)
1 - 76 oz box of borax (4.49)
1 - 2 lb carton of epsom salts (.99)
1- bottle reconstituted lemon juice (32 oz for .99)
$10.36 for over 300 pellets

I used a 2 gallon bucket to mix the following dry ingredients;
1-54 oz box of washing soda (you can substitute a box of White King Detergent booster (no chlorine or phosphates) for the washing soda)
1-76 oz box of Borax
1- 2 lb carton of epsom salts
I measure out 2 to 2 1/2 cups of the mixture into a large glass mixing bowl and add lemon juice a a tablespoon at a time and stir until it begins to clump. It will fizz a little bit but not very much. If you squeeze the clumps between your fingers it will feel slightly sticky.

Place enough to loosely fill each of the ice-cube molds in a plastic ice cube tray (you will need 3 trays with sixteen molds per tray)

Put on disposable glove or cover your thumb with a thin plastic shopping bag (this is very drying to your skin) and press the damp mixture into the mold until it is level in each mold. The tops of the molded
Put them in the back seat of your car in direct sun - it will take several days to dry out depending on the temperature and humidity. (Do not microwave - it will prolong the drying time and the cubes will stick, do not put them in your oven - the trays might melt) You could also use a food dryer, or if it is summer set them on a table in the sun. We have very low humidity in the Central Valley, so I often set the trays on the trampoline when it is not in use. I bring them in at night as the dew re-wets the cubes.
They are ready to tap out of the trays when they pull away from the sides of the mold.
If you haven't tamped your cubes down firmly, some will crumble. Don't worry about it. Crumble up the cube and let it dry until it is like a clod. They grind it in a mortar, put into a shaker bottle. This is the best abrasive cleaner that I've found. A little sprinkle (takes very little), hot water, wait a few minutes until the
detergent starts to dissolve, then use a rag to scrub. My broiler pan came clean so easily.

Also, if you are making just 48 pellets at a time, what do you do with the powder that's left? I asked for a large empty whey powder container and stored the extra powder there.
From what I can figure, it costs me about three to four cents per dishwasher pellet.
You should use some lemon juice as a rinse aid in your dishwasher to avoid spots.
DIY-Homemade Cat Food-4 Flavors-So Easy
Chunky Meat and Rice Cat Food
Ingredients
- 1/2 pound ground meat (chicken, beef, lamb or turkey are fine)
- 1/4 cup rice
- 1 large hard-boiled egg
- 4 teaspoons olive oil
- 1 cup chicken stock
Method
- Mash the boiled egg.
- Place all the ingredients into a saucepan and bring to the boil over a medium-low heat.
- When the stock is boiling, reduce the heat and simmer gently for 20 minutes or until the stock reduces. The rice will expand and swell and absorb much of the liquid.
- Remove your home made cat food mixture from the heat and allow it to cool completely.
- Blend the mixture in a food processor until all the ingredients are mashed together.
- Then place into an air-tight container and store in the fridge for up to 3 days.
Chicken and Pasta Cat Food
Ingredients
- 1/2 pound ground chicken
- 1 small finely chopped carrot
- 1/2 cup macaroni
- 2 tablespoons vegetable oil
- 1 1/2 cups chicken stock
Method
- Add the oil, garlic and chicken to a saucepan and cook until the chicken is cooked thoroughly.
- Add the chicken stock, carrot and macaroni and bring the mixture to the boil.
- When it's boiling rapidly, reduce the heat to low and allow to simmer for 15 minutes, or until the macaroni becomes very tender.
- Remove from the heat and allow the mixture to cool completely.
- Blend the mixture in a food processor so the ingredients are mashed together.
- Then place into an air-tight container and store in the fridge for up to 3 days.
Sardine Feast Cat Food
Ingredients
- 1 tin sardines in oil
- 1/2 cup cooked rice
- 1/2 teaspoon finely chopped parsley
Method
- Cook the rice until it's very soft.
- Drain well, then add a complete tin of sardines in oil and the finely chopped parsley.
- Mix the ingredients together well.
- Store any unused mixture in an air tight container in the fridge until needed again.
Meat and Oats Cat Food
Ingredients
- 1 cup rolled oats
- 3 cups water
- 1 hard-boiled egg
- 1 pound minced beef
- 2 tablespoons vegetable oil
- 1 tablespoon finely chopped spinach
Method
- Boil the rolled oats in water until they become very soft and begin to absorb the water.
- While these are cooking, boil an egg.
- When it's cool enough, remove the eggshell and mash the egg into the oats.
- In a fry pan, add the oil and beef and cook thoroughly.
- Add the beef into the oat and egg mixture and stir through the finely chopped spinach.
- Mix the home made cat food ingredients together well.
- Store any unused mixture in an air tight container in the fridge until needed again.
source:http://www.savvyhomemade.com
DIY-Homemade Bath Crayons:

Buy some glycerin soap at a craft store. Melt it in the microwave, add food coloring, and pour into a mold. I used an ice cube tray. You can also add essential oils if you go for scents, though I find that a bit unnecessary for bath crayons. Takes about an hour to cool completely, then pop out of the mold and you have crayons!
Homemade Beauty: Shave Cream
All my life, I've used Skintimate shave gel. This is a very nice shaving gel, but for a few bucks regular price for a bottle, it's not incredibly cost effective. Also, as most of us frugalistas know, it doesn't matter if we have the money to spend on items like this - we don't want to! Our money could be more effective elsewhere.
Enter: homemade shave cream. This recipe is adapted from Reader's Digest Homemade book (I highly recommend this book if you're interested in learning about other homemade items).
Here's what you need to make this homemade solution:

Ingredients:
Enter: homemade shave cream. This recipe is adapted from Reader's Digest Homemade book (I highly recommend this book if you're interested in learning about other homemade items).
Here's what you need to make this homemade solution:

Ingredients:
- 1 cup conditioner
- 1 cup shampoo
- 5 tablespoons baby oil
- 5 tablespoons hand cream
- Use a large bottle or some other large storage container to store the shave cream. Pour in conditioner first, then shampoo.
- Add baby oil; then hand cream.
- Secure the container and shake. Let mixture sit for about an hour.
No comments:
Post a Comment