Soap Snowmen
January Family Crafts – DIY Soap Snowman
I CAME ACROSS THIS CUTE SNOW DAY PROJECT...FUN AND THE KIDS WILL LOVE IT.
I CAME ACROSS THIS CUTE SNOW DAY PROJECT...FUN AND THE KIDS WILL LOVE IT.
FUN AND EASY CRAFTS TO CELEBRATE AMERICA!
These creative and patriotic crafts for kids are fun for the whole family and are perfect as 4th of July decorations. With the right materials, you and your children can craft like pros this summer!
These creative and patriotic crafts for kids are fun for the whole family and are perfect as 4th of July decorations. With the right materials, you and your children can craft like pros this summer!
4th of July star wand
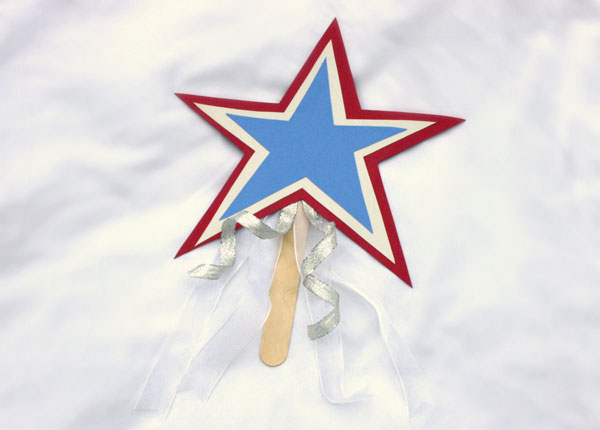 Materials:
- Red, white and blue cardstock paper
- Popsicle stick
- Ribbon
- Hot glue gun
- Elmer’s Craft Bond Permanent Dot Runner
- X-ACTO Decorative Shape templates
- X-ACTO Gripster Knife
Directions:
- Place the X-ACTO Decorative Shapes Template on the red piece of cardstock paper.
- With the X-ACTO Gripster Knife, carefully cut out the large star from the template.
- Place the X-ACTO Decorative Shapes Template on the white piece of cardstock paper.
- With the X-ACTO Gripster Knife, carefully cut out the medium star from the template.
- Place the X-ACTO Decorative Shapes Template on the blue piece of cardstock paper.
- With the X-ACTO Gripster Knife, carefully cut out the small star on the template.
- Apply the Elmer’s Craft Bond Permanent Dot Runner to the back of the white star, then place it in the middle of the red star.
- Apply the Elmer’s Craft Bond Permanent Dot Runner to the back of the blue star, then place it in the middle of the white star.
- Cut three, 18-inch pieces of ribbon, then fold each piece of ribbon in half.
- Carefully glue the folded ribbon and the popsicle stick to the back of the red star with the hot glue gun, let dry.

Materials:
- Red, white and blue cardstock paper
- Popsicle stick
- Ribbon
- Hot glue gun
- Elmer’s Craft Bond Permanent Dot Runner
- X-ACTO Decorative Shape templates
- X-ACTO Gripster Knife
Directions:
- Place the X-ACTO Decorative Shapes Template on the red piece of cardstock paper.
- With the X-ACTO Gripster Knife, carefully cut out the large star from the template.
- Place the X-ACTO Decorative Shapes Template on the white piece of cardstock paper.
- With the X-ACTO Gripster Knife, carefully cut out the medium star from the template.
- Place the X-ACTO Decorative Shapes Template on the blue piece of cardstock paper.
- With the X-ACTO Gripster Knife, carefully cut out the small star on the template.
- Apply the Elmer’s Craft Bond Permanent Dot Runner to the back of the white star, then place it in the middle of the red star.
- Apply the Elmer’s Craft Bond Permanent Dot Runner to the back of the blue star, then place it in the middle of the white star.
- Cut three, 18-inch pieces of ribbon, then fold each piece of ribbon in half.
- Carefully glue the folded ribbon and the popsicle stick to the back of the red star with the hot glue gun, let dry.
Patriotic handprint flag
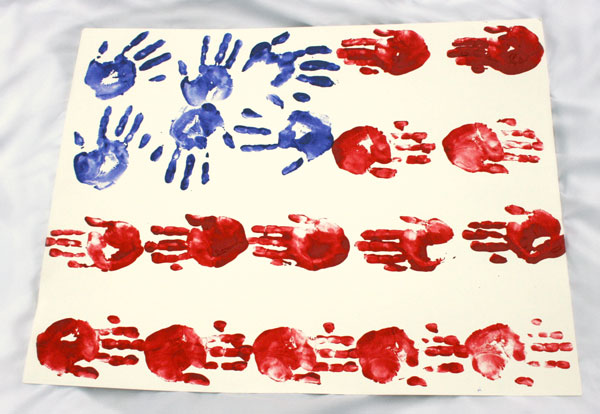 Materials:
- Red, white and blue washable craft paint
- Two white sturdy paper plates
- White poster board
- Pencil
- X-ACTO Ruler
Directions:
- Using a pencil and the X-ACTO Ruler, draw the outline of the American flag lightly on the poster board. (Draw a square in the top left corner for the stars and thick lines for the stripes).
- Place blue paint on one paper plate.
- Place red paint on the other paper plate.
- Dip one hand in the blue paint and then press your hand inside the square area on the poster board multiple times to create the handprint stars.
- Dip your other hand in the red paint and then press that hand on every other line multiple times to create the stripes.
- Let dry.

Materials:
- Red, white and blue washable craft paint
- Two white sturdy paper plates
- White poster board
- Pencil
- X-ACTO Ruler
Directions:
- Using a pencil and the X-ACTO Ruler, draw the outline of the American flag lightly on the poster board. (Draw a square in the top left corner for the stars and thick lines for the stripes).
- Place blue paint on one paper plate.
- Place red paint on the other paper plate.
- Dip one hand in the blue paint and then press your hand inside the square area on the poster board multiple times to create the handprint stars.
- Dip your other hand in the red paint and then press that hand on every other line multiple times to create the stripes.
- Let dry.
American flag tissue paper wreath
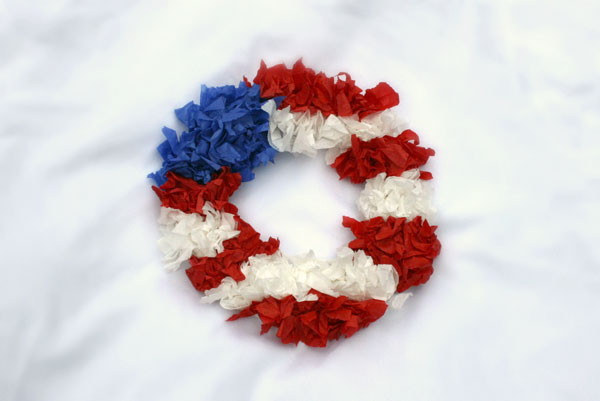 Materials:
- Elmer’s Bi-Fold Foam Board
- X-ACTO Gripster Knife
- Red, white and blue tissue paper
- Elmer’s Quick Dry Dual Tip Glue Pen
- Pencil
- X-ACTO Ruler
Directions:
- On one side of the Elmer’s Bi-Fold Foam Board, draw a circle with a pencil.
- With the X-ACTO Gripster Knife, carefully cut out the circle.
- With the X-ACTO Ruler, mark 1-1/2 inch marks on the inside of the circle every inch or so.
- With the X-ACTO Gripster Knife, carefully cut out the inside circle to make the wreath base.
- With the X-ACTO Ruler, mark a square in one corner of the wreath and then mark lines across and down the remainder of the wreath.
- Tear multiple 3-inch by 3-inch squares of red, white and blue tissue paper.
- Pinch the middle of each tissue square while gently pulling the ends upward.
- Apply the Elmer’s Craft Bond Quick Dry Glue to the square section and carefully place each blue tissue piece until the area is covered.
- Apply the Elmer’s Craft Bond Quick Dry Glue to the line section and carefully place each red tissue piece until the area is covered.
- Repeat step nine — alternating red and white — until the wreath is completely covered.

Materials:
- Elmer’s Bi-Fold Foam Board
- X-ACTO Gripster Knife
- Red, white and blue tissue paper
- Elmer’s Quick Dry Dual Tip Glue Pen
- Pencil
- X-ACTO Ruler
Directions:
- On one side of the Elmer’s Bi-Fold Foam Board, draw a circle with a pencil.
- With the X-ACTO Gripster Knife, carefully cut out the circle.
- With the X-ACTO Ruler, mark 1-1/2 inch marks on the inside of the circle every inch or so.
- With the X-ACTO Gripster Knife, carefully cut out the inside circle to make the wreath base.
- With the X-ACTO Ruler, mark a square in one corner of the wreath and then mark lines across and down the remainder of the wreath.
- Tear multiple 3-inch by 3-inch squares of red, white and blue tissue paper.
- Pinch the middle of each tissue square while gently pulling the ends upward.
- Apply the Elmer’s Craft Bond Quick Dry Glue to the square section and carefully place each blue tissue piece until the area is covered.
- Apply the Elmer’s Craft Bond Quick Dry Glue to the line section and carefully place each red tissue piece until the area is covered.
- Repeat step nine — alternating red and white — until the wreath is completely covered.
Patriotic 4th of July paper plate noisemakers
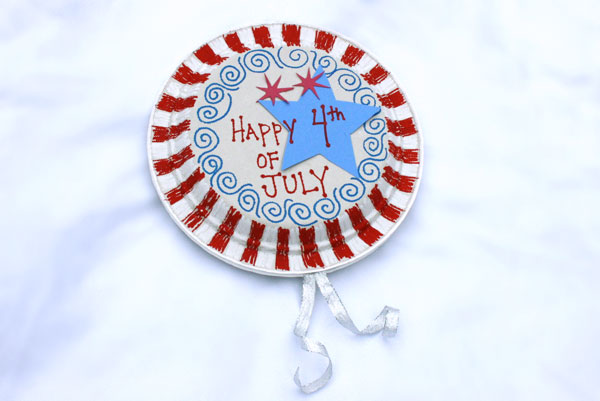 Materials:
- Two white paper plates
- Hot glue gun
- X-ACTO Decorative Shapes Template
- X-ACTO Gripster Knife
- Red and blue cardstock paper
- Elmer’s Painters Paint Markers in red, white and blue
- Elmer’s Craft Bond Quick Dry Dual Tip Glue Pen
- Dried pasta or dried beans
- Ribbon (optional)
Directions:
- Place the X-ACTO Decorative Shapes Template on the cardstock paper.
- With the X-ACTO Gripster Knife, carefully cut one to three stars from the template.
- Using the Elmer’s Quick Dry Glue Pen, glue the stars to the wrong side of one paper plate.
- With the Elmer’s Painters Paint Markers, decorate the wrong sides of one or both paper plates. Let dry.
- Lay one of the paper plates on a hard surface (decorated side down) and fill it with dried pasta or dried beans.
- With the hot glue gun, carefully apply glue around the edge of the paper plate.
- Quickly and carefully place a folded piece of ribbon on the hot glue near the bottom of the plate (optional).
- Quickly and carefully place the second paper plate on top of the first (right sides together) to seal the paper plates together.
- Let dry.
source:http://www.sheknows.com/parenting/articles/963658/4th-of-july-crafts-for-kids

Materials:
- Two white paper plates
- Hot glue gun
- X-ACTO Decorative Shapes Template
- X-ACTO Gripster Knife
- Red and blue cardstock paper
- Elmer’s Painters Paint Markers in red, white and blue
- Elmer’s Craft Bond Quick Dry Dual Tip Glue Pen
- Dried pasta or dried beans
- Ribbon (optional)
Directions:
- Place the X-ACTO Decorative Shapes Template on the cardstock paper.
- With the X-ACTO Gripster Knife, carefully cut one to three stars from the template.
- Using the Elmer’s Quick Dry Glue Pen, glue the stars to the wrong side of one paper plate.
- With the Elmer’s Painters Paint Markers, decorate the wrong sides of one or both paper plates. Let dry.
- Lay one of the paper plates on a hard surface (decorated side down) and fill it with dried pasta or dried beans.
- With the hot glue gun, carefully apply glue around the edge of the paper plate.
- Quickly and carefully place a folded piece of ribbon on the hot glue near the bottom of the plate (optional).
- Quickly and carefully place the second paper plate on top of the first (right sides together) to seal the paper plates together.
- Let dry.
source:http://www.sheknows.com/parenting/articles/963658/4th-of-july-crafts-for-kids
“Bee Mine” Hanging Valentine
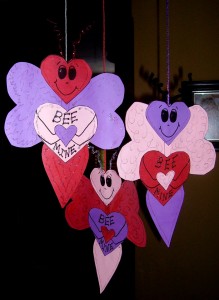
Valentine’s Day will be here soon and it’ll be time to take down the winter decorations and put up the hearts. This hanging hearts decoration says ,”Bee Mine.”
Supplies:
- Red, pink and lavender construction paper
- Head and wings (Pattern)
- Body, neck and hearts (Pattern)
- Colored or tinsel pipe cleaners
- Cord or ribbon
- Tape Scissors
- Glue stick
- Glitter glue or white glue and glitter
Directions:
- Glue the littlest hearts to the “Bee Mine” hearts.
- Fold the pipe cleaner in half and curl the ends around a pencil. Tape the pipe cleaner to the back of one head.
- Tape the cord or ribbon to the top of the same head.
- Glue the neck to the bottom of the head.
- Tape or glue one of the “Bee Mine” hearts to the neck.
- Tape or glue the bottom heart to the bottom of the “Bee Mine” heart.
- Glue the wings to the back of the bee.
- Glue a neck piece to the bottom of the second head. Glue the second head over the taped side of the first head.
- Glue the second “Bee Mine” heart over the taped “Bee Mine” heart.
- Using glitter glue, make decorations on the wings and body of the bee. Let dry and hang.
Paper Love Bugs
Difficulty: Easy
Age: 4 and up

You know those pesky love bugs that fly in the air? Here is a paper love bug that your kids will adore!
Share your love of crafts this Valentine's Day!
What you'll need:
- Empty toilet paper tube
- Pink paper
- Scissors
- Glue
- Pipe cleaners
- Pen, maker, crayons, or pencil
How to make it:
- Paint or cover an empty toilet tube with pink paper to make the body of the bug.
- Cut two hearts from construction paper.
- Attach these with tape or glue on either side of the body.
- Encourage your child to draw a face on the top of the tube. Pipe cleaners make great antennae.
- Write a cute message on the wings such as "Valentine, you make my heart flutter."
I always see birds out of my window on the tree in my garden and I wanted to feed them. The only bit that concerned me was spending a fortune on a store bought bird feeder, so I had the idea to make my own.
I got a 750ml empty 'Tropicana' carton and cut a hole in 2 sides roughly in the middle. Then, I pierced 2 smaller holes on the sides just below the carton cap.
I got some string and poked it through the two holes and then tied it together at the lid. I tied it again about 8cm up the string so that it made a loop for the bird feeder to hang off a branch.
I got some raisins, soaked them in warm water and chopped them, put them in and hung it on my tree.
Tips if you would like to try:
- Instead of using one bit of string through the holes, use two to make it stronger.
- When tying the knots on the string, tie them 3-4 times to make them stronger.
- If there are sharp bits around the edges of your two big holes, use a couple of bits of cello tape to cover them so that the bird does not damage it's feathers entering your bird feeder.
- Cut the two big entrance holes to the size of bird that comes.
- Check if the food you're feeding the birds is safe for them to eat.
- Hang the feeder quite high so that the bird will be safe from predators such as cats and foxes etc.
Thank you for reading.
source:http://www.savvyhomemade.com
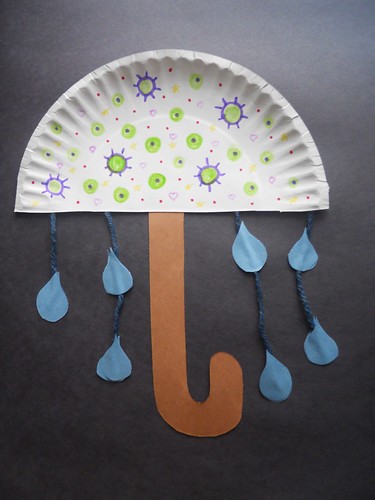
A Rainy Day Craft
Supplies:
- Red, pink, white, purple, and other construction paper, oak tag, or gift wrap
- Pencil
- Scissors
- A long length of colorful yarn (thick yarn works better than thin string)
- Glue stick
| Using construction paper, cut out a lot of hearts that are the same size.Make a template of a heart the size you would like yours to be (or go to a printable heart template). A good size for this craft is made by folding a piece of paper into eights (3 folds). Then, draw half a heart by the fold line. Cut out the hearts (this will make four hearts), and save one as your template. |
| Place one heart on the table (with the fold pointing upwards). Spread glue on the top surface. |
| Fold a second heart in half, and place it on top of one side of the first heart, matching the center lines. |
| Fold a third heart in half, and place it on top of the first heart, next to the second heart, again matching the center lines. |
| Lay the yarn along the center line of the heart.Put glue on the inner flaps of either the second or third heart, then stick them together, enclosing the yarn within the flaps. |
| Glue many other heart triplets to the string. You may have to make a knot under each heart to keep it from sliding down the string (if the string is too thin or if you don't use enough glue).You now have a great decoration for Valentine's Day source:http://www.enchantedlearning.com |
MARTIN LUTHER KING COLORED HANDS WREATH
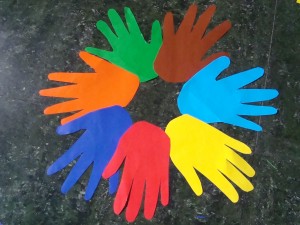
Martin Luther King Day is just around the corner. Martin Luther King Day is always the 3rd Monday in January and it marks Martin Luther King’s Birthday. Well, today’s craft is in honor of Martin Luther King’s Birthday. I’m going to show you how to make a colored hands wreath for Martin Luther King Day. This craft is just perfect for the occasion, in celebration of Martin Luther King’s birthday. The colored hands represents children of different races joining hands in peace and unity. A few colored papers, a pair of scissors and a glue is what you need. So, let’s get started.
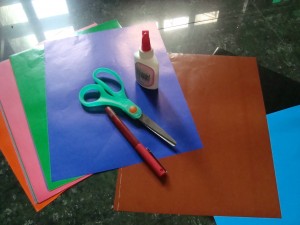
MATERIALS NEEDED
colored papers, assorted
scissors
glue
scissors
glue
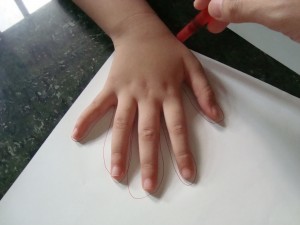
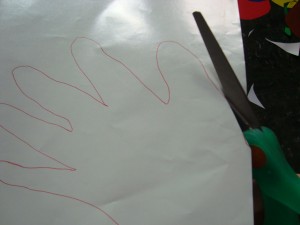
With the back portion of the colored papers, let your child trace his/her hand with a marker. Do the same to the other paper colors until you have around 7-8 pieces.
With a pair of scissors, cut the drawings and set aside.
When all hand shapes are cut, arrange it in a circle as if the hands are reaching outwards. Make sure the colors are alternately placed. Glue the outer side so it touches the side of the other hand. Continue doing this until you create a circle that resembles a wreath.
There you have it….. you just finished making your colored hands wreath for Martin Luther King Day. Doesn’t it look awesome when finished? Now go hang it proudly for all to see.
Creative Easter Handouts for Kids or just a fun home project
I know Easter is a bit away but I came across these cute handmade Easter carrots with yummy goodies inside. I can think of so many wonderful things to put inside them.
Easter "carrots" made using Cheetos (or you could use Goldfish crackers or even Jelly Beans) and piping bags from Wilton. These were a huge hit for your child's class at Easter time.
sources:http://creativeorganization.blogspot.com
BIRD BINOCULARS
Grade: K-2
Age: 4-8
Activity Summary:
Children can recycle cardboard rolls to create some make-believe binoculars for bird watching.
Objectives:
Students will learn how to spot birds with their own homemade binoculars.
What You Need:
2 paper rolls (about 4" - 5" long) per student
single hole punch
glue
yarn or string
Optional: Paint or paper and glue for decorating
What You Do:
Give each student 2 paper rolls and have them glue them together on the sides. Let dry.
Help students put a hole in each side of the binoculars.
Tie the ribbon/yarn through the holes.
Optional: decorate the binoculars with paint or glue and paper.
Bring children outside to look for birds and have them look through their own creations.
Talk about the birds from your area. Refer to books and see if you can spot different types of birds.
http://www.kinderart.com
New Years Party Hats

Materials Needed:
8 1/2″ x 11″ Cover Weight Paper (Eco-White & Shimmer Gold)
8 1/2″ x 11″ Text Weight Paper (Black & Shimmer Silver)
1/4″ Super Tacky Tape
Happy New Year Rubber Stamp
VersaMark Watermark Inkpad
Metallic Silver Embossing Powder
Embossing Powder Heat Tool
Black Brads
Clear Adhesive Crystals
1/4″ Black Satin Ribbon
Foam Square Adhesives
1/8″ Hole Punch
Bone Folder
Xacto Knife
Scissors
6″ Guillotine Trimmer (optional)
Instructions:
1. Cut one 4″ strip of super tacky tape. Apply to upper left corner of Shimmer Gold cover paper as shown and set aside.
2. Using scissors or guillotine trimmer, create fringe topper by cutting one sheet each of Shimmer Silver and Black text paper in half widthwise. Make fringe cuts along 8 1/2″ side approximately 1/8″ apart, making sure to leave approximately 2″ uncut at opposite end for rolling (B). Roll fringed paper around pencil tightly, secure with tape and remove pencil. Curl fringe with bone folder. Center fringed tube on the sheet of 8 1/2 x 11″ Shimmer Gold cover paper that was prepped with tape earlier (C). Form cone shape, then unpeel super tape backing and press firmly to temporarily hold in place (D).
3. Cone needs to be permanently secured with brads. Do this by making small holes with an xacto knife where indicated (E). Insert brads into holes and fasten in place.
4. Stamp “Happy New Year” onto Eco-White cover paper with VersaMark inkpad. Sprinkle with Metallic Silver embossing powder. Shake off excess powder and heat with embossing heat tool. Cut phrase out with slight outline and adhere onto front of hat with two foam squares.
5. Punch 1/8″ holes at side of hat and thread approximately 24″ of black ribbon through holes. Knot ribbon at both ends with knots on inside of hat. Place on head and pull knots downward to tighten (F).
6. To add sparkle, stick adhesive gems all over surface of hat, including brads as pictured.
Celebrate the Chinese New Year with this fun and easy Chinese dragon craft for kids. Make it a group project and create your own dragon parade.
Learn about Chinese New Year traditions and symbols. Get more Chinese New Year craft ideas for kids to celebrate the holiday.
What you'll need:
- Paper egg carton
- Scissors
- Hole punch
- Yellow craft paint
- Black craft paint
- Paint brush
- Paint with daubers (or BINGO marking paints); or craft paint and paint brushes
- 7mm Wiggle eyes
- 1/4" White pom-pom balls
- Red felt scrap
- Tacky glue
- 2 Jingle bells (1/2")
- Ribbon (we used 1/4" wide)
How to make it:
- Cut the cups apart on the egg carton. Even out the edges so the cup will sit evenly upside down on the table.
- Paint the inside of one cup black for the inside of the mouth. Paint the outside yellow.
- Using as few or as many cups as you wish, paint the outside of the cups yellow. Let dry.
- Using the daubers, let the children paint different color dots on the yellow cups. Let dry.
- Hole punch 2 holes in each cup directly across from each other.
- Lace the ribbon through the holes to tie the dragon together.
- Tie a jingle bell on each end of the ribbon.
- Glue the head on the dragon. Note: You may need to "prop" the head up while it dries.
- Cut a red tongue out of felt and glue inside of mouth.
- Glue 2 pom-poms on top of the head and then glue 2 wiggle eyes attaching them to the pom-poms. (see photo) Let dry. Source:http://crafts.kaboose.com/dragon.html
Written by: Amanda Formaro [Amanda Formaro is the crafty, entrepreneurial mother of four children. | www.craftsbyamanda.com]

Grade: K-6
Age: 5-12
Age: 5-12
Activity Summary:
Children can create spider webs using craft sticks. Pom pom spiders can be added as well. This is a fun project for elementary aged kids. Younger ones can join in the fun, but a grown up will need to do a little gluing for get them first.
What You Need:
- 3 craft sticks
- Purple paint
- Paintbrush
- Black yarn
- 1 medium light green pom-pom
- 1 light green chenille stem
- 2 purple wiggle eyes
- White craft glue
- Scissors
What You Do:
- Paint the craft sticks purple and let dry.
- Glue the wiggle eyes to the pom-pom.
- Cut the chenille stem into eight equal pieces. Bend each piece at a 90 degree angle. Glue the legs onto the pom-pom. Set the spider aside to dry.
- Meanwhile, glue the three craft sticks into a flower shape, crossing over each other.
- Glue the end of the yarn to one of the craft sticks. Holding that piece with your finger, turn the sticks over and begin wrapping the yarn from stick to stick, wrapping once around each stick as you work your way around in the “flower”. Once you get all the way around, adjust the yarn upward and continue going around again. Do this a third time to complete the web.
- Turn the sticks over to the backside and add glue to all the yarn intersections. Let dry.
- When dry, turn over and glue the spider to the web.


Tip: This wrapping technique is similar to that of a dream catcher. Simply stretch, wrap, stretch, wrap, and so on.
Garbage Bag Ghosts

1 white kitchen garbage bag / bin liner
4-5 white plastic shopping bags
scissors
black permanent marker
chopstick or other long, sharp tool (a large nail will do)
(optional) string or twine
You will be able to make two ghosts from each garbage bag.
4-5 white plastic shopping bags
scissors
black permanent marker
chopstick or other long, sharp tool (a large nail will do)
(optional) string or twine
You will be able to make two ghosts from each garbage bag.
DIY Easy Halloween Keepsake Rug

For this project, you will need:
1) Black Doormat or Accent Rug. I found mine at Walmart for $4.88!
2) Letter Stencils. Whichever style and size you want-- the ones used here are made by Plaid, and are at Walmart for $3.97.
3) Paint brushes and/or spouncers. I used a short, coarse bristle brush.
4) Craft paint in whatever color you want-- mine is Glow in the Dark!
5) Soft Fabric Paint, in White and Black
6) Newspaper to protect your work surface
7) Damp rags
8) Cooperative children with adorable feet!
Candy Corn Wreath
\\\\

1. You’ll need a Styrofoam wreath (ours is 16 in.), black duct tape, a hot-glue gun, a wide ribbon and candy corn (we used Brach’s).
2. Cover the wreath in tape.
3. To get a sense of how the corns will fit, lay them around the wreath in single rows, with one row pointing left and the next pointing right, but don’t glue down. (It won’t take long and your final product will be more polished.) Remove the corn from the wreath and hot-glue the pieces in the pattern one at a time, starting from the outer edge of the wreath inward, until you’ve covered the entire top and side.
4. Repeat the process in the center, starting at the same point as you did for the top so that you can cover any corn-free space with the ribbon when you’re finished.
5. Wrap ribbon through the wreath at the candy corn seam, tie into a bow and hang on a sturdy wall hook.

source: instructables.com
Halloween coloring pages
Visit http://www.freefunhalloween.com/halloween-coloring-pages/ and print some fun Halloween coloring pages...
A great and easy art project that your kids will love.
Puffy Candy Corn

What you'll need:
- 1 sheet black construction paper
- Tissue paper – white, yellow, orange, cut or torn into ½” squares
- White craft glue
- Scissors
- Pencil with eraser
- Pattern from Candy Corn Luminary
How to make it:
- Print off the pattern and cut it out.
- Glue pattern to the center of the black paper (see image).
- Line the top section of the candy corn pattern with white craft glue.
- Place a square of white tissue paper on the pencil eraser and twist the paper around the eraser. Now with the tissue paper on the eraser, press it down into the glue. Continue until all top area of candy corn is covered.
- Repeat this process for orange in the middle section and yellow in the bottom section (see image).
- Let dry completely.
Tips:
- Buy construction paper at the dollar store for plenty of fun projects.
- You can use left over crepe paper streamers for this project instead of tissue paper.
- Save tissue paper from birthday presents for projects such as this.
source:http://crafts.kaboose.com
Easy to Make witch hats

What you'll need:
- 2 sheets of black construction paper
- 1 sheet felt (green, orange, purple, or red)
- Strip of black felt
- White craft glue
- Scissors
- Tape
How to make it:
- Roll 1 sheet of black paper into a cone. Secure with tape (see image).
- Trim the bottom of the cone so that it will stand up on the table.
- Use a cup or jar as a guide and cut out a circle from black paper large enough for the hat brim.
- Glue the cone to the circle and set aside to dry (see image).
- Cut ¼” or ½” strips of felt and glue them around the cone.
- Cut a strip of black felt to go around the base of the cone.
- If you like, cut a bat out of black felt and glue to your hat.
Tips:
- Buy construction paper at the dollar store for plenty of fun projects.
- Felt is inexpensive so stock up on 5 or 6 sheets each time you go to the store.
- Traditional Halloween colors include black, orange, purple, red and green. However, you can use whatever colors you like for this project!
Creepy Candle Sticks
Because vampires are sensitive to light, rely on soft light at your soiree from candles resting in wax-dripped candle holders, which are fashioned to resemble dripping blood.
Step 1: Squeeze Paint into Bottles
Squeeze the paints into each bottle, using a straw to spread the paint around. (You can also cover the bottle openings with paper towel and shake them.) Use multiple colors to get a fun effect. Repeat several times so that the entire insides of all the bottles are covered. Let dry completely.
Step 2: Add Candles
Place the bottles on a protected surface. Insert a candle into each bottle. Light the candles, letting the wax drip down the outsides of the bottles. (You may need to hold a lit candle in your hand over the top of each bottle and have the wax drip down.) Let dry completely.
TIP
We used a combination of Americana Gloss Enamels and Folk Art Extreme Glitter to achieve this look. Make sure the candles sit securely in the bottle openings before lighting. Never leave a lit candle unattended.Step 3: Light Candles
Insert the same used candles into each bottle. Light just before guests arrive.
source:www.freshhomeideas.com
Sugar skull making instructionsCelebrate Day of the Dead with your own sugar skulls! | ||||||||||||||||||||||||||||||||||||||||||||||

| Sugar Skulls are a traditional folk art from Southern Mexico used to celebrate Day of the Dead. Mounds of colorful sugar skulls are sold by Indian vendors in open air village markets during the week preceding the holiday. Spirits of the dead are welcomed back to their homes with beautifully decorated altars made by their loved ones. Sugar skulls, marigolds, candles, incense and special foods adorn home altars. Families take the flowers and sugar skulls to the cemetery to decorate the tombs on November 2. Sugar skulls are colorfully decorated with icing, pieces of bright foil, colored sugars and usually bear the name of the deceased loved one being honored. They are easy to make by children and adults, and if kept dry, they can last a year. MexicanSugarSkull.com's Angela Villalba is the creator of the original sugar skull mold. We now have 13 wonderful high quality molds - and all the right supplies that you need to create your own fabulous skulls. Make sugar skulls as part of your family tradition to remember your dear, departed loved ones. | |||||||||||||||||||||||||||||||||||||||||||||
 | Sugar skull recipeCAUTIONDo not make sugar skulls on a rainy or high humidity day. They will not turn out.Please don't forget the meringue powder!Meringue Powder BrandDo not use meringue powder from hobby shops or cake supply shops as it's usually diluted and cut way too much for use with heavy granulated sugar. It's ok for icing, just it will not hold together sugar skulls! We get calls daily from teachers & folks who's sugar skulls are "sandy" and not sticking together and have a big mess on their hands and don't have enough time to get new meringue powder and redo the project. Start right from the beginning! The only reliable meringue powder is the one we sell or that of Sur La Table gourmet kitchen shop/ catalog. Mix together well in large bowl: 1 teaspoon Meringue Powder for every cup of granulated sugar used. Step 1: Mix dry ingredients well.Variation: Colored Skulls Most people prefer white skulls the first time they make them, but if you'd like colored sugar skulls, add paste food coloring TO THE WATER. For a 5 pound bag of sugar, use 1/4 cup meringue powder and 10 teaspoons of water. Yield 5 large skulls or 20 medium skulls or 100 mini skulls or any combination. For a 10 pound bag of sugar, use 1/2 cup meringue powder and 7 Tablespoons water. Yield 10 large skulls or 40 medium skulls or 200 mini skulls or any combination. | |||||||||||||||||||||||||||||||||||||||||||||
 |
10 pounds of sugar = 21 cups 3 teaspoons = 1 Tablespoon | |||||||||||||||||||||||||||||||||||||||||||||
 |
Powdered sugar for Royal Icing 1 pound box = 3 1/2 cups 2 pound bag = 7 cups (do not sift Powdered Sugar) Measurement: 3 teaspoons make a Tablespoon: 4 Tablespoons make 1/4 cup. But on this website, 7 Tablespoons (21 teaspoons) of Meringue Powder = 1/2 cup! (Please don't email me on this!) Sugar Skull making is not an exact science... we like easy measurements! Especially when measuring with kids. | |||||||||||||||||||||||||||||||||||||||||||||
 |  Mix well with hands until every bit of sugar is moistened. If your fingerprints remain when you squeeze the sugar in your hand, it is ready to mold. (Right) It should feel like cool "beach sand." Mix well with hands until every bit of sugar is moistened. If your fingerprints remain when you squeeze the sugar in your hand, it is ready to mold. (Right) It should feel like cool "beach sand."If it doesn't hold together, mixture is too dry. (Left) Remember, water sinks, so keep the sugar mixture mixed up frequently as you make your sugar skulls. | |||||||||||||||||||||||||||||||||||||||||||||
 | To moldPack sugar mixture FIRMLY into mold with special attention to chins & edges. Use a straight edge to scrape the back of the mold flat. Pack down some more until perfectly tight.Place a stiff cardboard square (approx. 5" x 6") over mold and invert immediately. Lift mold off carefully. Throw any "mistakes" back into your bowl, stir up and try again. If mix is too dry, spritz with a water bottle. | |||||||||||||||||||||||||||||||||||||||||||||
 |  TIPIf all the sugar mixture does not fall out of mold easily, it is too wet. Re-mix with a bit more sugar. Hand wash and dry your mold after every 5 skulls to avoid sticking. Most Sugar Skull makers will have a collection of molds to make the molding process more enjoyable. TIPIf all the sugar mixture does not fall out of mold easily, it is too wet. Re-mix with a bit more sugar. Hand wash and dry your mold after every 5 skulls to avoid sticking. Most Sugar Skull makers will have a collection of molds to make the molding process more enjoyable. | |||||||||||||||||||||||||||||||||||||||||||||
 | To DryAll sizes of the molded sugar skulls need to air-dry on their card boards from 8 hours to overnight before they are ready to decorate. Medium and Mini skulls may be decorated after they are completely dry.Large skulls require a few more steps. They are a 2-piece mold, and must be "scooped out" after they are partially dry; start checking them in 5-6 hours. When the skulls feel dry enough to handle, hold skulls carefully and hollow both the back and the front out with a spoon, leaving the skull wall 1/2" thick. Do not scoop out the neck area. It's very important to scoop out the larger skulls as they are so thick, they trap moisture - AND they are so heavy that they slide apart if not scooped. Set the hollowed skulls upside down to continue drying until totally dry (approx. 12 hours). When completely dry, dust off and assemble the front and back of the skull with a 1/4" bead of thick royal icing, either applied with a knife or squeezed from an icing bag (one side only). Align points on the back of the skull with the sides of the neck, and press the two sides together until they are firmly connected. The icing will ooze out a little. Drag your finger over the seam to remove excess icing. Try to do this with just one pass - touching the skull too much will make the icing look bad. Drag your finger across the base of the neck crack to remove excess icing. Lay skull aside to dry. When seam is dry, about 2 hours minimum, it is ready to decorate. Sugar skull blanks may be made up to a year ahead of time awaiting decorating. Just store in "breathable" boxes like cardboard. Not plastic lidded boxes. | |||||||||||||||||||||||||||||||||||||||||||||
 | TIPS
| |||||||||||||||||||||||||||||||||||||||||||||
 | Royal icing recipeMix 2/3 cup water, 1/2 cup meringue powder and 2 pounds powdered sugar with an electric/stand mixer until icing peaks (about 9 minutes!) Don't mix up more than 2 pounds at a time. Keep in a tightly covered container. DO NOT REFRIGERATE.Royal icing is a cement type icing used for gingerbread house construction. It isn't very tasty, but it is strong, dries pretty and lasts. Use ONLY concentrated paste food colorings (NOT liquid food coloring from the grocery store!) Yes, we have 12 great colors on oursugar skull molds and supplies page. Mix icing & paste colors in disposable cups. Use pastry bags and metal decorating tips if you are a pro or into cake decorating. Yes, we have great disposable pastry bags on the Order Page! Add 2-3 ounces of Royal Icing (no more than 1/4 full). Squeeze to decorate. Calculate each 5 pounds of sugar skulls will need 2 pounds of powdered sugar Royal Icing. Most skull makers prefer 5-6 paste colors to decorate with and at least one pack of colored tin foil. Yes, we have tin foil in deep Purple, Magenta, Orange, Gold and Red, seesugar skull molds and supplies page. | |||||||||||||||||||||||||||||||||||||||||||||
 |
The sugar "scoopings" from Large skulls will net about 50%. Sugar will be soft and moist and may be made into smaller skulls. This moist sugar may be stored in plastic tightly-topped box for a day or two. When you're ready to use sugar, give it the hand-squeeze test. If too dry, spritz with the water bottle until it holds together again. | |||||||||||||||||||||||||||||||||||||||||||||
 | All skull sizesHave fun decorating your skulls with colored Royal Icing, sequins, feathers, beads, even earrings made from soda pop tops. Colored foil and icing are how Mexican sugar skulls are decorated. Foil is pasted down with icing, and is great for making crowns, crosses, hearts, shiny eyes or even pipes. Labels, wrappers, trinkets and shells can personalize a skull in memory of your dear, departed loved one. Be creative! Have fun! Kids down to kindergarten have fun decorating sugar skulls. If youngsters don't have the coordination to use a pastry bag, let them "Finger-paint" with the colorful icing. | |||||||||||||||||||||||||||||||||||||||||||||
 | Can you eat the Sugar Skulls???There is nothing that will make you sick in Sugar Skulls except for the tin foil and other decorations. However, after all the handling that is done to make them, they aren't very clean! So, NO, you shouldn't eat a sugar skull. They are for decorative purposes only. | |||||||||||||||||||||||||||||||||||||||||||||
 | What's needed to make sugar skulls?
| |||||||||||||||||||||||||||||||||||||||||||||
 | Tradition The traditional Mexican sugar skull is placed on the home altar or the tomb to honor a deceased loved one. It decorates the altar and make it a happy place for the spirit to visit. The name of the loved one is usually written on the skull with icing in the market by the sugar skull maker. You can customize your skulls with characteristics that you remember –– like a tin foil pipe for Grandpa Joe who smoked a pipe on the porch after dinner. | |||||||||||||||||||||||||||||||||||||||||||||
source:mexicansugarskull.com
Paper Mache Candy Bowl

What's Halloween without the candy? Keep these crafty bowls filled and the little monsters will come running!
Materials and Tools:
paper grocery bags or craft paper
large glass bowl
aluminum foil
small bowl
decoupage medium
water
stir stick
paint
black craft foam
tombstone and tree templates (at right)
light transfer paper
blue painter's tape
pencil
craft knife
foam glue
clothespins
small black pompom
black embroidery floss
sewing needle
white thread
scissors
small bird figurine
black craft paint
bamboo skewer (optional)
Steps:
1. Turn the bowl that will serve as the mold upside down and cover the outside with aluminum foil. Fold excess foil into the interior of the bowl.
2. Tear the bags or craft paper into roughly 2" to 3" pieces.
3. Mix four parts decoupage medium with one part water in a mixing bowl. Dip each paper piece in the solution and place on the outside of the foil-covered bowl, overlapping the paper to cover the bowl. Work with the bowl inverted over a can so that it is easy to spin. Continue adding paper until 3-4 layers of paper cover the outside of the bowl.
4. Allow the bowl to dry for 24 hours.
5. When the paper bowl is dry, gently peel the foil off the inside of the glass bowl, releasing the bowl from the paper shell. Gently peel foil from the paper shell.
6. Paint the paper bowl. We used black spray paint on the outside and red house paint on the inside. Allow the paint to dry.
Note: Sometimes the bowl will become slightly misshapen after you paint it. To restore the bowl to its original shape, wait for the paint to dry completely, place the glass bowl you used as a mold inside of the paper bowl and let it sit for a few hours.
7. With a craft knife, cut a spooky tree and three tombstone shapes from black craft foam. If using templates, transfer the images onto the craft foam with light colored transfer paper, holding the paper in position with blue painter's tape. Glue these shapes to the outside of the bowl with foam glue. Use clothespins to hold the foam pieces in place while the glue dries for 24 hours.
8. Create a spider by threading black embroidery floss through a small black pompom. Secure the embroidery floss "legs" by coating them with glue. String the spider on a piece of white thread and attach to the tree.
9. Paint a small bird figurine black with craft paint and glue it to the tree. If the tree begins to droop, brace it with a bamboo skewer that has been painted black and glued both to the back of the tree and the top of the bowl.
source:http://www.diynetwork.com
HOW TO DECORATE PAPER LANTERNS FOR HALLOWEEN

Light up your Halloween party with paper lanterns decked out in spiders, bugs and creepy crawlies.
Materials and Tools:
round paper lantern
black paper or card stock
small black brads
scissors or craft knife
small hole punch (optional)
red tissue paper and tape (optional)
hanging bulb style lamp fixture
fabric (optional)
sewing machine (optional)
round paper lantern
black paper or card stock
small black brads
scissors or craft knife
small hole punch (optional)
red tissue paper and tape (optional)
hanging bulb style lamp fixture
fabric (optional)
sewing machine (optional)
- Cut out several spooky shapes from black paper or cardstock with scissors or a craft knife. Our cutouts were of things like rats and mice, spiders, and other creepy-crawlies.
- For the red accent on the black widow, cut an hourglass shape out of the spider's abdomen area and tape a piece of red tissue paper over the cutout on the back side.
- Punch a small hole in each shape with a hole punch or cut a hole with scissors or a craft knife.
- Slip the legs of a brad through the hole and attach the cutout to the outside of the lantern by poking the brad through the paper lantern and separating the legs of the brad.
- Insert a hanging bulb style fixture.
- To disguise the cord, sew a tube of fabric at least two times as long as the lamps cord. Insert the cord and bunch the fabric together.
source: http://www.diynetwork.com
Check out this cute Halloween Treat...Great for your child's school Halloween party.
These plump candy packages make perfect party treats. Just wrap everybody's favorite bean in orange tulle, tie off with a green pipe cleaner, and your little guests will be happily nibbling their favors all the way home.
source from parenting.com
Stationed on a walkway or porch, these homemade lanterns will extend a ghostly greeting and good-bye to all your holiday visitors.
- Materials
- Clean plastic gallon milk jugs
- Black permanent marker
- Craft knife
- String of 50 clear low-wattage holiday lights
- Instructions
- Draw ghost eyes and mouths on the jugs. Tip: Leave the caps on while you do this, so the jugs don't dent.
- Use the craft knife to cut a half-dollar-size hole in the back of each jug (a parent's job).
- Arrange the ghosts near each other and string the lights between them, stuffing several bulbs into each of the jugs.
March 26th Art Project
(Poet Robert Frost Birthday)-HAIKU STRAW PAINTING
Written by: Carole Rathfon [Carole is a teacher at Kaiser School in Oakland, CA.]

Grade: all
Age: all
Activity Summary:
Students will learn how to write a Haiku poem. They will then discover how to make an ink painting to illustrate their poem.
Objectives:
- Learn about haiku poetry.
- Have the experience of writing a haiku.
- Make an ink painting to enhance the haiku.
What You Need:
- Haiku poems
- Slide or poster of a Japanese brush painting (optional).
- Straws
- White construction or other heavy paper
- Higgins Black ink with dropper
- Brush and water jar (optional)
- Pink tissue paper (optional)
What You Do:
- Tell students about HAIKU poetry and read some old and new examples.Structure of Japanese 17th century Haiku poems:
- Have 3 lines (in classical structure the first line has 5 syllables, the second has 7 syllables, the last has 5 again, but that doesn't necessarily work in English, because the English language doesn't have as many words to describe the same things as the Japanese language does.)
- Refer to nature
- Use ordinary things to talk about significant issues like finding happiness in the beauty of nature, dying, falling in love, being left alone, not having friends, etc.
- Can be happy, sad, humorous, frightening, etc.
The mighty Eagle
Catches prey with talons bare
Listen to the squish
Night and silver moon
Neighbor playing on his flute
Very out of tune
Small, alone, a child
Sobs and tears in a corner
Darkness gives a hug
Winter rainy day
Playing in the big puddles
Water everywhere
- Have student write a haiku poem. Check it for nature references and correct form.
- Have student neatly write the poem on the top left corner of the white paper.
- Drop a few (just need a tiny bit) drops of black ink on the paper (not on the poem part).
- With a straw, blow the ink around. If you get close you can move it all over the page to get branch-like shapes and little spidery shapes. If you blow hard, you get splat shapes.
- For older students, you can add "raindrops" by dipping a brush in ink, then putting it in water to dilute the ink, then holding the brush over the paper and tapping the brush lightly to make drops.
- For younger students, you can add "flowers" to the branches by gluing bits of crumpled pink tissue paper to the branches of the dried painting.
- Mount on large black paper to make a border around the painting.
Students of all ages LOVE this project, and the combined paintings make a great bulletin board display!
MARCH 25
Sculptor Gutzon Borgium's Birthday, 1871
Independence Day (Greece)
GREEK STORY VASES


Activity Summary:
Students will learn about Ancient Greek Pottery designs as they make their own mini vases using styrofoam cups and paint.Objectives:
Introducing students to the art of Greek vases while they develop their own storytelling skills.Vocabulary:
greek, vase, pottery, red, black, ware,What You Need:
- styrofoam cups
- Oil Pastels (in black and brick red)
- sharpened pencil
- tissues
- art reproductions (of Greek vases)
What You Do:
- Introduce Greek vases through images. Describe creating and storytelling techniques used on vases.
- Have students lightly draw their own story in 2 parts, first on paper and then on both sides of the cup with a pencil. Emphasize the use of clear outlined images and design with few details
- Using the pencils, have students "carve" into the lines they wish to keep without breaking the cup. Encourage them to take their time.
- Color inside the outlined areas with black pastel. Have the students press hard, then smudge with a black craypas. Color outside of the black forms (in the negative space) with brick red craypas. Smudge the pastel onto the cup using tissues. An "outline" will appear white around the forms from the cup color.
- After the vases are complete, each student should be encouraged to write a short story describing the image on their work of art.




 TIP
TIP.jpg)

No comments:
Post a Comment