
Healthy Homemade Fruit Snacks
Why are these healthy fruit snacks?
I’m glad you asked! Not only are these healthy fruit snacks made from whole fruit, but they also use grass-fed gelatin. This stuff is full of beneficial things like collagen (essential for strong nails, hair, and beautiful skin). It’s also a great source of high quality protein and amino acids.
Sweetened only with a little bit of honey, and colored by the fruit themselves, these snacks are simple, delicious, and very kid (and crazy mom) friendly. Blueberry is my favorite (which is saying something because it’s my least favorite berry of the bunch). Combined with the lemon juice… oh boy. They are good. Yes, these yummy treats are a truly healthy fruit snack.

Homemade Healthy Fruit Snacks
Inspired by this recipe from the Mommypotamus.
Ingredients:
2/3 cup fresh lemon juice or fresh orange juice (if you don’t like sour go with orange!)
2/3 cup frozen or fresh berries (raspberries, blueberries, strawberries are all great.)
1 – 2 Tbs honey
5 Tbs gelatin (from grass fed cows… like this)
2/3 cup frozen or fresh berries (raspberries, blueberries, strawberries are all great.)
1 – 2 Tbs honey
5 Tbs gelatin (from grass fed cows… like this)
Looking for quality real food ingredients? Be sure to check out the Village Green Marketplace!
Directions:
1. Pour juice and berries into a small saucepan. Heat over medium heat, stirring occasionally until berries become tender and begin to soften.
2. Add honey and stir until completely incorporated. You will want the fruit to dissolve quite a bit until you have a compote.
3. Puree mixture using a immersion blender or small blender (my magic bullet works great for this!)
4. Let sit, off heat, for 5 – 10 minutes.
5. Whisk in gelatin, one tablespoon at a time. Whisk vigorously until completely incorporated, mixing the gelatin in very gradually to avoid lumps. (If you do get lumps, just run the mixture through your blender again or you can put it back on the heat to help dissolve the gelatin.)
6. Pour into a 8 x 8 or 9 x 9 glass dish. Refrigerate until set (30 minutes to an hour). Cut in small squares. (You could also use some cute molds like this and create awesome shapes. I’m not awesome like that… but you could be!)
Note: I like to keep these in my fridge (I love cold things!), but they do transport and keep nicely at room temperature.
 
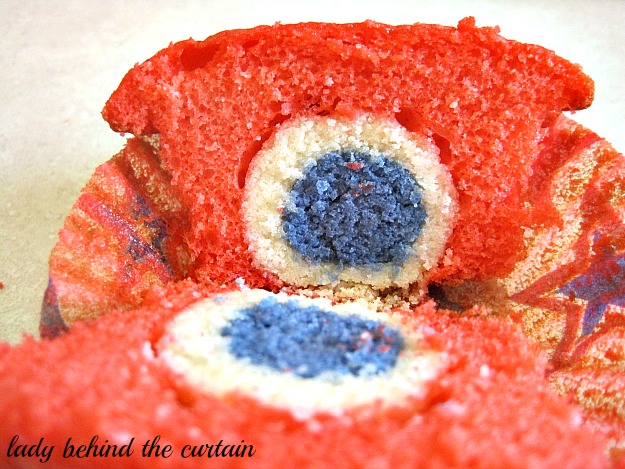
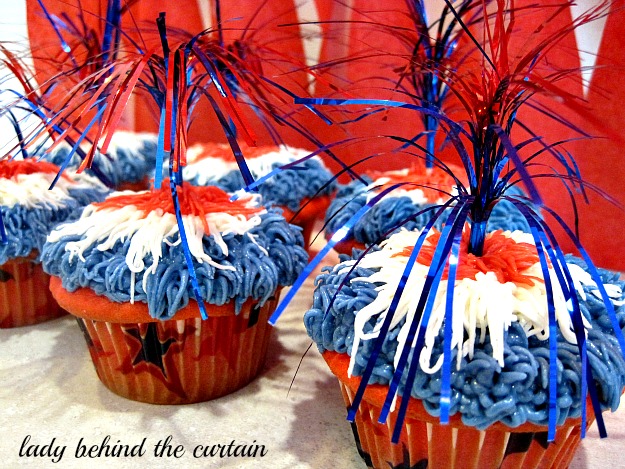
How fun are these cupcakes? Filled with a cake ball gives everyone a little surprise! Topped with red, white and blue bursts makes this cupcake a must at your next Memorial Day or 4th of July Celebration!
I used boxed white cake mix and homemade butter frosting for display purposes only. Next time I make these cupcakes for a party I’ll do lemon cake balls and a strawberry cupcakes. TIP: I recommend using homemade frosting the store bought doesn’t hold up as well. Makes approximately 24 cupcakes. Depends on the size of cake balls.
I’m Stuck In You Cupcake How To:
Ingredients
2 white cake mixes (also ingredients listed on the box)
1 container of store bought white frosting
butter frosting (double recipe)
red food coloring
blue food coloring
24-cupcake liners
Directions
Make ONE cake mix as directed on the box. Separate batter. One into a round cake pan and the other into a bowl. Color with blue food coloring and pour into another round cake pan. Bake as directed. Cool completely. When cooled crumble the cakes. Keep them in separate bowls. TIP: I peeled the bottom and top layer off in order to get only the blue and white colors.

Add the store bought frosting to the white and the blue cake crumbs. Only add enough so that when the cake is picked up it can be formed. You won’t need the whole container but most of it.

Form the blue cake into small balls using about 1 teaspoon of cake. Freeze for 30 minutes.

Using about a tablespoon of white cake, flatten the cake in the palm of your hand and work the white cake around the blue cake.

Once all the balls are covered, freeze again for 30 minutes. In the mean time make the cupcake batter following the directions on the box.

Add one small scoop of batter into the cupcake liners.

Place the cake ball in the center.

Fill the cupcake tin with enough cake batter to cover the cake ball.

Bake at 350 degrees for 17 minutes. Cool completely. While cooling make the butter frosting. Once the cupcakes are cooled begin frosting.
A peek inside!
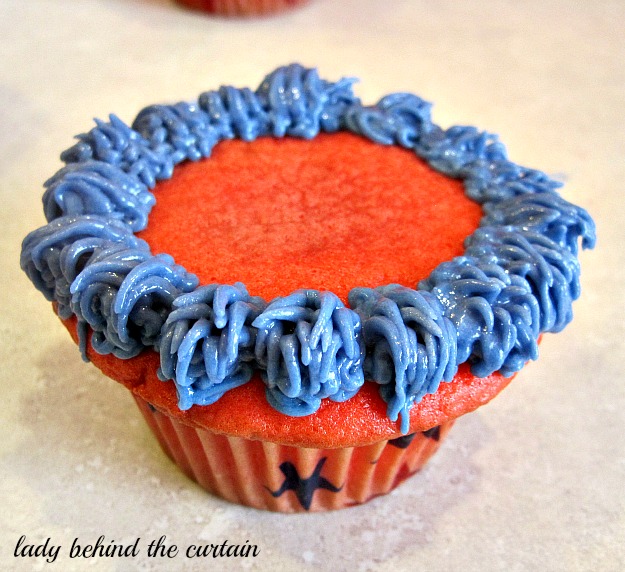
Use the “grass” tip. TIP: I had 3 tips and 3 disposable piping bags. This makes the process so much easier. No having to stop and clean before moving on to another color.

Start with blue. Using the press and pulling motion make on pass around the outside on the top of the cupcake. Then go around again to make sure the holes have been filled and their is enough height.
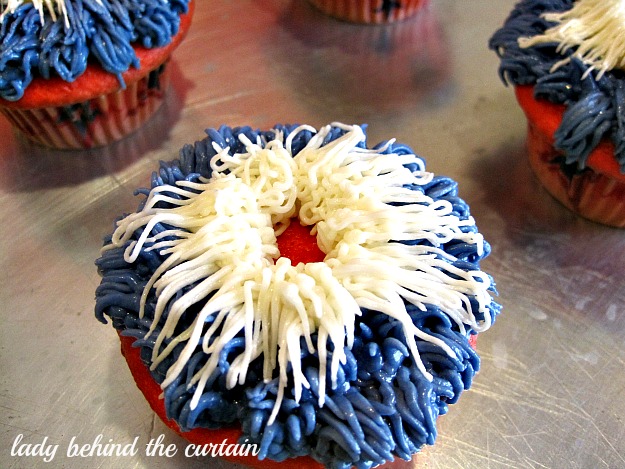
White layer.
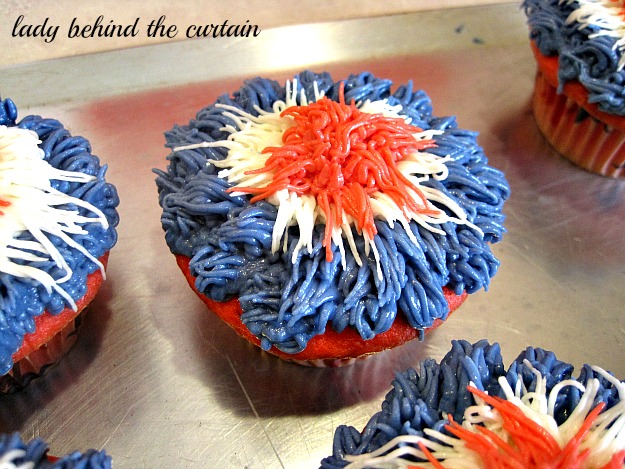
Red layer. This is a LBC original!
source:http://www.ladybehindthecurtain.com/im-stuck-in-you-cupcakes/
STAINED GLASS JELLO (ALSO
KNOWN AS BROKEN GLASS JELLO)
 INGREDIENTS:
4 boxes (3-ounces each) Jello (or store brand gelatin dessert) in different colors
14-oz can sweetened condensed milk 2 envelopes unflavored gelatin (Knox) Water DIRECTIONS:
1. For each flavor, dissolve one box of Jello in 1 cup of boiling water. Pour into a square container that is about 6 to 8" square and chill at least 3 hours, or overnight. (Try to use the same size for all four so that the blocks will come out the same. In this case the smaller the better - I used 8" pans and felt my "blocks" were a little too flat.)
2. After chilling the flavors, cut them into small blocks.
3. Carefully mix the blocks in a 9x13-inch pan.
4. In a separate bowl, sprinkle 2 envelopes of unflavored gelatin into ½ cup cold water. After the gelatin blooms, add 1½ cups boiling water and dissolve. Add the can of condensed milk. Stir and let cool. Pour cooled milk mixture over Jello blocks in 9x13 pan. Skim off any small bubbles that are created when you pour the condensed milk on the Jello pieces. Chill overnight or at least 3 hours until firm.
5. Cut into blocks or shapes and serve.
(Recipe adapted from The Food Librarian)
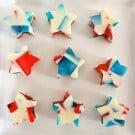
July 4th Chocolate Covered Strawberries
I came across this great idea for July Fourth and I had to share it with everyone.
 Looking for 4th of July desserts recipes? These red, white, and blue strawberries are awesome enough to impress. And they are super-easy to make. White Chocolate Covered Strawberries with Blue Sugar & Nonpareils Recipe & Photos: Mississippi Kitchen (Lorie Roach); licensed under aCC BY 3.0 license INGREDIENTS 2 lbs fresh strawberries with fresh green caps attached 2 cups white chocolate chips 1 spoon shortening blue sugar crystals blue nonpareils DIRECTIONS Wash and dry the strawberries, leaving the green caps:  Melt one cup of white chocolate chips and one tablespoon of shortening in a metal bowl placed over some simmering water, and stir until smooth. Pour blue sugar crystals and blue nonpareils in small bowls:  Dip the strawberries in the melted white chocolate:  Then in the sugar or nonpareils. Then place them on a wax paper lined baking sheet until they harden:  Recipe inspired by a photo of patriotic strawberries that Lorie Roach's friend Beth made and has posted on her Facebook. source:http://www.cupcakesforparty.com/2012/06/july-4th-chocolate-covered-strawberries.html?utm_source=bp_recent&utm-medium=gadget&utm_campaign=bp_recent Marinated Flank Steak |
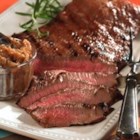 |
Submitted By: GUYCON
Photo By: Allrecipes
|
"A wonderful flank steak on the grill I invented that friends just love! My girls think this is great, and it doesn't take long to grill. This also works great when sliced and used for fajitas."
INGREDIENTS:
1/2 cup vegetable oil
1/3 cup soy sauce
1/4 cup red wine vinegar
2 tablespoons fresh lemon juice
1 1/2 tablespoons Worcestershire sauce
|
1 tablespoon Dijon mustard
2 cloves garlic, minced
1/2 teaspoon ground black pepper
1 1/2 pounds flank steak
|
DIRECTIONS:
| 1. | In a medium bowl, mix the oil, soy sauce, vinegar, lemon juice, Worcestershire sauce, mustard, garlic, and ground black pepper. Place meat in a shallow glass dish. Pour marinade over the steak, turning meat to coat thoroughly. Cover, and refrigerate for 6 hours. |
| 2. | Preheat grill for medium-high heat. |
| 3. | Oil the grill grate. Place steaks on the grill, and discard the marinade. Grill meat for 5 minutes per side, or to desired doneness. |
| ALL RIGHTS RESERVED © 2013 Allrecipes.com | Printed from Allrecipes.com 6/16/2013 http://allrecipes.com/Recipe-Tools/Print/Recipe.aspx?recipeID=18074&origin=detail&servings=6&metric=false |
Chocolate Cookie Candy Pretzel Bark

Ingredients
- 14 whole Oreo cookies, broken up into quarters
- 1 ½ cups pretzel sticks, broken into pieces
- 1 pound white chocolate candy melts (such as Wilton White Candy Melts
)
- 1 cup Red, White, and Blue M&M's
or other candy-coated chocolate candies
- Colored sprinkles
Instructions
- Cover a large cookie sheet with a Silpat Non-Stick Baking Mat
or a large piece of wax paper.
- Spread the cookie and pretzel pieces evenly onto the mat or wax paper.
- Melt the white chocolate – either in the microwave* or over a double boiler – until smooth and fully melted. (*Anytime you melt chocolate in the microwave, it’s best to heat the chocolate in 30-second time increments, then stop to stir the chocolate before heating it more. Chocolate melts very quickly in the microwave and it can easily burn!)
- Drizzle the melted chocolate over the cookie-pretzel mixture, making sure it evenly coats the cookie and pretzel pieces. If necessary, use a spatula to evenly spread the melted chocolate.
- While the chocolate is still wet, sprinkle the candy pieces and sprinkles evenly over the chocolate, pushing the candy down a bit if necessary to make sure that it is embedded in the melted chocolate.
- Let cool until the chocolate firms up. Peel the bark from the Silpat mat or wax paper and break into small pieces.
- Store in an air tight container.
source: http://www.afamilyfeast.com/chocolate-cookie-candy-pretzel-bark/
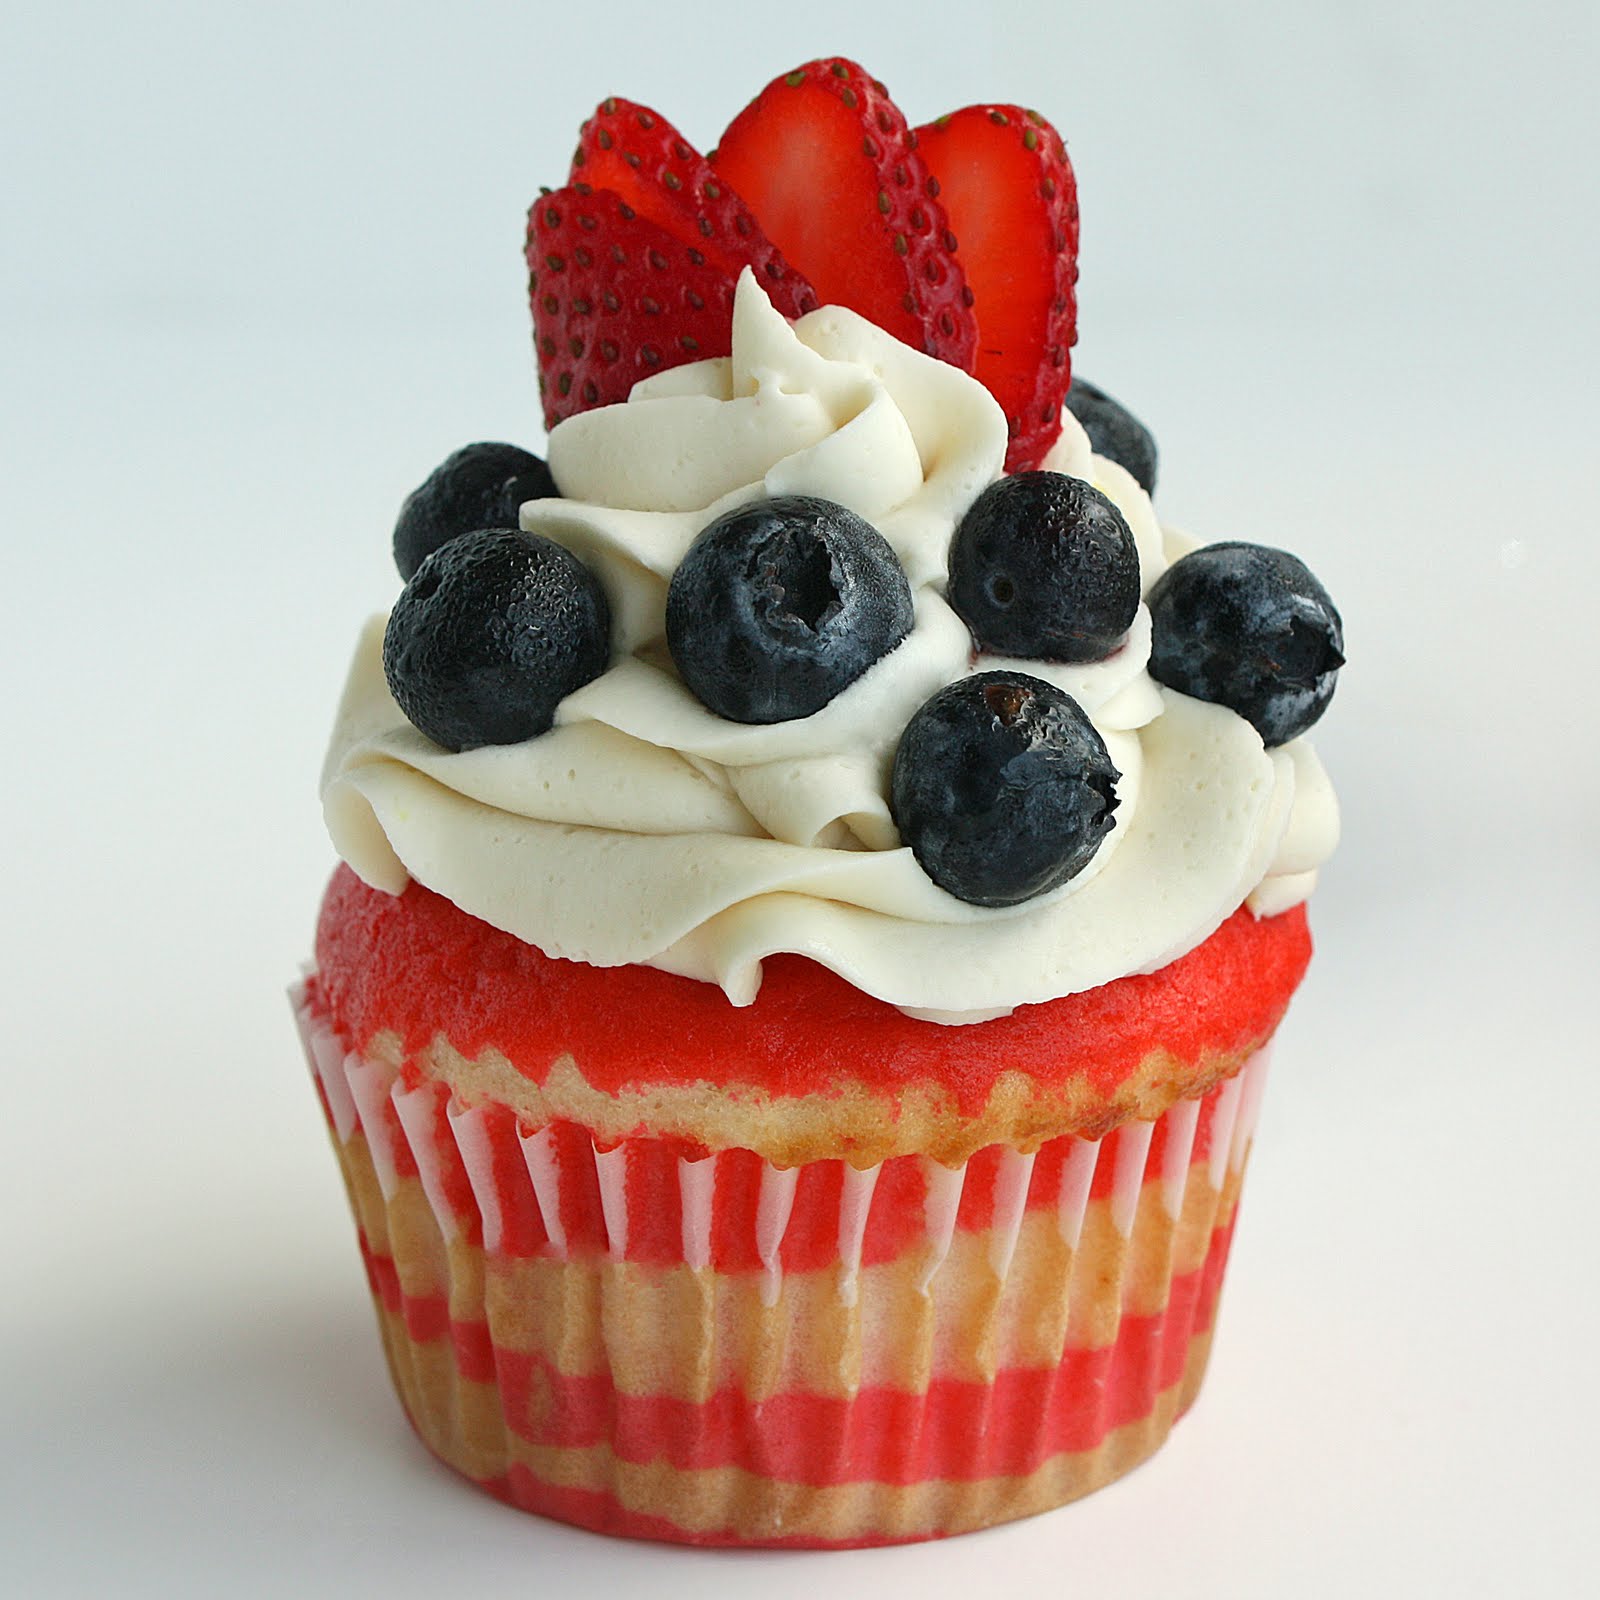
When I worked full time I couldn’t wait to get to the end of the work week so I could relax and kick up my feet on the weekends. Then Sunday night I would get that dreaded feeling that accompanies going back to work Monday for a whole week of the grind. Some people struggle with the transition between working full time to being home all the time. I definitely didn’t have that problem. I embraced it fully. The thing with motherhood is everyday is a Monday. There are no Fridays to look forward to for a break from diaper changes. But then again…everyday can be a Friday too, depending how you look at it. Today was one of those days that I felt lucky to be home. I felt guilty as John rolled out of bed at the crack of dawn to go to work. He has mini-camp all weekend. My kids slept in until after eight. We had a leisurely breakfast, went to the gym, and then swam at the pool with friends. Minus the stroller spill where Wes ate the asphalt…it was a good day. I was the boss of my day and our schedule was whatever I wanted it to be. Don’t get me wrong, there are days where I feel like hugging John’s leg pleading,”Take me with you to work! Don’t leave me!” But today wasn’t one of them… These flag cupcakes have a classic vanilla flavor with a hint of lemon that compliments the strawberries and blueberries. I finally found a frosting that I love. It isn’t a pure white frosting (more off-white), but it tastes yummy. Print Flag Cupcakes with Vanilla Butter cream
Yield: 18 cupcakes
Ingredients Cupcakes:
1 white cake mix
2 eggs 1 cup sour cream
½ cup milk
1/3 cup vegetable oil
1 teaspoon lemon zest
Strawberries for garnish
Blueberries for garnish
Frosting: 1 cup butter (2 sticks), softened 3-4 cups powdered sugar, sifted ½ teaspoon salt 2 teaspoons vanilla extract Up to 4 Tablespoons milk or heavy cream ¼ teaspoon lemon zest (optional)
Instructions For Cupcakes: Combine all ingredients until incorporated. Scrape sides of bowl and then beat on med-high speed for 3 minutes. Divide batter equally in half between two bowls. Use red food coloring to color one bowl of batter to desired color of red and leave the other one white. Wilton brand gel colors have the brightest color and are good to use here. To make flag striped cupcakes alternately place a spoonful of red batter and a spoonful of white batter in the cupcake holder. The batter is thick, so it won't spread on its own. A great tip is to set out a little bowl of water where you're working. Dip your finger in the water and then gently spread the batter out. The water will make it so the batter doesn't stick to your fingers. Bake cupcakes according to the cake mix package directions. Frosting: Beat butter for a few minutes with a mixer with the paddle attachment on medium speed. Add 3 cups of powdered sugar and turn your mixer on the lowest speed until the sugar has been incorporated with the butter. Increase mixer speed to medium and add vanilla extract, salt, and 2 tablespoons of milk/cream and beat for 3 minutes. If your frosting needs a more stiff consistency, add remaining sugar. If your frosting needs to be thinned out, add remaining milk 1 tablespoon at a time. Frost cooled cupcakes with frosting. Garnish with strawberry fans and blueberries.
Tip: To make strawberry fans for garnish just slice strawberry down to the stem without slicing all the way through.
Notes Source: cupcake base from Our Best Bites and the frosting from Savory Sweet Life
Source:http://www.the-girl-who-ate-everything.com/2010/05/flag-cupcakes-with-vanilla-buttercream.html
Surprise Rainbow Piñata Cake

When you cut into this beautifully decorated rainbow cake and candy spills out just like a piñata.
A Betty Crocker pound cake mix is used to make this Rainbow Piñata Cake that is hollowed out to allow room for lots of candy inside. Decorated with a rainbow of fondant, this cake would be perfect to celebrate just about any occasion.
Here is how to make this colorful, fun, surprise cake…

Preheat oven to 350˚F. Grease two 9″ round baking pans with shortening. Dust pans with flour and tap to remove excess.
Beat cake mix and softened butter on low speed until combined. Add water and eggs and beat on low to combine. Mix on medium speed for 2 minutes. Equally divide batter among the two round cake pans (13 ounces in each.) Bake for 22-26 minutes until a toothpick in the center comes out clean. Cool in pans for 10 minutes, then remove and cool completely on a cooling rack.

Measure and cut cakes in half, so you have four rainbow shaped cakes. Set the cakes on top of each other to make sure they are all the same size. If not, cut off any excess.

Set two of the rainbow shaped cake pieces aside. Lay the two remaining cakes flat on a cutting board. Trim off the rounded tops of each cake so that these cakes can be sandwiched flat in between the other two cakes. Then, use a sharp knife to cut a smaller rainbow shape out of the centers of these two cakes, making a well for the candy.

Remove all the scraps and crumbs from your work surface, leaving your two cut-out cakes and two whole cakes.

Pipe Betty Crocker Cake Icing onto one side of a cut-out cake. Place the flat side of one whole cake on top of the icing. Pick up the stacked cakes and turn it upside down, so that the whole cake is now on the bottom and the cut-out cake is on top. Pipe icing along the edge of the cut-out cake, and carefully pick up the other cut-out cake and set it on top.

Pour candy into the cut out area of the cake, filling the hole completely, so that there is no room for the cake to sag once it’s upright. Pipe icing around the edge of the top cut-out cake.

Place the flat side of the final cake layer on top. If needed, pipe any remaining icing in between the cake layers to fill in any gaps.

Cut a piece of cake board the size of the bottom of the rainbow cake. Pick up the cake and turn it so that the rainbow is facing you, not laying flat, and set the cake on the board. Use a tub of Betty Crocker Rich and Creamy Vanilla Frosting to frost the cake, making it as smooth as possible.

Color 16 ounces fondant light blue. This will be the sky and it looks good with streaks of darker blue throughout, so there’s no need to completely mix the coloring into the fondant.

Lightly grease a cutting board or counter with shortening and roll out fondant into a large rectangle.

Pick up fondant and drape it over cake.

Smooth out fondant.

Cut off any excess fondant from edges of cake. Set cake on a larger cake board. You can use a dab of frosting to hold it in place, if needed.

Create a rainbow by coloring pieces of fondant (about 1 ounce each) using violet, indigo, blue, green, yellow, orange and red coloring. Roll each color into a long log. Set the baking pan used to bake the cake, upside down. Starting with the red fondant, set one log on the pan along the top edge. Set the orange log next to the red. Your fondant pieces may stick to each other if they are a bit sticky. If they don’t stick, use a small amount of water as edible glue.

Continue to add rainbow stripes, adding yellow, green, blue, indigo, then finally violet. Cut across the fondant logs in the middle of the cake pan, so your rainbow is the same size as your cake. Remove excess fondant.

Smooth out the rainbow, pressing all the pieces together. Brush one side of the rainbow lightly with water.

Carefully pick up rainbow and press the side that has been brushed with water up against the fondant covered cake. Hold the rainbow in place for about a minute until it adheres to the cake.

To make clouds, pinch off varying sizes of white fondant, roll them into balls. At the end of each side of the rainbow, stack the fondant balls into cloud formations.

Once the clouds are completed your cake is ready to be displayed. I cut my larger cake board to look like a cloud, and set it on a piece of blue sky paper for added affect.

To serve cake, cut and allow candy to fall out. I made a cut in the center of the cake in order to get a nice photo but found that by doing so my candy got covered in crumbs. I suggest you start by cutting off one end of the rainbow cake, allowing the candy to spill out of the cake for more of a piñata like effect.
source:www.tablespoon.com
Valentine’s Day Treats & Recipes – Some Sweet Suggestions


A Valentines Day Sweet – Dark Chocolate Walnut Pomegranate Clusters

This is more of an idea than a recipe. Use your imagination.
Ingredients
- 8 ounces dark chocolate
- 3/4 cup toasted walnut pieces
- 3/4 cup pomegranate seeds
Directions
- Melt chocolate in double boiler. Make chocolate clusters one of two ways: (1)Mix walnut pieces and pomegranate seeds in with chocolate and put spoonfuls of chocolate mixture on parchment paper lined baking sheet; (2) line mini-muffin tin with paper liners. Spoon a little melted chocolate in the bottom of the liner. Sprinkle a few walnuts and pomegranate seeds on top, then drizzle more melted chocolate on top. Sprinkle another layer of walnuts and pomegranate seeds on top, and finish with a drizzle of melted chocolate.
- Place in refrigerator until firm.
Notes
I tried making these chocolate clusters with black walnuts as well as regular walnuts. Black walnuts have a unique flavor. They are stronger tasting and have a little bit of a fruity flavor that paired nicely with the pomegranate seeds and chocolate.
Source:http://easypreschoolcraft.blogspot.com

Valentine's Day Cookies-Yummy
Ingredients
- 1 cup (2 sticks) unsalted butter
- 2 cups sugar
- 2 large eggs
- 4 2/3 cups all-purpose flour, plus more for dusting
- 1 teaspoon baking soda
- 1/4 teaspoon salt
- 1/4 cup buttermilk
- 1/2 cup pale-pink or white sanding sugar (optional)
- Petal dust in pink, orange, and violet tones (optional)
- 2/3 cup apricot or strawberry jam, slightly warmed (optional)
Directions
- In bowl of electric mixer fitted with the paddle attachment, cream butter and sugar until fluffy, about 4 minutes. Add eggs, one at a time, beating well after each. Sift flour, baking soda, and salt into large bowl. On low speed, gradually add flour mixture to mixer bowl, alternating with buttermilk, until combined. Wrap dough in plastic; chill until firm, 1 hour or overnight.
- To color white sanding sugar, if using: Place a few tablespoons in a small bowl. Mix in petal dust with a toothpick, a bit at a time, until desired shade is reached. Colored sanding sugar will last indefinitely.
- Heat oven to 350 degrees with two racks centered. Line 2 baking sheets with parchment paper. On lightly floured surface, roll chilled dough 1/8 inch thick. Cut out hearts using any 1- to 3 1/2-inch heart cookie cutters. If desired, cut centers out of some hearts. Transfer with spatula to baking sheets. Chill for 30 minutes. Sprinkle with sanding sugar, if using. Bake until just golden but not too brown, about 10 minutes. Transfer cookies to rack. Continue with dough; re-roll scraps.
- To make sandwich hearts: Brush bottom heart lightly with jam; cover with a second heart with center cut out; jam will adhere hearts. Fill cut-out area with more jam.
source.www.marthastewart.com

Red Raspberry Velvet Cake
Tools:
Heart Tasty-Fill™ Pan
Cooling Grid
Toothpick
Ingredients:
1 package (18.25 oz.) Red Velvet cake mix
1 container (12 oz.) Frozen whipped topping (thawed)
1 cup raspberry preserves
White Chocolate Buttercream Icing
White chocolate shavings (optional)
fresh raspberries (optional)
vegetable pan spray
Makes: 8-10 servings
Directions:
Preheat oven to 350°F. Spray Tasty-Fill™ pans with vegetable pan spray.
Prepare cake mix according to package directions; divide batter evenly between prepared pans. Bake 25 to 30 minutes or until toothpick inserted in center comes out clean. Cool in pan on wire rack 10 minutes; remove from pan and cool completely.
In medium bowl, fold together whipped topping and preserves. Spoon into cavities of cooled cakes. Assemble cake by inverting top layer onto bottom layer. Chill cake while preparing icing.
Ice cake and add white chocolate shavings and raspberries as desired. Chill until ready to serve.
White Chocolate Buttercream Icing:
From Wilton: "Delicious chocolate taste in an icing you can tint! White Chocolate Buttercream Icing has the decorating versatility you want."
Ingredients:
18 ounces (3 6 ounce pkgs) white baking chocolate coarsely chopped
1/4 cup milk
1 cup solid vegetable shortening
1 cup butter or margarine
2 teaspoons pure vanilla extract
8 cups confectioners' sugar
1/4 cup milk
Makes: Icing serves 6 cups.
Directions:
1. Microwave chocolate with 1/4 cup milk in microwavable bowl on Medium-high for 1-2 minutes; stir chocolate halfway during cooking time. Do not overheat. Chocolate will continue to melt while being stirred.
2. Cream butter and shortening with electric mixer. Add vanilla.
3. Gradually add sugar, one cup at time, beating well on medium speed. Scrape sides and bottom of bowl often.
4. When all sugar has been mixed in, icing will appear dry.
5. Add milk and beat at medium, speed until light and fluffy.
6. Beat in chocolate.
Keep icing covered with a damp cloth until ready to use.
source:http://romancingthechocolate.blogspot.com
Potato Gnocchi 1 - 2 - 3
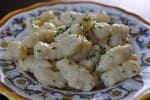
Make your own homemade potato gnocchi, this is an inexpensive pasta dish you can make any night of the week.
Ingredients
- 2 pounds of Russet potatoes
- 3 cups of flour
- 1 egg
- salt
Instructions
Boil potatoes for about 10 - 15 minutes. Use a small to medium sized potato (larger potatoes will take longer to boil). You can leave the skins on while boiling the potatoes. When the potatoes are fork tender let the potatoes cool until they can be handled comfortably. Peal potatoes and place into a medium sized bowl. Use a potato masher to mash the potatoes until they are of a smooth consistency. Turn mashed potatoes onto a large board. Make sure that you have let the potatoes cool enough so when you add the egg it won't immediately cook. The potatoes are cool enough when you can handle them easily with your hands.
Add 1 to 1 1/2 cups of flour to the potatoes, make a well on the center of the flour, and add 1 to 1 1/2 teaspoons salt. Add 1 egg to the flour, and mix egg into the potato and flour mixture. When all of the flour has been fully incorporated into the potato mixture add remaining flour. Mix until all of the flour is absorbed, this should have the texture of bread dough.
Take a small portion of the potato gnocchi dough and roll into a long tube. Using a knife cut the tube into 1/2 inch pieces. To make the classic gnocchi shape take a piece of gnocchi and roll it across a fork to leave the impression of the fork tines into the dough.
Cook gnocchi by boiling in a large pot of salted water for about 2 to 3 minutes, or until the gnocchi floats.
You can finish your gnocchi with a simple butter and Parmesan cheese topping if you like. For this take about 2 cups of cooked gnocchi, and place in a bowl, and add 1 1/2 tablespoons of butter, 2 teaspoons of Parmesan cheese, and mix together well.
This recipe makes quite a bit of gnocchi, you can leave the gnocchi until and in air tight container for up to 48 hours so you can cook it during the next day or two. You can also cook the gnocchi and re-heat it later. I think it is best to cook the gnocchi just before serving.
Homemade Graham Crackers
I finally made homemade graham crackers for the first time and LOVED them. I may never buy the commercial ones again--okay, well, maybe for using the crumbs to make a crust or something, but I just may have to try a crust using homemade sometime, too! I just don't like how everything you buy has hydrogenated oils and high fructose corn syrup and all the other stuff we can't even pronounce.

I ran across these homemade graham crackers, actually when Maria at Two Peas and Their Pod (how cute and talented is she!) posted them back in November of last year. I had them in mind to make since then. Taylor was up for snack at preschool a few days ago and I decided it would be a great time to finally make the graham crackers. I made some changes to Maria's recipe, but not many. I think it is a great homemade graham cracker. Instead of whole wheat flour, I used some graham flour that I have and instead of sugar I used evaporated cane juice sugar. It worked great! Here is the recipe as I made them. Thanks, Maria. I can't wait to try them as S'mores sometime! I cut mine a bit thick and may try them a little thinner next time. I really liked the nuttiness from the graham flour. I sprinkled them with a cinnamon/sugar mix before baking.
HOMEMADE GRAHAM CRACKERS
1/2 cup unbleached all-purpose flour
2 cups graham flour (whole wheat is fine)
1/4 cup evaporated cane juice sugar (regular sugar is fine)
1/2 teaspoon salt
1 teaspoon baking powder
1 teaspoon ground cinnamon
1/2 cup cold butter, cut into pieces
2 tablespoons honey
1 tablespoon molasses
1/4 cup water (may need a little more--I used another tablespoonful)
In bowl of food processor, combine flours, sugar, salt, baking powder and cinnamon. Pulse a few times. Add the cold butter and pulse until texture is dry and crumbly.
In a separate bowl, mix together the honey, molasses and water. Add to food processor and blend together until it forms a ball. Wrap in plastic wrap and chill for one hour.
Preheat oven to 350 degrees. Roll the dough out on a well floured surface (I used all purpose). Roll the dough out pretty thin and cut with cookie cutters or cut into rectangles. Make fork marks in the dough. Transfer to baking sheets lined with parchment paper (that's what I use, just a baking sheet would work fine). You could sprinkle these with sugar or cinnamon/sugar before baking.
Bake for 11-14 minutes until golden and crisp. This recipe made 19 3 1/2 inch hearts.
Rainbow Pinwheel Cookies
1 17.5-oz. bag Betty Crocker Sugar Cookie Mix, mixed according to package directions

(or your favorite sugar cookie dough recipe)
Liquid food coloring, as desired (McCormick Neon shades work well)
Rainbow sprinkles, if desired
Preheat oven to 350°F. Divide dough evenly into five bowls, and color each with a different color liquid food coloring. Roll each color of dough into grape-sized balls. Combine a ball of each color and quickly roll into a larger ball. It will look like a little beach ball. Then roll that ball between your hands and the counter until you have a cylinder about 12 inches long. Starting from one end, roll the dough into a coil, twisting the cylinder as you go. Roll edges of the cookie in sprinkles. Bake the cookies for 10 to 11 minutes, or until done.
Yields: approximately 3 dozen cookies
Recipe provided by Shelly Ruybalid
Make Your Own Rock Candy

- Making this old-fashioned treat combines sweets and science, so it’s the perfect recipe for kids and the young at heart. Best of all, the only ingredients you need are sugar and water—and a little patience.
By Rachel Faucett
Homemade Rock Candy
Yields 12 ounces of candyPrep time: 5 minutes
Cook time: 10 minutes
Set time: 5 to 7 days
Cotton string or wooden skewers
Wooden craft sticks or pencils
Clean 32-ounce glass jars
2 cups water glass jars
4 cups granulated sugar, plus extra for assembly
Food coloring (optional)
INSTRUCTIONS
1. If using cotton string: Cut string into a few 6”-pieces. Tie one end of each string to a pencil or wooden craft stick, then place across the mouths of the glass jars, one per jar. Make sure the pieces of string hang into the jars without touching the bottom or sides.
If using skewers: Tie skewers to craft sticks perpendicularly, so you’re able to suspend the skewers in the middle of the jars. Make sure the skewers aren’t touching the bottom or sides.
2. In a medium saucepan, bring 2 cups of water to a boil. Add the granulated sugar one cup at a time, stirring each cup until the sugar is completely dissolved before adding the next cup. If desired, gradually add several drops of food coloring, stirring continuously until the food coloring is mixed in and the sugar is fully dissolved.
3. Remove the solution from heat and let sit for 5 minutes.
4. While the solution is cooling, moisten strings or skewers in water and roll in granulated sugar until they are lightly covered. This jumpstarts the formation of the sugar crystals.
5. Remove the strings or skewers from the jars, then carefully pour in syrup. Next, lower one string or skewer into each jar.
6. Loosely cover the top of each jar with a paper towel or foil to prevent dust from getting into the mixture. Don’t seal tightly, as there needs to be enough ventilation for the water to evaporate.
7. Let sit undisturbed for 5-7 days. The crystals will begin to form within a few hours and continue for several days. It will take some time to form the larger crystals like you see in the candy store. If you don’t see anything form within the first 24 hours, try boiling the syrup again and dissolving another cup of sugar in it. Let it cool slightly, then pour back into the jar and re-insert the strings.
8. Once it’s crystallized to your liking, remove the strings or skewers and let dry. Wrap in cellophane, tie off with string or ribbon and store in a cool, dry place.

Rock Candy Ideas
- Rock candy skewers make perfect cupcake toppers.
- Tie paper flower petals to skewers and bundle them together for a rock candy bouquet.
- Make rock candy in a rainbow of colors and package in clear cellophane as a gift or favor for a rainbow party.
- Tie silk cord to ends of rock candy for a kid-friendly candy necklace.
source:http://www.homemadesimple.com
Peanut Butter-Pretzel Truffles

I feel like I've been doing my readers a disservice. See, I've made these delicious balls of heaven a few times in the past year and never blogged them. Why wouldn't I have blogged them if they're delicious balls of heaven? Well, because they're so amazing that they get eaten way too quickly and I've never been able to get a picture. That is, until I decided to hide a few in the fridge before taking them to their destination. The next day - supreese! Peanut Butter Pretzel balls for lunch? Why, don't mind if I do!
What's not to love about these, seriously? Peanut Butter. Pretzels. Chocolate. Need I say more? Plus, rememberChocolate Salty Balls anyone?!
Peanut Butter-Pretzel Truffles
Ingredients:
1 1/2 cups pretzel pieces
1/2 cup creamy peanut butter
1 tablespoon unsalted butter, at room temperature
2 tablespoons brown sugar
pinch of salt
3 tablespoons powdered sugar
1 cup semi-sweet chocolate chips
1 tablespoon vegetable shortening
Directions:
Using a food processor or resealable plastic bag and rolling pin, crush pretzels in to small bits, but not finely ground.
In a small bowl, combine peanut butter, butter, brown sugar and salt, stirring until completely blended and smooth. Add the pretzels and mix thoroughly. Add the powdered sugar and mix until combined.
Line a small baking sheet with wax paper. Using a small cookie scoop or spoon, gently shape 2 teaspoons worth of peanut butter mixture into a ball with finger tips. Place the ball on the wax paper-lined cookie sheet and repeat with remaining peanut butter mixture. Place the baking sheet in the fridge and chill at least 30 minutes.
When ready to dip the truffles, microwave the chocolate chips and shortening together in a small bowl at 50% power in 30-second increments until completely melted and smooth. Stir after each 30-second increment.
Working one at a time, dip peanut butter truffle into the melted chocolate and use a fork to roll it around to ensure it's completely coated with chocolate. Let extra chocolate drip off and place on wax paper-lined sheet. Repeat until all truffles are coated.
Return the baking sheet to the fridge and chill for at least 30 minutes. Store in an airtight container in the fridge.
Source: Brown Eyed Baker
Beer Puffs

These tiny puff rolls made with beer may be filled with crab salad, tuna salad, chicken salad or whatever suits your fancy for a tasty appetizer. They are quite easy to make, are a perfect bite-size sandwich, and perfect for parties. Beer puffs work equally as well with sweet fillings for dessert bites.
Prep Time: 20 minutes
Cook Time: 20 minutes
Total Time: 40 minutes
Ingredients:
- 1 cup beer
- 8 Tablespoons (1 stick or 1/4 pound) butter
- 1 cup sifted all-purpose flour
- 1/2 teaspoon salt
- 4 eggs
- Filling of your choice
Preparation:
Preheat oven to 450 degrees F. Line baking sheets with parchment paper or Silpat baking liners.
In a heavy saucepan, heat beer and butter until it barely comes to a boil and the butter is melted. Add flour and salt, lower heat, and stir constantly until the mixture pulls away from the side of the pan and forms a ball. Remove from the heat and let rest for 1 minute. Add eggs, one at a time, beating each one in until the dough is shiny.
Drop or pipe dough in 1-inch rounds onto prepared baking sheets. Bake 10 minutes at 450 degrees F. Reduce heat to 350 degrees F, and turn baking sheets. Bake beer puffs an additional 10 minutes until brown and dry. Turn off oven, crack open the oven door, and let puffs dry further until cool.
Split beer puffs with a fork (or slice with a serrated knife) and fill with your choice of fillings such as paté, chicken salad, tuna salad, seafood salad, vegetable cheese mix, pudding, mousse, or whatever you like.
Note: Feel free to add your favorite herbs or spices to the flour for added flavor. I used a piping tip to make fast work of forming the puffs on the baking sheets. I do not bother with a pastry bag. Just cut a small corner from a zip-top freezer bag, insert the piping tip, spoon in the batter, squeeze out the air, seal the bag, and pipe the puffs. No pastry bag to wash.
Yield: 60 to 80small puffs
source:homecooking.about.com
Jello Easter Eggs with Vanilla Filling
 |
| Jello Eggs |
Been pretty busy this week, but I wanted to take a moment to share these jello eggs with you guys. I came up with the idea of making them when my kids were young. I usually make them at Easter time, but they're fun any time of the year.
 |
| Jello Egg Molds |
I start with these egg molds. I got mine at the grocery store about 15 years ago, but you can find them online and occasionally in thrift shops. I've also seen molds that make egg halves.

I fill the molds with the jello jiggler recipe (below), then chill for at least 4 hours. After unmolding, I cut them in half lengthwise and then I use a melon ball tool to make a little well in each half. Pop that little bit into your mouth - cook's treat.

Arrange the prepared halves on a serving tray. Do this before you fill the halves, or you'll have a huge mess on your hands.

I like to pipe a pretty swirl of the vanilla cream cheese mixture using a pastry bag and star tip (you can use a zip-top freezer or storage bag).

To pipe the filling more than 6 hours ahead of time, add a packet of Whip It to the cream cheese filling mixture when you add the heavy cream. You can skip this step if you like, but I think of it as extra insurance.
 |
| Jello Easter Eggs |
Jello Easter Eggs with Vanilla Filling
Jello Eggs
(makes 3 whole jello eggs, or 6 halves)
3 ounce package of jello, any flavor
1 1/4 cups boiling water
Lightly spray egg mold with non-stick cooking spray. Snap mold together and set it on a small tray to catch any spills. Combine jello and boiling water together; stir for 3 minutes until the jello is completely dissolved. Slowly pour mixture into 3 whole eggs (or 6 halves). Repeat as many times as you like, with as many jello flavors you like, until all your eggs are filled. Chill for at least 4 hours.
When you're ready to unmold the eggs, slowly pry the mold halves apart (I use a butter knife to gently coax the halves apart). Using a sharp chef's knife, cut the eggs in half lengthwise using one continuous motion. Next use a melon ball tool to make a well in the large end of each egg half.
Vanilla Filling
(makes enough to fill about 24 egg halves)
8 ounces cream cheese, room temperature
1/2 cup sugar
1 teaspoon vanilla
1/8 teaspoon salt
1/2 cup heavy cream
Cream together the cream cheese, sugar, vanilla, and salt until smooth. Add the heavy cream and whip until stiff peaks form. Put the cream cheese filling into a pastry bag that has been fitted with a star tip and pipe the filling into the egg halves. Chill until service.
Note: To fill the jello eggs with cream cheese filling more than 6 hours ahead of time, add a packet of Whip It to the cream cheese filling mixture when you add the heavy cream.
source:http://butteryum.blogspot.co.uk
Creative Easter Handouts for Kids or just a fun home project

I know Easter is a bit away but I came across these cute handmade Easter carrots with yummy goodies inside. I can think of so many wonderful things to put inside them.
Easter "carrots" made using Cheetos (or you could use Goldfish crackers or even Jelly Beans) and piping bags from Wilton. These were a huge hit for your child's class at Easter time.
sources:http://creativeorganization.blogspot.com

1 Tbsp. yeast
2 Tbsp. sugar
1 1/2 c. warm water
1 Tbsp. oil
1 tsp salt
3 1/2 c. flour
3/4 c. melted butter, divided
3/8 tsp. garlic salt
1/2 tsp. dried rosemary
1 Tbsp Parmesan cheese
8 one-quarter inch wooden dowels, cut into 18" lengths (get these from a craft store)
or 8- 12" skewers. (I used the skewers because it's what I had)
instructions
In a bowl mix the yeast, sugar, and warm water together and let sit for 2-3 minutes until foamy.
Add oil, salt, and flour and either knead by hand or using dough hook for about 5 minutes. (If dough seems too sticky add an extra tbsp or two of flour).
Remove dough and spray the bowl with Pam or lightly coat with olive oil. Place dough back in the bowl turning once to coat, then cover with a towel and let rise until doubled. (About one hr)
Divide dough into 8 equal parts (about 4 oz each). Lightly cover your hands with flour and roll each part into a 16-18 inch long snack (as pictured above).
Moisten the skewer or dowel with water at the top where you will start wrapping the dough. Wrap the dough around the skewer or dowel down to the bottom. Moisten the skewer where the breadstick will end as well. ( Leave about 1/4 of an inch at the top and bottom if using the skewers, and about 1/4 of an inch at the top and 5 inches at the bottom if using the longer wooden dowels. )
Hang skewers over the edge of a 9x13 inch pan (like pictured above). Let rise until doubled again.
Brush with 1/4 cup melted butter. Bake at 375 for 15-20 minutes or until golden.
Meanwhile, combine remaining 1/2 cup melted butter, garlic salt, rosemary, and Parmesan cheese.
Immediately brush seasoned butter mix on breadsticks when they come out of the oven
.
.
Editable Bird's Nest

Recipe Summary:
This fun craft is not only adorable when done, but it's tasty too! Sit the kids down to make this fun spring project. Be sure to make extras for friends and family.Ingredients:
- Chow mein noodles
- chocolate chips or brick chocolate
- Jelly beans
- candy coated chocolate eggs
- marshmallow chicks
- peanut butter
- wax paper
- paper plates (colored plates optional)
Directions:
Place squares of wax paper onto to individual plates. Put chow mien noodles in a large bowl. If using brick chocolate, break into pieces. Melt chocolate chips or pieces in the microwave, or over low heat on stove, just until melted. Pour melted chocolate over chow mien noodles, mix together to coat.
Place mounds of chocolate/chow mien mixture onto several plates (on top of waxed paper). Have children form the mixtures into nests. Be sure the chocolate has cooled, but don't wait too long or it will harden!
Using peanut butter as an adhesive, "glue" down the jelly beans and candy coated chocolate eggs inside the nest cavity. "Glue" marshmallow chick on the edge of or inside of the nest.
These make fun gifts from kids to their friends, teacher and family members. You can also make these nests at birthday parties as a fun and edible take home party favor.
Recommended Books:
Cream Cheese Olive Penguins
Cream Cheese Olive Penguins

These penguins are coming to add a little more fun to your New Year’s Eve party. Or any other party, of course.
I promise that these appetizers will be a big hit and your guests will love them!
Who could just say no to such cuteness?
I couldn’t. That’s for sure.
In addition, these cuties are ridiculously easy to prepare. All you need is some olives, a carrot, cream cheese, and a few minutes of your time. That’s it!
To make them more fancy, you can add a little garlic salt or herbs in the cream cheese. That would be amazing!
Here’s the step-by-step recipe…
The ingredients.

1. We need big and small olives.
I found them both at Tesco.

2. We also need one peeled carrot sliced into rounds. We need 18 rounds.
Cut a small notch out of each carrot slice to form feet. Save the cut out piece.

3. Toothpicks.

4. Softened cream cheese.
Plain or mixed with garlic salt and herbs. That is up to you.

5. Cut a slit from top to bottom, lengthwise, into the side of each bigger olive.

6. Use a small spoon or a pastry bag (or a plastic bag with a corner cut out)…

… to fill each bigger olive with cream cheese.

7. Place a filled olive on top of a carrot slice and secure with a toothpick.

8. Then, cut a small slit into each smaller olive.

9. Press the saved cut out carrot piece into the small olive to form the beak.

10. Set a small olive onto the large olive, adjusting so that the beak, cream cheese chest, and notch in the carrot slice line up.
And that’s all! So, so simple.
Enjoy!

source:zoomyummy.com
SNOWMAN CHEESE BALL

Wondering what you can make to go to one of your holiday parties that’s fast, easy, and will be the star of the buffet table? This snowman cheese ball is the perfect thing. It’s flavored with almond basil pesto and Italian cheeses. It’s not only cute, but also delicious. I first learned about this snowman several years ago from my sister-in-law, and have been making it every Christmas since. She had made a snowman cheese ball, but one that lays down on a platter to a family event. We all thought it was just about the cutest thing ever. I can’t believe before this cute little snowman we ate pre-packaged cheese balls, it seems so long ago now. Over the years, I have experimented with different flavors and started making my snowman sitting upright in two cheese balls, instead of 3 cheese balls laying on a platter. You could also make this snowman with Mexican shredded cheeses and chopped chipotle peppers, or blue cheese, Monterrey jack cheese and crisp smoky bacon.
Snowman Cheese Ball Recipe
Ingredients3 – 8 oz packages cream cheese, at room temperature
4 cups Italian blend shredded cheese
3 teaspoons almond basil pesto, recipe follows
1/2 cup grated Parmesan
Almond Basil PestoA handful of fresh basil
1/2 cup sliced almonds
1 clove garlic
2 – 3 tablespoons olive oil
salt and pepper
Decorationnose – carrot
eyes and buttons – raisins
crown – rosemary, or you could do a hat with stacked crackers
arms – asparagus, green onions or pretzels
on crown – cranberries
scarf – green onion (I used 2 pieces attached in the back with toothpicks and held on with a cocktail toothpick in the front), carrot or radish shaving
mouth – red pepper or currants
optional – add a corn pipe, a chunk of baby corn on the end of a toothpick
Method1. Make pesto first in the food processor by adding basil, almonds, garlic, salt and pepper to processor. Pulse until chopped. Turn processor on and stream in olive oil until pesto is movable.2. Add cream cheese and pesto to a large bowl. Use a hand mixer to blend the pesto through the cream cheese. Add shredded cheese and use hands to incorporate. Divide the cheese into 1/3 for the head and 2/3 for the body. Make into a ball in your hands. Roll in grated Parmesan and place on platter. Refrigerate until firm, at least 4 hours.2. Decorate snowman with carrot, asparagus, raisins, cranberries, green onion, red pepper, and rosemary.
source:babble.com
Halloween Popcorn Cake

Prep Time: 15 minutes
A super easy Halloween treat idea - popcorn coated with marshmallows, and mixed in with all kinds of Halloween candy!
Ingredients
- 2 1/2 quarts of popped popcorn (this is about 1/3 cup of seeds if making your own'
- 1 (10.5) ounce bag mini marshmallows
- 3 tablespoons butter
- assorted mix-ins
Instructions
- Melt butter and marshmallows together. Add popcorn and mix slightly. Add in mix-ins and mix until the melted marshmallow mixture has coated all the popcorn.
- Pour mixture into a bundt pan that has either been sprayed with cooking spray or buttered. Turn out onto a serving dish and enjoy!
source:http://www.tasteandtellblog.com
Trick-Or-Treat Cookies for Halloween

These Trick-or-Treat cookies have a surprise inside. Each cookie either holds a treat, like mini chocolate candies, or a trick, here they are small sugar ants. Which will you get? You’ll have to break one open to find out.
HOW TO MAKE TRICK-OR-TREAT COOKIES:
Make one or more batches of cut out cookie dough (recipe below, or use your favorite) and after chilling it take it out of the fridge to warm up so it can be rolled out. Preheat your oven to 350 and clear a shelf in your fridge or a spot in your freezer large enough to hold a cookie sheet.

Roll out one half of your dough between two sheets of parchment paper to a 1/4th inch thickness. Remove the top layer of parchment and cut out your cookies, dipping the cutter in flour to keep it from sticking. We’ll be baking the cookies on this same parchment so space them about an inch apart.
Right now you are cutting two parts of each cookies (the top and the bottom) so if you have an asymmetrical cutter be sure to flip it over and cut half of them mirror image, as shown above.

Trim the parchment away from the dough so that it’s small enough to sit on your cookie sheet and slide the parchment onto the cookie sheet. Put this in the fridge or freezer to firm up so you can pull away the excess dough.
Later we’ll baking the cookies right on this sheet so trimming the parchment means they’ll bake flat. I keep the cookies on this same parchment throughout so they don’t have a chance to lose their shape.

Once the dough has firmed up pull away the excess from around the cut out shapes. You can save the scraps for more cookies later.

Before baking chill the cookies and the cookie sheet again for about 10 minutes before putting them in the oven. (You can roll out your second layer while you’re waiting, instructions are just under the next photo.)
Bake for about 10 minutes, checking and rotating the cookie sheet half way through. After that check often and remove once the edges of the cookies are just starting to look brown and the tops look set.
Slide the parchment onto a cooling rack and let them sit for a few minutes until the cookies are cool and strong enough to slide them off the parchment and right onto the cookie rack.

Roll your second half of the dough to 1/2″ or 3/8″ thick. You’ll be cutting the middles for you cookies so only cut half as many this time, so if you cut six earlier, you only need three now. (No need to make mirror image cut outs this time.) Use smaller cutters to create a hole in the center of each shape.

Trim the parchment, slide onto a cookie sheet and chill the dough as you did for the first round. When it’s firm remove the excess dough from the outside as well as the inside of your shapes.

Again, chill these very well on the cookie sheet before baking them. Check and rotate after five minutes and keep an eye on them after that. Remove when the bottom edges begin to brown and cool carefully, as you did for the first set.

While your cookie pieces are cooling mix up some glue from one cup of powdered sugar and four tablespoons of milk (as per the recipe below). Put this into a sandwich sized zip bag and clip a teeny tiny corner off.
Lay your cookies out so the bottom piece has the flattest side up, the middle and tops will have the flattest side down. When constructed the top and the bottom of your cookies will show the pretty side that was up while they were baking and they’ll look nice and tidy. If you have asymmetrical cookies here be sure all the bits will match when they are sandwiched.
Glue the middle part of your cookie to the bottom.

Fill the cookies with your trick or your treat. Be random, no cheating! Don’t overfill them and check to make sure the top of your cookie will fit on with no trouble. It’s much easier to do this not before more sugar glue is introduced.

I made four different shapes: pumpkins, ghosts, tombstones and coffins (my favorite).

A detail shot to show the middle layer of cookie is a bit thicker than the top and bottom layers.
Glue the top on, decorate if you’d like, and you’re done! Now, serve these and see how much fun people have breaking them open.
NOTES:
Important: Make sure anything you might put inside these cookies is edible, you don’t want somebody accidentally swallowing something like a plastic spider (which I really, really wanted to hide inside these).
These cookies were inspired by the Pinata Cookies made over at She Knows, which are genius. Since I didn’t need mine to be striped I used a cut out sugar cookie recipe instead and created a thicker middle layer. I did try to cut the cookies out when the dough comes out of the oven and is still warm, the technique that is in the She Knows recipe, but found it created an edge that was too crumbly.
I used a set of seven Halloween cookie cutters made by Wilton for the cookies you see here. I cannot seem to find the same set online, it came packaged in a coffin shaped box and it’s probably already 50% off at Joann. The middles of my cookies were cut out using my Ateco 12-piece round cutters, which I love and find myself using often.
I find rolling dough to be tedious so I invested in a Roll-Pat (that page shows it as Roul-Pat but mine says Roll-Pat on it). It’s similar to a Silpat but oversized and the bottom layer grips your counter top. This is lovely because I prefer to roll dough between two layers of parchment and this keeps the parchment from slipping on my counter top. Love it, especially as what I think of as gingerbread construction season arrives.
There are so many options for what tricks you can hide inside, here I used some black cake decorations made by Wilton, they are complete edible but don’t taste like much. I also considered some small flat sour gummy candies, salted licorice coins, various cake decorations (skull and crossbones!) and Pop Rocks. For the treats the only things could find that are small enough are mini M&Ms or (my favorite) Valrhona Perles Craquant. Sadly I found that Reeses Pieces or candy corn wouldn’t fit inside, I tried. A friend mentioned that mini-candy corn might exist in the world and if I’d managed to find some I definitely would have used that as well.
I’m also considering seeing if I can make the coffin cookies tall enough to fill with some sugar skeleton pieces I found. I’d also include the Valrhona Perles Craquant as graveyard dirt. And small gummi worms if I can find some.

Click more for the recipe.
TRICK-OR-TREAT COOKIES RECIPE
- 12.0 ounces (2.5 cups) all-purpose flour
- 1/8 teaspoon baking soda
- 1/4 teaspoon salt
- 1 cup (2 sticks) butter, at room temperature
- 3/4 cup sugar
- 1 large egg
- 1 teaspoon vanilla extract (I love the vanilla paste made by Nielsen-Massey)
- gel food coloring (optional)
- for the glue:
- 1 cup powdered sugar
- 4 teaspoons milk
- to go inside:
- mini M&Ms or other small treat candy
- cake decorations or other small trick candy
Directions:
Mix together your dry ingredients (flour, baking soda and salt).
Beat the butter and sugar in an electric mixer until smooth. Add the egg and vanilla and beat for a minute more. If you’re adding food coloring put a few drops in now, it’ll be easier to see how much you need to add later and speed the process up.
With your mixer on a low speed gradually add half your flour. Take a moment to add more food coloring here if you’re using it and think you need it. Mix everything on low for a minute here, we need these cookies to be strong over tender so developing a little gluten won’t hurt. Add the rest of the flour and mix until everything all comes together.
Divide the dough into two balls. Flatten each a little and wrap individually in plastic wrap. Chill in the fridge until firm, four hours or overnight.
Each amount of dough will make six to eight Trick-or-Treat Cookies.
Chewy Soft Pretzel's


I like making bread. It's like tiny at-home science experiments. Cultivating sourdough has become a hobby of mine, and I love trying to generate different flavors from my starters.
My roommate is enamored with the fact that there is fresh baked bread all the time. SO MUCH, that she recenltly brought home a 50 pound bag of flour to further my research....
Challenge accepted.
Here is the recipe I will be using
2 1/2 cups Bread Flour
1 teaspoon salt
1 teaspoon sugar
2 1/4 teaspoons yeast
1 cup warm water
Coating
1 cup boiling water
2 tablespoons baking soda
more salt
3 tablespoons butter, melted
source:www.instructables.com
Halloween Deviled Eyes

Ingredients
- 6 large eggs, hardboiled, peeled and cooled
- 3 tbsp mayonnaise
- 1/4 tsp dijon mustard
- 1 tsp finely chopped fresh herbs (such as oregano, basil or thyme)
- 1/2 tsp lemon juice
- salt, to taste
- paprika
- water
- 4 spanish olives with pimentos, cut into three circles each
Directions
- 1Cut the eggs in half and remove the yolks (drop them into a medium-sized bowl). Arrange the intact egg white halves on a plate and set aside.
- 2To the egg yolks, add the mayonnaise, dijon mustard, herbs, lemon juice and salt. Mash and stir with a fork until fully combined and somewhat smooth.
- 3Divide the egg yolk mixture evenly between the egg white halves mounding it as necessary.
- 4In a small bowl, combine a small amount of paprika with water to form a paste. Use a toothpick to draw vein lines on the whites of the eggs.
- 5Press one olive round into the yolk of each egg.
- 6Cover and chill until ready to serve.
source:http://www.tablespoon.com
Pork Tenderloin with Pan Sauce

This recipe is not new to the blog. I posted it about 2 years ago but it definitely warrants a re-post and an updated picture.
This is my "go-to" pork tenderloin recipe. It's pretty foolproof and sure to be a hit with all-ENJOY!

I'm pretty happy with the time change from last week. I can actually start taking pictures of dinner dishes again--Yay!!

I served this up with some roasted "teeny-tiny" baby potatoes and my daughter's favorite veggie, brussel sprouts!
Ingredients:
1⁄2 cups olive oil
1⁄3 cup soy sauce
1⁄4 cup red wine vinegar
Juice of 1 lemon
1-2 tbsp Worcestershire sauce
1-2 tbsp fresh parsley, finely chopped
2 tsp dry mustard
Freshly cracked black pepper, to taste
4 cloves garlic, peeled and minced
1 1-lb. pork tenderloin (silver skin removed)
Directions:
Combine all marinade ingredients and reserve 2-3 Tbsp. Place the pork tenderloin and marinade in a Ziplock bag and let marinate for at least 3-4 hours.
Preheat oven to 350 degrees. In a hot skillet over medium-high heat, sear each side of tenderloin for 2-3 minutes. Place in the oven and cook for 30-40 minutes or until the meat has reached 160 degrees. Let rest for at least 5 minutes before slicing.
Pan Sauce:
Pan scrapings from pork tenderloin
1/2 cup of chicken broth
2-3 tbsp of pork marinade (thoroughly mixed)
1-2 tsp butter
Meanwhile, place the skillet back on the stove over medium heat. Add the chicken broth and scrape up all the browned pieces from the bottom of the pan. Add the marinade and let it boil down for 2-3 minutes. Add the butter and remove from heat stirring until butter has melted. Pour over the pork tenderloin.
source:http://chefmommy-brandao.blogspot.ca

Sponge roll with homemade Nocciolata
For the Nocciolata:
- 150 gr of hazelnuts, shells and skins removed
- 100 gr of milk chocolate
- About 50 ml of warm milk
- 2 tbs cocoa powder
- 2 tbs icing/powdered sugar
For the Sponge:
- 5 eggs
- 100 gr flour
- 100 gr fine/caster sugar
To assemble the roll:
- Alchermes*
- Some extra caster sugar
To make the Nocciolata: Grind the hazelnuts in a food processor (or if you’re more romantic or want a chunkier style, in a mortar and pestle!) until it looks like fine sand. Add the cocoa powder and icing sugar and continue blending. As you blend, the oil from the hazelnuts should begin creating a paste. Melt the milk chocolate over a bain marie, then add to the food processor to combine. Finally, add the warm milk, just a small amount at a time or as much as you need to reach a spoonable, creamy consistency and depending on the quality of your ingredients. Transfer to a jar and if not using right away, store it in the fridge.
To make the sponge: The key is in whisking the eggs. The longer you whisk them, the fluffier and lighter your sponge will be. Separate the yolks from the whites and place in two clean metal or glass mixing bowls. Whisk the egg yolks with an electric mixer or electric egg beaters for up to ten minutes, or until the yolks become very pale and fantastically creamy. Add the sugar and whisk to combine. Clean the beaters very well, then whisk the whites until stiff peaks form. Gently fold in small amounts of the whites and the flour, alternately, to the yolks until just combined.
Pour into a baking tray prepared with baking paper (the sponge should be at most 2cm tall, a little less than an inch) and bake at 150ºC for about 10-15 minutes or until the top is golden and firm to the touch.
Remove the sponge from the oven and let it cool ever so slightly so you can handle it easily – you still want to work with it while it is warm. Gently turn upside down onto a sheet of plastic wrap scattered evenly with caster sugar (this helps to stop that lovely golden top from sticking to the plastic). Remove the baking paper to reveal a lovely, spongey soft cake and with a pastry brush, stain this side of the sponge evenly with Alchermes, then generously spread your homemade Nutella over the top (this is best done with Nutella at room temperature; you can even warm it a little if it helps to spread it easily).
Taking the short end of the sponge, carefully roll the entire thing up tightly and secure with the plastic wrap. Keep in the fridge for at least 30 minutes or even overnight before removing the plastic wrap carefully, cutting into thick slices and serving. If you like, sprinkle the top with some icing sugar before slicing (especially handy if you have found the top has stuck to the plastic).
Mummy MeatLoaf

Before heading out with your kids for a night of trick-or-treating, put a chilling spin on some classic comfort foods. Serve our Mummy Meatloaf and a side of cheesy Swamp Creatures, and your little tricksters won't be able to stop ogling their food! (Or will it be ogling them?)
What you'll need
- Meatloaf from your favorite recipe (ours used about 2 pounds of meat)
- American cheese
- Olive slices
How to make it
- Make your favorite meatloaf recipe and shape the loaf to resemble a mummy's body with crossed arms. Bake the loaf until it's cooked through.
- Let it rest about 3 minutes, then lay 1-inch-wide strips of American cheese across the body as shown, leaving a narrow space on the head for the olive slice eyes. Trim any overhanging cheese with scissors and return the mummy to the still-warm oven to slightly melt the cheese, about 1 minute.source:spoonful.com

I thought these were so cute,,,Had to share.
Lastly, stun your guests with this Candy Corn pudding I found at Craftster.org. Start with instant plain vanilla instant pudding and mixed it with food coloring. Use classic yellow food coloring gel for one layer and neon orange food coloring gel for the other. You may want to add just a couple drops of classic red to darken it a bit, in the other layer. The top layer is Cool Whip.
source:http://www.dealiciousmom.com
Microwave Mummy Suckers
Mummy Cookies
Great last minute idea's for Halloween
- Skill Level:
- Beginner
- Prep Time:
- 35 Minutes
Ingredients
- 1/2 cup (1 stick) butter or margarine, softened
- 3/4 cup sugar
- 1/2 cup REESE'S Creamy Peanut Butter
- 1 egg
- 1/2 teaspoon vanilla extract
- 1 cup all-purpose flour
- 1/2 teaspoon baking soda
- 1/4 teaspoon salt
- 2 cans (16 oz. each) ready-to-spread white frosting or about 3 cups homemade white frosting
- 40 (about 1 cup) REESE'S Minis Peanut Butter Cups
Directions
- Heat oven to 350 deg. F.
- Beat butter and sugar in medium bowl until fluffy. Add peanut butter, beating until smooth. Add egg and vanilla; beat well. Stir together flour, baking soda and salt; gradually add to butter mixture, beating until blended (dough will be soft). Roll dough into 1-1/2 inch balls; place about 3 inches apart on ungreased cookie sheet. (Cookies spread while baking.)
- Bake 13 to 14 minutes or until cookie is set and edges are lightly browned. Cool several minutes; remove from cookie sheet to wire rack. Cool completely.
- Transfer frosting to pastry bag with basket weave tip. Pipe diagonal stripes of frosting across cookies to resemble the wrappings on a mummy. Place 2 mini peanut butter cups as eyes; pipe additional stripes in opposite direction, partially covering "eyes" so that the eyes seem to be peering from beneath the wrappings. About 20 mummy cookies.

These made-in-the-microwave suckers are quick and so fun to make! I also love the fact that they're cheap--less than 50 cents per batch to make.
Step 1

Makes 12
Ingredients:
1 cup granulated sugar
½ cup light corn syrup
Food coloring (we used orange and purple)
a few drops orange oil, if desired (or any other flavoring oil)
Sucker Sticks or Popsicle Sticks
Wax Paper
White Chocolate (candy melts, almond bark, or white chocolate chips)
Edible Eyes (can buy at craft stores, or whatever you want to use for eyes--choc chips, M&M's)
Directions:
Lay out sucker sticks on a cookie sheet lined with foil (shiny side up) or lightly sprayed with cooking spray. Mix sugar and corn syrup in a medium microwave-safe bowl. Cover with plastic wrap.
Step 2

Microwave on high for 3 minutes 15 seconds. Remove from microwave, stir with a clean spoon, cover with a new piece of plastic wrap and microwave for another 3 minutes 15 seconds.
Step 3

Remove from microwave and mix in any food coloring/flavoring oils that you want. Pour 1 tablespoon of hot mixture on top of each sucker stick. Let set completely (about 2 minutes). Remove from pan and you're ready to decorate!
Step 4

Lay suckers out on wax paper. Microwave white chocolate in microwave safe bowl at 30-second intervals, stirring after each until melted. Using a small spoon, drizzle melted chocolate over the suckers.
Step 5

Add edible eyes (or chocolate chips, or M & M's...whatever you want to use for eyes). Remove from wax paper and set on a CLEAN sheet of wax paper (so you can get rid of the excess drizzles). Let set completely, about 10 minutes, before serving.
Skeleton Cupcakes

Ingredients
Preparation- 10 Chocolate Cupcakes
- 1 stick (1/4 lb.) unsalted butter
- 1/2 cup shortening
- 3 cups confectioners' sugar
- 1/2 teaspoon vanilla extract
- 1/8 teaspoon salt
- 20 brown M&M's
- 1 long strand black licorice
- 25 white mini jellybeans
- 10 mini Chocolate Cupcakes
- 1 (9 oz.) box chocolate wafers
- Beat together butter and shortening for 2 minutes. Slowly beat in confectioners' sugar. Add vanilla and salt; beat for 1 minute. Mound 1/4 cup frosting in center of top of each larger cupcake.
- For faces, add M&M's, pieces of licorice and halved jellybeans (see photo).
- For hats, dab frosting on mini cupcakes, invert and stick to chocolate wafers. Put one on each icing mound.
source:myrecipe.com
Shrunken Heads in Cider

I thought this was so cool!
- YieldServes about 30
Ingredients
- 2 cups lemon juice
- 2 tablespoons coarse salt
- 8 large Granny Smith apples
- 32 whole cloves
- 2 gallons apple cider
- 2 (12-ounce) cans frozen lemonade concentrate, thawed
- 2 cups spiced rum (optional)
Directions
- Preheat oven to 250 degrees. Line a baking sheet with parchment paper; set aside. In a medium bowl, mix together lemon juice and salt; set aside.
- Peel apples and cut each in half through the stem; remove seeds and core. Using a sharp paring knife, carve a face, as desired, on the rounded side of each apple half. Place apples in lemon mixture for one minute; transfer to paper towels to drain.
- Place apples, face-side up on prepared baking sheet and transfer to oven. Let bake until apples are dry and begin to brown around the edges, about 90 minutes. Remove apples from baking sheets and press cloves into the "eye" sockets.
- Combine cider, lemonade, and rum (if using) in a large punchbowl; float shrunken heads on top.
Halloween Candy Apples

Ingredients
Preparation- 8 wooden craft sticks
- 8 medium Gala apples
- 2 (6.5-ounce) packages caramel apple wraps
- 1 (16-ounce) chocolate bar
- 16 ounces vanilla bark coating
- Orange paste food coloring
- Toppings: colored sprinkles, chopped peanuts, black writing gel
- Insert craft sticks into apples. Cover each apple with 1 caramel wrap.
- Microwave at HIGH 15 to 20 seconds. Cool.
- Melt chocolate bar in a small saucepan over low heat.
- Dip each apple into chocolate; let dry.
- Melt vanilla bark coating in a small saucepan over low heat; stir in orange food coloring.
- Dip or drizzle each apple with vanilla coating mixture. Decorate with desired toppings, and let dry.
Easy Owl-Ween Treats

Open-faced Oreos, M & M’s, candy corn, and sprinkles bring a convenience store treat―a MoonPie―to life. Secure cookies and candy to your MoonPie with melted chocolate candy coating. Then insert a 12- x ¼-inch dowel, available at craft stores, into marshmallow center and secure with more chocolate for an eye-popping, kid-friendly sweet.
Source:SouthernLiving.com
Witch Hat Cookies Recipe

Ingredients
- Round Fudge-Dipped Cookies
- Hershey’s® Kisses
- Orange Decorator Icing (in the tube)
Instructions
- Lay out the round fudge-dipped cookies so the bottoms are facing up.
- Pipe a line of orange decorator icing around the outer bottom rim of a Hershey’s® Kiss and press firmly into place in the middle of the cookie.
- Pipe an orange bow onto the cookie as shown. Allow time for your icing to set.

These popable, sweet and crispy cornbread bites with salty, all-beef hot dogs taste exactly like a state fair corn dog in a teeny-tiny package!

Start the Mini Corn Dog Muffins by making the cornbread batter. Whisk together melted butter and sugar, then incorporate 2 eggs.


Next, pour in the secret ingredient that makes this cornbread ultra moist and yummy – buttermilk.

After the wet ingredients are combined, stir together the dry ingredients, including cornmeal, flour, baking soda and salt. Then, whisk the dry ingredients into the wet ingredients in two batches, whisking well between each batch.


Spray a mini muffin tin with non-stick spray, and spoon 1 Tablespoon of batter into each mini cup.

Next, cut up the hot dog centers. I used 100% beef Hebrew National Hot Dogs. You could totally use turkey dogs, if that’s your preference!

Hebrew National’s are longer, thinner hot dogs, so I cut each one into 6 pieces. You’ll want each piece to be about 1″ long.

Finally, place a hot dog piece into the center of each muffin tin.

And bake.


These piping hot, sweet and savory mini corn dog muffins are the perfect game-day food!

Mini Corn Dog Muffins
Makes 48 mini muffinsIngredients:
1/2 cup melted butter (or 1/4 cup butter + 1/4 cup unsweetened applesauce)
1/2 cup sugar
2 eggs
1 cup buttermilk
1/2 teaspoon baking soda
1 cup cornmeal
1 cup all purpose flour
1/2 teaspoon salt
8-10 all-beef hot dogs, cut into 1″ bites
Directions:
1. Preheat oven to 375 degrees. Combine butter and sugar in a bowl, and whisk to combine. Add eggs and whisk to incorporate. Add buttermilk and whisk to incorporate.
2. In a separate bowl, combine baking soda, cornmeal, flour, and salt, and stir to combine. Whisk into wet ingredients in two batches.
3. Spray a mini muffin tin with non-stick spray, and spoon 1 Tablespoon of batter into each mini muffin cup. Place one hot dog bite into the middle of each cup.
4. Bake for 8-12 minutes (oven temperatures vary), or until cornbread is golden brown. Cool in mini muffin tin for 5 minutes before serving. Store leftovers in the refrigerator, and re-heat for 20-30 seconds before serving.

A schmear of cold ketchup really sends the corn dog flavor over the top. I can’t get over how insane these are!

I literally had to pry Ben’s fingers from the mini muffin tin. Once he popped, he could not stop.

These are amazing served straight out of the oven, but can be made ahead of time, stored in the refrigerator, and microwaved for 30 seconds or so when it’s kickoff time. They taste just as good reheated. Not that I nuked five today and would know or anything.

source:http://iowagirleats.com
SUNDAY SUPPER
Roasted Pork Chops With Drunken Honey Crisp Apples

Note: Don't add too much liquid to the simmering apples because they'll release juice of their own.
About This Recipe
| YIELD: | serves 4 |
| ACTIVE TIME: | 15 minutes |
| TOTAL TIME: | 35 minutes |
Ingredients
- Kosher salt and freshly ground black pepper
- 1/4 teaspoon fresh thyme leaves
- 1/4 teaspoon garlic powder
- 1/4 teaspoon onion powder
- 4 double-cut pork chops, 1 1/4- to 1 1/2-inch thick, about 8 ounces each
- 1 1/2 tablespoons olive oil
- 4 tablespoons unsalted butter
- 5 large Honeycrisp apples, peeled, cored and sliced
- 1/4 cup sugar
- 1 tablespoon brown sugar
- 1 teaspoon cinnamon
- 1/8 teaspoon nutmeg
- 2 tablespoons rum
- 1/4 cup water
- 1 teaspoon cornstarch
- 1 tablespoon fresh juice from 1 lemon
- 1/2 cup dry white wine
- 1 cup low-sodium store-bought or homemade chicken broth
Procedures
- 1Adjust oven rack to lower-middle position and preheat oven to 400°F.
- 2Combine 1/2 teaspoon salt, 1/2 teaspoon pepper, thyme, garlic powder, and onion powder in a small bowl and stir to combine. Pat pork chops dry with a paper towel and season both sides with seasoning mixture. Heat oil in a large skillet over medium-high heat until lightly smoking. Add pork to pan and cook without moving until well browned on first side, about 4 minutes. Flip and transfer skillet to oven. Continue to cook until instant-read thermometer inserted into center of thickest section of chop registers 145°F, about 10 minutes. Transfer to a large plate, tent with foil, and allow to rest.
- 3While pork cooks, melt 2 tablespoons butter in a medium saucepan over medium heat. Add apples, a pinch of salt salt, sugar, brown sugar, cinnamon, nutmeg, rum, and water to pan, stirring to combine. Bring to a boil, reduce heat to medium-low, and simmer until apples are almost tender, about 5 minutes. In a small bowl, dissolve cornstarch lemon juice and add to simmering apple mixture. Simmer until thickened, about 2 minutes longer. Set aside and keep warm.
- 4When pork is cooked, return skillet to a burner set over high heat. Add wine and cook, scraping up browned bits from bottom of pan. Add chicken broth and cook, simmering until sauce is reduced by half, about 7 minutes. Off heat, swirl in remaining 2 tablespoons butter. Serve pork with sauce and apples
source:www.seriouseats.com
8 FUDGE RECIPES...
These are great recipes to do with the kids.
I hope you have as much fun with them as I have.
"Share" this great recipe with your friends and family.
MICROWAVE FUDGE
1 pound powdered sugar
1/2 cup cocoa
1/4 cup milk
1/4 pound margarine (or butter)
1 Tbsp. vanilla
1/2 cup chopped nuts
1 pound powdered sugar
1/2 cup cocoa
1/4 cup milk
1/4 pound margarine (or butter)
1 Tbsp. vanilla
1/2 cup chopped nuts
1. Blend powdered sugar and cocoa in mixing bowl then add milk and butter, cook in Microwave Oven for 2 minutes. ( do not mix these ingredients, merely place in the bowl)
2. Remove bowl from microwave and stir to mix ingredients.
3. Add vanilla and nuts and stir until blended.
4. Pour in greased container and place in freezer for 20 minutes or refrigerator for 1 hour.
5. Cut and serve. Yield: 60 pieces.
2. Remove bowl from microwave and stir to mix ingredients.
3. Add vanilla and nuts and stir until blended.
4. Pour in greased container and place in freezer for 20 minutes or refrigerator for 1 hour.
5. Cut and serve. Yield: 60 pieces.
____________________
 MINUTE MICROWAVE FUDGE
From the kitchen of Erica Wilson on Mrs. Clauses' website
Ingredients:
1 pound of powdered sugar
1/2 cup cocoa
1/4 teaspoon salt
1/4 cup milk
1 Tablespoon vanilla extract
1/4 pound butter/margarine
1 cup chopped nuts
Ingredients:
1 pound of powdered sugar
1/2 cup cocoa
1/4 teaspoon salt
1/4 cup milk
1 Tablespoon vanilla extract
1/4 pound butter/margarine
1 cup chopped nuts
1. Mix all dry ingredients together.
2. Put in a 8"x8" inch microwave safe pan (important to use this size pan).
3. Add milk and vanilla extract.
4. Place chunk of butter/margarine in center ( leave butter as whole do not chop up). Microwave on high for 2 minutes until bottom of dish feels warm. Stir vigorously and blend in chopped nuts.
5. Put in mold or whatever and chill for 1 hour.
*Use real butter for best results.
__________________
EASY MICROWAVE PEANUT BUTTER FUDGE
Ingredients
12 oz. semi-sweet chocolate chips
1 can sweetened condensed milk
2 heaping Tbs peanut butter
12 oz. semi-sweet chocolate chips
1 can sweetened condensed milk
2 heaping Tbs peanut butter
Put chocolate chips and sweetened-condensed milk in microwave safe bowl.
Cook on high for 5 minutes.
Remove from microwave, stir in peanut butter.
Spread in pan.
Cool and cut. Enjoy!
Cook on high for 5 minutes.
Remove from microwave, stir in peanut butter.
Spread in pan.
Cool and cut. Enjoy!
__________
CHOCOLATE PEANUT BUTTER RAISIN FUDGE
Ingredients:
1 12 ounce package chocolate chips
1 cup chunky peanut butter
3 cups mini marshmallows
3/4 cups raisins
Melt chocolate chips and peanut butter over medium heat (or in microwave watching closely). Fold in marshmallows and raisins, stirring until marshmallows are melted. Pour into 7x11 pan and chill until firm. Cut into squares. Store in an airtight container in the refrigerator.
__________

MICROWAVE ROCKY ROAD FUDGE
Ingredients2 cups (12-oz. pkg.) NESTLE'S TOLL HOUSE Semi-Sweet Chocolate Morsels
1 can (14 oz.) Sweetened Condensed Milk
1 teaspoon vanilla extract
3 cups miniature marshmallows
1 1/2 cups coarsely chopped walnuts
1. LINE 13 x 9-inch baking pan with foil; grease lightly.
2. MICROWAVE morsels and sweetened condensed milk in large, uncovered, microwave-safe bowl on HIGH (100%) power for 1 minute; STIR.
3. Morsels may retain some of their original shape. If necessary, microwave at additional 10-to 15-second intervals, stirring just until morsels are melted.
4. Stir in vanilla extract. Fold in marshmallows and nuts.
5. PRESS mixture into prepared baking pan. Refrigerate until ready to serve.
6. Lift from pan; remove foil. Cut into pieces.
__________
MICROWAVE PEANUT BUTTER FUDGE
Ingredients
1 cup butter, plus more for greasing pan
1 cup peanut butter
1 teaspoon vanilla
1 pound powdered sugar
1 cup butter, plus more for greasing pan
1 cup peanut butter
1 teaspoon vanilla
1 pound powdered sugar
Directions:
1. Microwave butter and peanut butter for 2 minutes on high.
2. Stir and then microwave on high for 2 more minutes. Add vanilla and powdered sugar to peanut butter mixture and stir to combine with a wooden spoon.
3. Pour into a buttered 8 by 8-inch pan lined with waxed paper. Place a second piece of waxed paper on the surface of the fudge and refrigerate until cool.
Cut into 1-inch pieces and store in an airtight container for up to a week.
_________
CHOCOLATE PEANUT BUTTER CHIP FUDGE
Ingredients:
2 cups (12-oz. pkg.) HERSHEY'S SPECIAL DARK Chocolate Chips or HERSHEY'S Semi-Sweet Chocolate Chips
1 can (14 oz.) sweetened condensed milk (not evaporated milk)
1 teaspoon vanilla extract
Dash salt
1 cup REESE'S Peanut Butter Chips
2 cups (12-oz. pkg.) HERSHEY'S SPECIAL DARK Chocolate Chips or HERSHEY'S Semi-Sweet Chocolate Chips
1 can (14 oz.) sweetened condensed milk (not evaporated milk)
1 teaspoon vanilla extract
Dash salt
1 cup REESE'S Peanut Butter Chips
1. Line 8-inch square pan with foil.
2. Combine chocolate chips, sweetened condensed milk, vanilla and salt in heavy saucepan. Cook over low heat, stirring constantly, until chips are melted and mixture is smooth. Remove from heat. Add peanut butter chips; stir quickly just to distribute chips throughout mixture. Spread evenly in prepared pan.
3. Refrigerate 2 hours or until firm. Remove from pan; peel off foil. Cut into squares. Store tightly covered in refrigerator. NOTE: For best results, do not double this recipe.
__________
CHOCOLATE ORANGE FUDGE (Can be made in micro-wave)
Ingredients:
2 1/2 cups semisweet chocolate chips
1 (14-ounce) can sweetened condensed milk
1/2 cup toasted and chopped pecans
2 teaspoons grated orange peel
1. Line a 8 x 8 x 2-inch baking pan with lightly buttered waxed paper or aluminum foil. Set aside.
2. Melt chocolate chips with condensed milk in the top of a double boiler or in a bowl in the microwave. Stir until smooth.
3. Remove from heat and stir in pecans and grated orange peel.
4. Spread in prepared dish and chill until until firm.
5. Carefully remove fudge from pan using the edges of the foil. Cut into squares. Store covered in refrigerator.
Makes about 2 1/2 pounds candy.
__________
S’MORES FUDGE (Made on Stove Top OR Microwave
Ingredients
1 can sweetened condensed milk (Not evaporated milk)
12 oz. bag of milk chocolate or Semi-Sweet chips
1 cup mini marshmallows
3 graham crackers
1 can sweetened condensed milk (Not evaporated milk)
12 oz. bag of milk chocolate or Semi-Sweet chips
1 cup mini marshmallows
3 graham crackers
1. Depending on melting method~ Place chocolate chips and Sweetened Condensed Milk in a pot or bowl.
2. Mix in broken cracker pieces into the heated and melted mixture.
3. Mix in mini marshmallows.
4. Spread evenly in a greased 9×9 pan/dish.
5. Before cutting, cool in refrigerate for one hour. Keep remaining fudge in fridge.
2. Mix in broken cracker pieces into the heated and melted mixture.
3. Mix in mini marshmallows.
4. Spread evenly in a greased 9×9 pan/dish.
5. Before cutting, cool in refrigerate for one hour. Keep remaining fudge in fridge.
Spider and Owl Rice Crispy Treats
 I will today share with you 2 of my most favorite things…
Halloween treats and Marshmallow krispies.
The combining of the two is so obvious…right?
I know lots of you can’t bring in homemade snacks to school, which kinda sucks.
to school, which kinda sucks.
I mean, how else are you gonna show the other moms you are the BEST if you can’t bring in the most awesome treats at the Halloween party?
you are the BEST if you can’t bring in the most awesome treats at the Halloween party?
Errr, uhhh..did I just say that out loud?
Anyway, that’s not what I think it’s just what I hear, ummm, that some moms do. Yeah, uhh, but totally not me. I am not competitive at all.
The thing about these treats is they’re super simple, the kids will love them, they are no-bake and duh, they look like spiders and owls. The end.
First you need to make your krispie treats. I used Cocoa Pebbles.
 I used a 2″ round cookie cutter to cut the krispies into circles.
 I may or may not have eaten the scraps. Believe what you will.
Then you’ll need some pretzel sticks, mini marshmallows, a black food writer and if you’re feeling extra creative I used vanilla Tootsie Rolls (flattened for fangs)
sticks, mini marshmallows, a black food writer and if you’re feeling extra creative I used vanilla Tootsie Rolls (flattened for fangs) Using a rolling pin, flatten the mini marshmallows…
 The marshmallow will stick on easily to the krispie treat.
 Then you can cut your fangs.
 And just press them on your spider. Draw eyes on with your black food writer and carefully stick the pretzel sticks in the sides for legs.
 Now since I bought this bag of flavored Tootsie Rolls I had a few other colors to play with…
 so I decided to make owls too. (if you can’t find flavored Tootsie Rolls, you could use Laffy Taffy or fondant)
 You make them just like the spiders…same eyes and all…just no fangs or legs.
I used an orange Tootsie Roll for the beak…
 And broke two pretzel sticks and put them in the top like ears or horns…which I totally know owls don’t have horns but it just made them look more Owl-ish, this is not science class, people.
 And then you’re done.
You can go to school and everyone can ooh and ahh over your treats and you can be like, “oh it was nothing…” and actually MEAN it!
Welcome to the Web Checkerboard Cake

Your Halloween guests will certainly be ensnared with this amazing cake. When you slice the cake open, they won’t believe their eyes—a bloody checkerboard pattern! Create this eerie delight with the Wilton Checkerboard Cake Pan Set.
Ingredients:
- Easy-Add White Ready-To-Use Rolled FondantAdd to shopping list White Ready-To-Use Rolled Fondant
- Easy-Add Black Icing ColorAdd to shopping list Black Icing Color
- Easy-Add Gum-Tex™Add to shopping list Gum-Tex™
- cornstarch
- 4 boxes (15.25-18.25 oz. each) white cake mix
- water, oil, eggs
- Easy-Add Leaf Green Icing ColorAdd to shopping list Leaf Green Icing Color
- Easy-Add Kelly Green Icing ColorAdd to shopping list Kelly Green Icing Color
- Easy-Add Violet Icing ColorAdd to shopping list Violet Icing Color
- Rose Icing Color (Combine Violet with Rose for violet shown)Easy-Add Rose Icing ColorAdd to shopping list Rose Icing Color
- Easy-Add Red-Red Icing ColorAdd to shopping list Red-Red Icing Color
- Easy-Add Piping GelAdd to shopping list Piping Gel
Pattern:
Makes:
Cake serves 20.
Techniques Used:
Tools:
- Easy-Add Roll-N-Cut MatAdd to shopping list Roll-N-Cut Mat
- Plastic ruler
- Easy-Add 10 x 14 in. Cake BoardsAdd to shopping list 10 x 14 in. Cake Boards
- Easy-Add 9 in. Fondant RollerAdd to shopping list 9 in. Fondant Roller
- Heart Cut-Outs™ (smallest used)Easy-Add Heart Cut-Outs™Add to shopping list Heart Cut-Outs™
- Easy-Add Brush SetAdd to shopping list Brush Set
- Easy-Add Wave Flower Former SetAdd to shopping list Wave Flower Former Set
- Toothpicks
- Easy-Add Checkerboard Cake Pan SetAdd to shopping list Checkerboard Cake Pan Set
- Easy-Add Mini Ball PanAdd to shopping list Mini Ball Pan
- Cake Board 6 in.Easy-Add Cake BoardAdd to shopping list Cake Board
- Scissors
- Easy-Add 9 in. Angled SpatulaAdd to shopping list 9 in. Angled Spatula
- Easy-Add 12 in. Disposable Decorating BagsAdd to shopping list 12 in. Disposable Decorating Bags
- Easy-Add Tip: 3Add to shopping list Tip: 3
- Easy-Add Tip: 14Add to shopping list Tip: 14
- Easy-Add Tip: 12Add to shopping list Tip: 12
- Easy-Add Tip: 789Add to shopping list Tip: 789
- Easy-Add 15 in. Angled SpatulaAdd to shopping list 15 in. Angled Spatula
- Easy-Add Cake Dividing ChartAdd to shopping list Cake Dividing Chart
- Dowel Rod
Instructions:
step 1
One day in advance: make spider legs. Tint 1 3/4 oz. fondant black; knead in 1/8 teaspoon of Gum-Tex. Roll a long, 1/8 in. log. Trim legs following the spider leg pattern—reversing pattern to make left side. Create two front legs, four middle legs and two back legs. Let dry on a cornstarch-covered board.
step 2
One day in advance: make flies. Tint 1/4 oz. fondant light gray; knead in a pinch of Gum-Tex. Roll out gray fondant 1/16 in. thick. Cut out two hearts per fly using the smallest heart Cut-Out. Overlap points 1/4 in. and attach with fondant adhesive.
For bodies, use remaining black fondant. Mold into a log, 1/2 in. long x 1/4 in. wide. Attach to wings with fondant adhesive. Let dry on cornstarch-covered, smallest curve wave former.
For bodies, use remaining black fondant. Mold into a log, 1/2 in. long x 1/4 in. wide. Attach to wings with fondant adhesive. Let dry on cornstarch-covered, smallest curve wave former.
step 3
Individually prepare three boxes white cake mix following package directions; divide batter into two portions. In one portion of batter, gently stir in Leaf Green Icing Color to desired shade. (Use clean toothpicks to transfer color from jar to batter.) Leave the second portion plain.
step 4
For bottom layer, place clean divider in the first prepared pan. Pour green-colored batter in the middle section and plain batter in the outer and center sections. Fill sections 2/3 full. Remove ring from pan by carefully lifting straight up on handles. Rinse and completely dry ring.
step 5
For top layer, repeat step 4 in second prepared pan. Remove ring from pan by carefully lifting straight up on handles. Rinse and completely dry ring.
step 6
For middle layer, place clean divider in the third prepared pan. Pour plain batter in middle sections and green-colored batter in outside and center sections. Fill sections 2/3 full. Remove ring from pan by carefully lifting straight up on handles. DO NOT PUT RING IN OVEN.
step 7
Bake and cool checkerboard cake following package directions. Bake and cool mini ball halves following package directions. Prepare buttercream icing. Tint portions black, green and violet; reserve some white.
step 8
Cut 6 in. board into a 2 1/2 in. circle. Cover with remaining black fondant.
step 9
Make spider. Attach mini ball halves with black icing and spatula. Position seam vertically.
Use tip 3 and white icing to pipe large eye. Use tip 3 and green icing to pipe small eye. Use tip 3 and black icing to pipe dot pupils. Use tip 3 and white icing to pipe zigzag smile. Use tip 14 and black icing to pipe stars over entire body.
Place on fondant-covered board.
Use tip 3 and white icing to pipe large eye. Use tip 3 and green icing to pipe small eye. Use tip 3 and black icing to pipe dot pupils. Use tip 3 and white icing to pipe zigzag smile. Use tip 14 and black icing to pipe stars over entire body.
Place on fondant-covered board.
step 10
Tint gel red. Use tip 12 to pipe gel into cake. Insert tip into cake at even intervals and squeeze gel into cake. Pipe in all three sections of all three layers.
step 11
Ice cake with violet icing and tip 789, smoothing with spatula.
step 12
Divide top of cake into 10ths using cake dividing chart.
Cut a parchment circle 9 in. to match top of cake. Place on cake dividing chart and mark 10ths using pencil. Place on iced cake and mark with toothpick.
Cut a parchment circle 9 in. to match top of cake. Place on cake dividing chart and mark 10ths using pencil. Place on iced cake and mark with toothpick.
step 13
Use tip 3 and white icing to pipe spider web on top of cake. Pipe side webs between every fifth mark.
step 14
Insert dowel rod where spider will sit. Position spider on cake and insert fondant legs. Position flies.
source:www.wilton.com
She's Weaving Home Cake

Talk about time to upgrade! This larger than life spider needs more growing room. Made from our Sports Ball Pan and resting on a 12 in. Round Cake, this spider needs some room to stretch his legs along with his fancy shoes.
Ingredients:
- Easy-Add Black Icing ColorAdd to shopping list Black Icing Color
- Easy-Add Violet Icing ColorAdd to shopping list Violet Icing Color
- small red dot candies
Makes:
Cake serves 28.
Techniques Used:
Tools:
- Easy-Add 12 in. Round PanAdd to shopping list 12 in. Round Pan
- Easy-Add Sport Ball PanAdd to shopping list Sport Ball Pan
- Easy-Add Mini Ball PanAdd to shopping list Mini Ball Pan
- Easy-Add Tip: 3Add to shopping list Tip: 3
- Easy-Add Tip: 4Add to shopping list Tip: 4
- Easy-Add Tip: 7Add to shopping list Tip: 7
- Easy-Add Tip: 8Add to shopping list Tip: 8
- Easy-Add Tip: 16Add to shopping list Tip: 16
- Easy-Add Tip: 32Add to shopping list Tip: 32
- Cake Boards (2 taped together for extra strenght)Easy-Add Cake BoardsAdd to shopping list Cake Boards
- Easy-Add Fanci-Foil WrapAdd to shopping list Fanci-Foil Wrap
- Easy-Add Cake Divider SetAdd to shopping list Cake Divider Set
Instructions:
step 1
Ice 1-layer round cake smooth; use cake dividing set to divide cake into 8ths. Pipe tip 3 string webbing in each section. Position sports ball cake toward back of round cake, allowing space for Mini Ball "head" to be positioned.
step 2
Mark 8 sections for legs and pipe in with tip 16 pull-out stars; add tip 32 zigzag puff feet. Pipe tip 8 whites of eyes (smooth with finger dipped in cornstarch). Add candies for center of eyes. Pipe in mouth with tip 4 and add tip 7 pull-out fangs. Cover body and face with tip 16 pull-out stars, making peaks down center of spider's back.
source: www.wilton.com
Spin a Scary Tale Cake

Pumpkins and spiders and webs, oh my! These cakes have just about everything you love about Halloween on them. Two-tier stacked cake is topped with a 3-D Dimensions Pumpkin Cake. There is excitement everywhere you look on this cake. Fondant spiders with top hats and others spinning their webs. All good Halloween fun.
Ingredients:
- Easy-Add Black Icing ColorAdd to shopping list Black Icing Color
- Easy-Add Violet Icing ColorAdd to shopping list Violet Icing Color
- Easy-Add Rose Icing ColorAdd to shopping list Rose Icing Color
- Easy-Add Orange Icing ColorAdd to shopping list Orange Icing Color
- Easy-Add Red-Red Icing ColorAdd to shopping list Red-Red Icing Color
- Easy-Add Lemon Yellow Icing ColorAdd to shopping list Lemon Yellow Icing Color
- Easy-Add Golden Yellow Icing ColorAdd to shopping list Golden Yellow Icing Color
- Easy-Add Leaf Green Icing ColorAdd to shopping list Leaf Green Icing Color
- Easy-Add Ready-To-Use White Rolled FondantAdd to shopping list Ready-To-Use White Rolled Fondant
- Easy-Add Gum-Tex™Add to shopping list Gum-Tex™
- Easy-Add Dark Cocoa Candy Melts® CandyAdd to shopping list Dark Cocoa Candy Melts® Candy
- Easy-Add Piping GelAdd to shopping list Piping Gel
- Marshmallows
- light corn syrup
- cornstarch
Makes:
Cake serves 113.
Tools:
- Easy-Add Dimensions® Large Pumpkin PanAdd to shopping list Dimensions® Large Pumpkin Pan
- Easy-Add 10 x 2 in. Round PanAdd to shopping list 10 x 2 in. Round Pan
- Easy-Add 14 x 2 in. Round PanAdd to shopping list 14 x 2 in. Round Pan
- Easy-Add Tip: 1Add to shopping list Tip: 1
- Easy-Add Tip: 3Add to shopping list Tip: 3
- Easy-Add Tip: 5Add to shopping list Tip: 5
- Easy-Add Tip: 16Add to shopping list Tip: 16
- Easy-Add Easy-Glide Fondant SmootherAdd to shopping list Easy-Glide Fondant Smoother
- Easy-Add Brush SetAdd to shopping list Brush Set
- Easy-Add Round Cut-Outs™Add to shopping list Round Cut-Outs™
- Easy-Add Rolling PinAdd to shopping list Rolling Pin
- Easy-Add Roll-N-Cut MatAdd to shopping list Roll-N-Cut Mat
- Easy-Add Nesting Pumpkins Metal Cutter SetAdd to shopping list Nesting Pumpkins Metal Cutter Set
- Easy-Add 2 1/2 in. Globe Tier SetAdd to shopping list 2 1/2 in. Globe Tier Set
- Decorator Preferred® Smooth-Edge Separator Plates (12 inch needed)Easy-Add Decorator Preferred® Smooth-Edge Separator PlatesAdd to shopping list Decorator Preferred® Smooth-Edge Separator Plates
- Easy-Add Dowel RodsAdd to shopping list Dowel Rods
- Easy-Add 16 in. Round Silver Cake BasesAdd to shopping list 16 in. Round Silver Cake Bases
- Easy-Add Cake BoardsAdd to shopping list Cake Boards
- Ruler
- Knife
Instructions:
step 1
In advance: Prepare 108 oz. of Chocolate Fondant; tint black. Tint white fondant as follows: 36 oz. violet; 12 oz. orange; 1 oz. green (reserve 1 oz. white).
step 2
Also: Make spider legs. Add 1/2 teaspoon Gum-Tex to 6 oz. violet fondant for 24 legs. Roll 1/4 x 3 in. logs; bend at 1 in. Let dry on cornstarch-dusted surface.
step 3
And: Cover Cake Base with 24 oz. violet fondant.
step 4
Bake and cool 2-pc. pumpkin and 2-layer round cakes. Prepare cakes for Stacked and Globe Pillar Construction. Prepare and cover both cakes with black fondant.
step 5
Make fondant pumpkins. Roll out orange fondant 1/8 in. thick. Use 2 smallest cutters from set to cut 8 pumpkins in each size; use 3rd smallest cutter to cut 4. Cut off stems. Trim sides of largest pumpkins to make thinner version. Attach pumpkins around cake sides using damp brush. Pipe tip 3 stems; smooth with finger. Use tip 1 to pipe rib lines and to outline features; fill in features and pat smooth. Attach to cake sides and decorate.
step 6
Pipe tip 1 words and swirls on sides of both cakes. Pipe tip 5 bead border on 10 in. cake. For small spiders, pipe tip 5 body and pat smooth. With tip 1, outline and pipe in hats (pat smooth); add outline hat band and stripes, legs, hanging string, dot and string facial features.
step 7
Decorate pumpkin. Trim off stem and leaves; position on cut-to-fit cake board. Ice eyes, nose and mouth areas smooth; outline features using tip 3. Cover with tip 16 stars. Attach marshmallow to top for stem; cover with tip 16 lines.
step 8
Make globe spiders. Cut hidden pillars to 7 1/2 in. Use 12 in. plate to mark plate leg positions, then insert pillars into base cake. Cover globes with fondant for spider bodies, leaving openings for pillars clear; slide globes onto pillars. Roll out orange fondant 1/8 ?in. thick. For hat brim, cut a circle using largest Cut-Out; use pillar end to cut away center. Slide brim over pillar and onto spider. For top of hat, use a 1 1/4 in. ball of fondant; roll out, leaving top edge thicker. Brush pillar area with piping gel, then wrap around pillar and shape. Cut 4 x 1 1/4 in. long green strips and attach to hats with damp brush. Roll and flatten small balls of fondant for eyes, pupils and nose; attach with damp brush. Attach spider legs with Thinned Fondant Adhesive.
step 9
At party: position 12 in. plate on spider pillars; position pumpkin cake on top.
*Combine Orange with a little Red-Red for orange shown. Combine Violet with Rose for violet shown. Combine Lemon Yellow with Golden Yellow for yellow shown.
source:www.wilton.com

Pumpkin Cupcakes
- 2 cups all-purpose flour
- 1 teaspoon baking soda
- 1 teaspoon baking powder
- 1 teaspoon coarse salt
- 1 teaspoon ground cinnamon
- 1 teaspoon ground ginger
- 1/4 teaspoon freshly grated nutmeg
- 1/4 teaspoon ground allspice
- 1 cup packed light-brown sugar
- 1 cup granulated sugar
- 1 cup (2 sticks) unsalted butter, melted and cooled
- 4 large eggs, lightly beaten
- 1 can (15 ounces) pumpkin puree
Preheat oven to 350 degrees.Line cupcake pans with paper liners; set aside. In a medium bowl, whisk together flour, baking soda, baking powder, salt, cinnamon, ginger, nutmeg, and allspice; set aside.
In the bowl of a stand mixer, fitted with the paddle attachment, combine the brown sugar, granulated sugar, butter, and eggs. Beat on medium speed until well combined. Add dry ingredients, and mix on low until smooth. Fold in pumpkin puree.
Divide batter evenly among liners, filling each about halfway. Bake until tops spring back when touched, and a cake tester inserted in the center comes out clean, 20 to 25 minutes, rotating pans once if needed. Transfer to a wire rack; let cool completely.
Makes ~ 18 cupcakes.
Source: Adapted from MarthaStewart.com.
Salted Caramel Buttercream
- 1/4 cup granulated sugar
- 2 tablespoons water
- 1/4 cup heavy cream
- 1 teaspoon vanilla extract
- 1 stick salted butter
- 1 stick unsalted butter
- 1/2 teaspoon sea salt
- 2 cups powdered sugar
In a saucepan, stir together granulated sugar and water. Bring to a boil over medium high heat. Cook without stirring until mixture turns a deep amber color, about 10 minutes. Remove from heat and slowly add in cream and vanilla, stirring until very smooth. Let caramel cool for about 20 minutes, until it is just barely warm and still pourable. Alternatively, you could use just under 1/2 cup of your favorite caramel sauce.
In a mixer fitted with paddle attachment, beat butter and salt together until lightened and fluffy. Reduce speed to low and add powdered sugar. Mix until thoroughly combined.
Scrape down the side of the bowl and add the caramel. Beat on medium high speed until light and airy, and completely mixed (about 2 minutes). Mixture should be ready to use without refrigeration. If your caramel was too hot when added, it will cause your icing to be runny. If this happens refrigerate for 15-20 minutes.
Pumpkin Pretzels
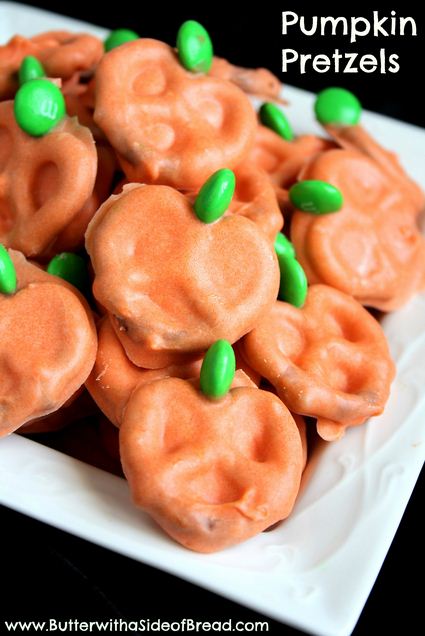
Pretzel Pumpkins
- 1 bag mini pretzels {you won’t use the whole bag, only about 1/4}
- 1 bag M&M’s candy, needing only the green ones {fun separating activity for kids!}
- orange food coloring, I used about 1/8th tsp of Wilton’s gel colors
- 1 bag White Chocolate chips, melted slowly {directions below}
- 1 TBSP shortening, to thin out chocolate

First step is to melt the chocolate. I used 10 oz of baking chocolate squares, but you can use a bag of white chocolate chips- the process is still the same. Before you even put it in the microwave, add about 1 TBSP shortening. You need to thin out the chocolate prior to dunking the pretzels or else the chocolate will be so thick you won’t even be able to tell it’s a pretzel under there! Shortening is the ONLY thing that will do this- don’t add water, butter, etc. Shortening!
Go slowly! White chocolate seizes easily, and you don’t want to coat your pretzels with grainy chocolate, right? Go slowly and stir minimally. I put mine on for 1 minute, stirred gently, then put it in for an additional minute. When I took it out, the chocolate still looked solid. It wasn’t! Add your orange coloring and stir gently, until it’s nice and smooth.
I’ve tested out a few ways to coat pretzels in chocolate and none of them really work as well as simply using your fingers. So I took a picture above of my elaborate technique.
Once you’ve dunked your pretzel, adding a nice coating, lay it out on a piece of wax paper. While it’s still wet, take a green M&M and set it in the crook of the pretzel, on it’s side. See? Now it’s a cute little green stem.
If you see a few bare spots on your pretzels, while they’re still wet, dab some more chocolate on them using your finger.

Pumpkin Cheese Balls

Here is what you need:

- 16 oz cream cheese, room temp
- 2 cups cheddar cheese
- 3 tbsp minced onion
- 3 tbsp salsa
- 1 tsp ground cumin
- 2 cups nacho cheese chips, crumbled
- top of 1 bell pepper for stem garnish

1. With a mixer, combine cream cheese, cheddar, onion, salsa and cumin. Mix until creamy.


source:www.familyfreshmeals.com
Red, yellow, orange and brown, all the leaves are falling … onto your cookie plate!
Yep, it’s that time of year. Leaves are turning colors and ovens are firing up. Here’s the best way evah to combine the two with these colorful Autumn Leaf Cookies.
Start it off quick and easy! Grab yourself a tube of Pillsbury Sugar Cookie dough and open ‘er up! How snazzy-simple is that for a first step?!

Because the out-of-the-package dough can be a leetle bit soft for making shaped cookies, we’re going to knead a bit of flour into the dough in order to make it perfectly pliable for our every whim.

Tear that dough into three parts, smoosh some colored gel right into it…

Then knead the gel through the dough to give it some seriously vibrant color. Feel free to add more gel coloring, as needed to make a great color once kneaded. Ha! Needed, kneaded.

Now tear the colored dough into several 1-inch pieces. Roll them loosely into balls, then create a checkerboard-style layout with the dough.

Use your fingers to blend the balls together slightly, then…

Roll the dough out with a wooden rolling pin. Once it’s about 1/2″ thick, sprinkle the top of the dough with turbinado or sparkling sugar, then…

Roll the dough to about 1/4″ thick.

Cut into leaves with a sharp knife. Drag the knife gently down the center of each leaf to create a line that will bake some authentic leafy impressionism.

Bake. Cool. Get ready to drool!
source:tablespoon.com
Deviled Eyes
Ingredients
- 6 large eggs, hardboiled, peeled and cooled
- 3 tbsp mayonnaise
- 1/4 tsp dijon mustard
- 1 tsp finely chopped fresh herbs (such as oregano, basil or thyme)
- 1/2 tsp lemon juice
- salt, to taste
- paprika
- water
- 4 spanish olives with pimentos, cut into three circles each
Directions
- 1Cut the eggs in half and remove the yolks (drop them into a medium-sized bowl). Arrange the intact egg white halves on a plate and set aside.
- 2To the egg yolks, add the mayonnaise, dijon mustard, herbs, lemon juice and salt. Mash and stir with a fork until fully combined and somewhat smooth.
- 3Divide the egg yolk mixture evenly between the egg white halves mounding it as necessary.
- 4In a small bowl, combine a small amount of paprika with water to form a paste. Use a toothpick to draw vein lines on the whites of the eggs.
- 5Press one olive round into the yolk of each egg.
- 6Cover and chill until ready to serve.
sources:tablespoon.com

Skeleton Cupcakes
To make these skeletal treats, start with chocolate-iced cupcakes. Let your child assemble the "bones" (white candy mints, licorice pastels, and white sprinkles) onto the top of each cake.
source:parents.com

Marshmallow Ghosts
Drape fondant over single (and double-stacked) marshmallows to create a whole crew of boo-tiful creatures. Kids will love helping roll out the fondant. Use decorating gel to add the eyes and mouths.
source:parents.com

Spooky Ravioli Spiders
To make this creepy-crawly dinner, fill a narrow-tip, condiment squeeze bottle with pasta sauce. Then, let your child create a tangled spider web pattern on a plate. Use cooked raviolis for the spiders' bodies and strips of orange peppers for their legs.
Peek-a-Boo Monsters

Start with pre-made cupcakes, then let your little one go wild creating a silly Halloween monster. Set out sour candy corn for the spiky hair. Cut a thin wafer in half and stick on two mini candy-coated chocolates for pupils.
source:parents.com
NO-BAKE, TEACUP TREATS
Remember that scene in Willy Wonka and the Chocolate Factory where he drinks the tea and then eats the cup? Well, here's a step-by-step guide to making your own deliciously edible cup-and-saucers.
The best part of making these sweet teacup cookies? No baking required!
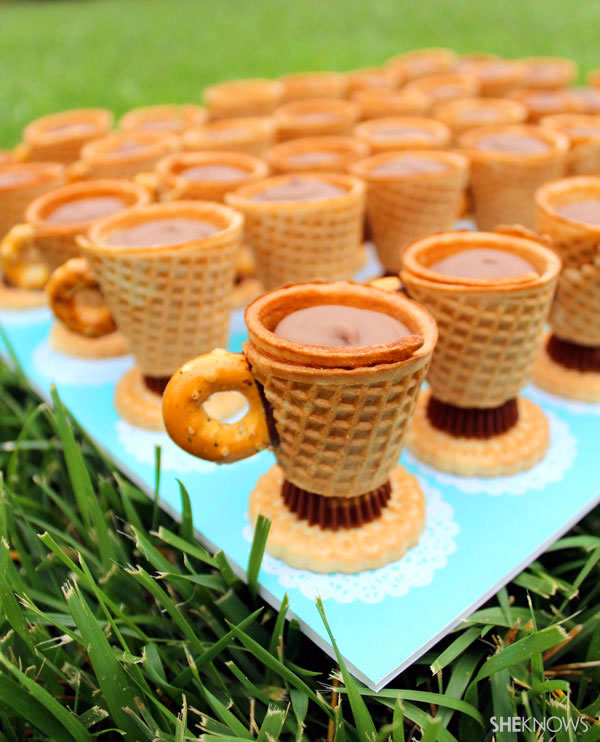
Ingredients:
- Vanilla sandwich cookie wafers
- Reese's Miniature Peanut Butter Cups
- Ice cream sugar cones (top 1-1/2 inch)
- Circle pretzels (found in Chex Mix Sweet 'n Salty Honey Nut mix)
- Chocolate frosting (chocolate pudding, chocolate ganache, etc.)
- Chocolate or vanilla candy melts
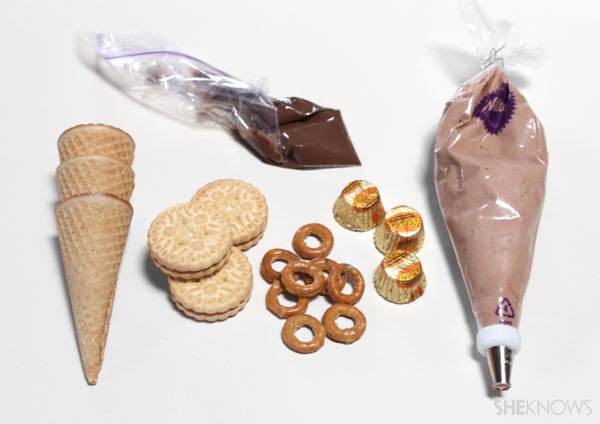
1
Step one
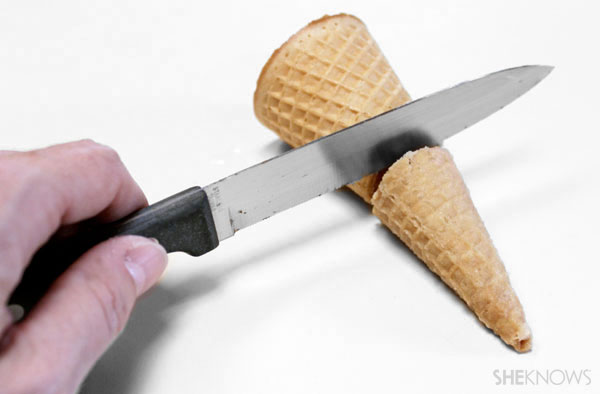
2
Step two
3
Step three
4
Step four
5
Step five
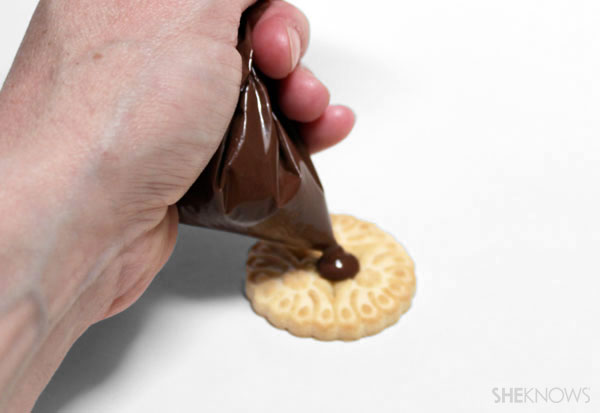
6
Step six

7
Step seven
8
Step eight
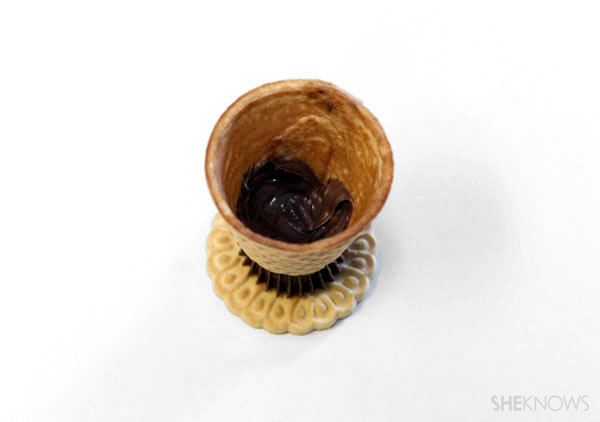
9
Step nine
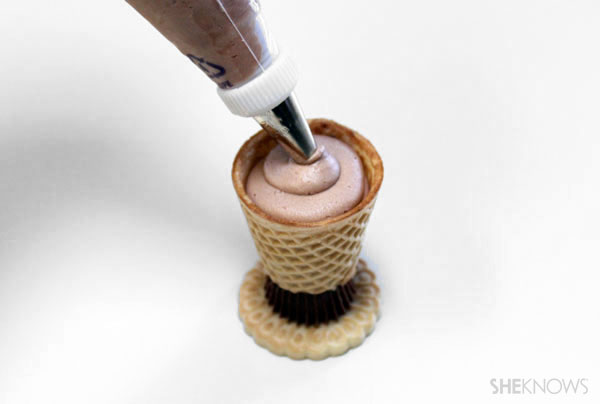
10
Step ten
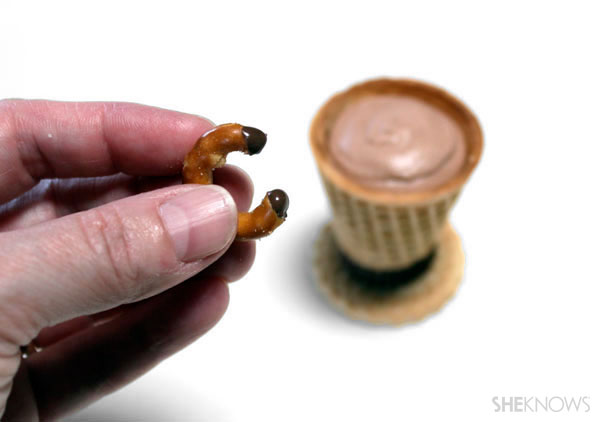
Helpful hints: Have everything unwrapped, cut, trimmed and ready to assemble. If your candy melt starts to harden, just microwave the zip-top bag for 20 to 30 seconds to soften.
Note: These are best served on the same day as preparation. The frosting, pudding or ganache filling tends to soften the sugar cone the longer it sits.
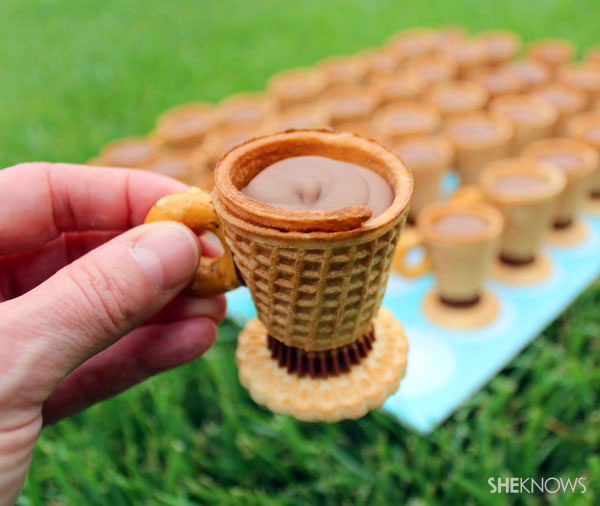
Colorful Caterpillar Cupcake

I found this super cool colorful caterpillar cupcake recipe. Now if this isn't fun, then I don't know what else is.I hope you have as much fun with this recipe as I did.
1 package vanilla cake mix
11/4 cups water
3 eggs
1/3 cup vegetable oil
Food Coloring
Buttercream Frosting
Assorted candies, candy-coated chocolate pieces, red string licorice, lollipops, and gummy worms
Preheat oven to 350 and mix all ingredients, bake for 21 to 23 minutes and let cool.
Buttercream Frosting
1 cup butter
1 teaspoon vanilla
1/4 teaspoon salt
1 teaspoon meringue powder
1 tablespoon milk
1 package powdered sugar
Beat butter, vanilla, and salt, next add meringue powder and milk. Gradually add powdered sugar, beat at high speed until frosting is light and fluffy! Next you can stir in food coloring until you get your desired colors.
Frost cupcakes place one cupcake on its side towards the end of serving platter. Place second cupcake on its side next to first cupcake, arrange remaining cupcakes.
Frost 1 reserved cupcake decorate with assorted candies, licorice and lollipops to create face and antennae. place plain cupcake upright at front of cupcake row for head, top with face cupcake on its side. Cut gummy worms into small pieces, attach to caterpillar body with frosting to create legs.
source:http://thewhoot.com.au

Witch Cupcakes
I just had to share these absolutely cute witch cupcakes. I am always looking for new family recipes to do with Aaliyah. Hope you have fun with this one.
Ingredients (For 12 cupcakes)
Make It
1. Place chocolate frosting in a freezer-weight zip-top bag and snip off a small corner. Pipe base of cones, dip in orange nonpareils, and set aside.
2. Place 1/2 cup vanilla frosting in a another zip-top bag and snip off a small corner. Tint remaining frosting green and frost cupcakes.
3. Turn cupcakes on sides, then place decorated cones on top. Using vanilla frosting, pipe eyes on cupcakes. Attach chocolate chips for pupils and pipe a dot onto chips. Use red icing for mouths, green icing for warts; shape candies into noses. Pipe chocolate icing onto cupcakes for hair and sprinkle with chocolate jimmies.
source:parents.com
source:parents.com

PUMPKIN COOKIE RECIPE
This one uses a simple cheat -- cake mix -- to make the easiest and most scrumptious pumpkin cookies you're likely to find anywhere.
Ingredients
- 1 package spice cake mix (about 18 ounces)
- 1/2 teaspoon cinnamon
- 1/4 teaspoon nutmeg
- 1/4 teaspoon ground allspice
- 1 can pumpkin filling (15 ounce)
Directions
- Combine all ingredients in a large bowl and stir to incorporate.
- Drop by rounded spoonful onto a greased cookie sheet.
- Bake in a preheated 350 degrees F oven for 18 to 20 minutes.
This recipe makes about 2 dozen cookies.

Bloody Cutcakes
- 1 (18.25oz) Betty Crocker Vanilla Cake Mix
- 3 tbsp unsalted butter, melted
- 2 1/2 tbsp vegetable oil
- 1 1/4 cup whole milk
- 3 eggs
- 1 box raspberry Jello
- Blue food coloring
- Red food coloring
- 8oz Ghirardelli semi-sweet chocolate
- 3/4 cup heavy cream
- 2 tbsp unsalted butter
- Black food coloring
1. Preheat oven to 350º and line 2 cupcake pans with liners. Set aside.
2. In a glass measuring cup, melt butter in the microwave. Add enough vegetable oil to measure to the 1/3 cup mark, and stir to combine. Prepare cake mix as directed on box using milk (instead of water) and the melted butter/vegetable oil mixture (instead of only the vegetable oil called for on the box). Add the 3 eggs one at a time and beat until well incorporated and fluffy (do not overbeat). Pour into cupcake liners, and bake as directed. Let cool completely.
3. Prepare raspberry jello as directed on the box. Add one very tiny drop of blue food coloring (insert the tip of a toothpick to pick up coloring) and 2 drops of red food coloring, then whisk to distribute. Let cool slightly.
4. With a fork poke a few deep holes on the top of cupcakes. Pour a teaspoon or so of jello into the holes – too much will oversaturate the cake and too little will not create the intended effect. (If you own one of those marinade injectors, now would be a good time to use it!)
5. Place chocolate and butter in a thoroughly dry glass bowl and microwave 1 minute. Stir, and if not fully melted, microwave for another 30-60 seconds more until melted. Do not overheat or you will scorch the chocolate. Add the cream all at once. Whisk until chocolate is a silky sauce (if the chocolate separates, keep whisking until it comes back together). Add one drop of black food coloring and whisk until distributed. Pour over to the top of cupcakes while still warm and with the back of a spoon coax drips to form along the sides. Serve immediately, and make sure to refrigerate any leftovers.
Salisbury Steak
Ingredients
- 1 pound lean ground beef
- 1 (10-ounce) can condensed cream of mushroom soup
 , divided
 - 1/2 cup Italian bread crumbs
- 1 egg, lightly beaten
- 1/2 cup frozen chopped onions
- 1 teaspoon steak seasoning (recommended: Montreal)
- 1 tablespoon canola oil
- 2 tablespoons butter, divided
- 1/4 cup cognac (optional)
- 1 (8-ounce) package sliced fresh mushrooms
- 2 cups low-sodium beef broth
- 1 (1.2-ounce) packet brown gravy mix
- Cooked rice, for serving
Directions
In a large bowl, combine beef, 1/4 can mushroom soup, bread crumbs, egg, onions, and steak seasoning. Mix thoroughly and shape into 4 oval patties.
Heat oil and 1 tablespoon butter in large skillet over medium-high heat. Brown patties on both sides and transfer to a plate.
Add remaining butter and cognac (remove pan from heat when adding cognac.) Saute mushrooms for 7 to 8 minutes. Add beef stock and whisk in gravy mix until smooth. Stir in remaining mushroom soup.
Return patties to skillet and spoon gravy over top. Cover pan and simmer for 20 to 25 minutes.
Serve Salisbury Steaks and Mushroom Gravy over hot cooked rice.
Mini Corn Dog Muffins